The 2011 Chevrolet Silverado offers rugged performance and timeless style, but its factory stereo system often leaves much to be desired. Whether you’re cruising through city streets or tackling off-road adventures, upgrading your Silverado’s audio system can elevate your driving experience. A high-quality stereo delivers crisp sound, deep bass, and seamless connectivity, turning every trip into a concert on wheels. This comprehensive guide walks you through everything you need to know to upgrade your 2011 Silverado stereo, from choosing components to installation tips and troubleshooting. Let’s dive in and transform your truck’s audio game.
Contents
- Why Upgrade Your 2011 Silverado Stereo?
- Essential Components for Your Silverado Stereo Upgrade
- Planning Your 2011 Silverado Audio Upgrade
- How to Install Your 2011 Silverado Stereo System
- Top Product Recommendations for Your Silverado Stereo Upgrade
- Troubleshooting Common Issues
- Enhancing Your Audio Experience Further
- Cost Breakdown of a 2011 Silverado Stereo Upgrade
- DIY vs. Professional Installation: Which Is Right for You?
- Maintaining Your New Audio System
- Why the 2011 Silverado Is Perfect for an Audio Upgrade
- Conclusion
Why Upgrade Your 2011 Silverado Stereo?
The stock audio system in the 2011 Silverado, while functional, lacks the power and clarity modern drivers crave. Many owners report muffled sound, limited bass, and outdated features like no Bluetooth or USB connectivity. Upgrading your stereo system addresses these issues and brings a host of benefits:
- Enhanced Sound Quality: Aftermarket stereos and speakers deliver crystal-clear highs and booming lows, making your music come alive.
- Modern Connectivity: Add Bluetooth, Apple CarPlay, Android Auto, and USB ports for seamless smartphone integration.
- Customization: Tailor your audio setup to your preferences, whether you love bass-heavy hip-hop or detailed classical music.
- Increased Vehicle Value: A premium audio system boosts your Silverado’s appeal if you decide to sell or trade it.
By upgrading, you create a personalized driving environment that matches your lifestyle. Now, let’s explore the key components you’ll need for a successful stereo overhaul.
Essential Components for Your Silverado Stereo Upgrade
A complete audio upgrade involves several components working together to produce stellar sound. Here’s a breakdown of what you’ll need:
1. Head Unit (Stereo Receiver)
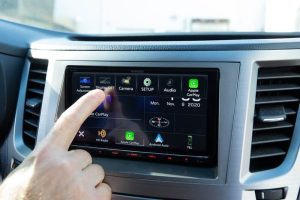
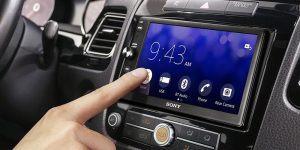
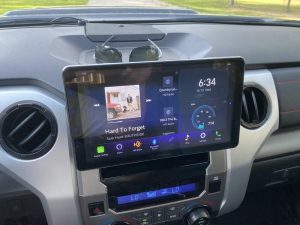
The head unit serves as the brain of your audio system, controlling playback, connectivity, and sound settings. For the 2011 Silverado, opt for a double-DIN head unit to fit the factory dash perfectly. Look for these features:
- Touchscreen Display: A 7-inch or larger screen makes navigation and control intuitive.
- Smartphone Integration: Apple CarPlay and Android Auto let you access apps, calls, and music hands-free.
- Bluetooth: Stream music and take calls without wires.
- HD Radio: Enjoy clearer radio broadcasts with digital signals.
Top brands like Pioneer, Kenwood, and Alpine offer reliable options. For example, the Pioneer DMH-2660NEX provides a vibrant touchscreen, Apple CarPlay, and customizable sound settings, ideal for Silverado owners.
2. Speakers
Speakers are the heart of your audio system, converting electrical signals into sound. The 2011 Silverado typically has four door speakers (6.5 inches) and, in some trims, tweeters or a center channel. Replace factory speakers with aftermarket ones for better clarity and power handling. Consider these types:
- Component Speakers: Separate woofers and tweeters deliver precise sound, perfect for audiophiles.
- Coaxial Speakers: Combine woofer and tweeter in one unit for easier installation and solid performance.
Brands like JL Audio, Focal, and Kicker produce high-quality speakers. The Kicker DS Series 6.5-inch coaxial speakers, for instance, offer robust bass and clear highs, fitting seamlessly into Silverado doors.
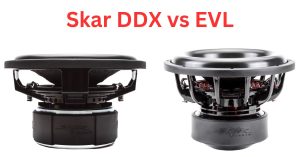
3. Subwoofer
A subwoofer adds depth to your audio with powerful low frequencies. For the Silverado, a compact 10- or 12-inch subwoofer fits well under the rear seat or in the trunk area. Powered subwoofers, which include a built-in amplifier, save space and simplify installation. Look for models from Rockford Fosgate or JL Audio for reliable bass performance.
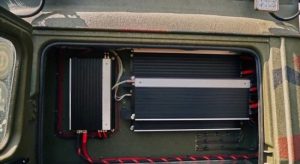
4. Amplifier
An amplifier boosts the power sent to your speakers and subwoofer, ensuring loud, distortion-free sound. Choose a multi-channel amp to power both speakers and a subwoofer. For example, a 4-channel amp like the Alpine BBX-T600 delivers clean power to your entire system.
5. Wiring and Accessories
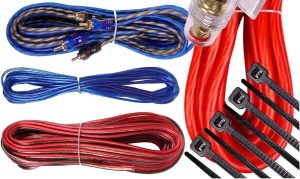
Don’t overlook the small stuff. Quality wiring, adapters, and mounting kits ensure a smooth installation. You’ll need:
- Wiring Harness Adapter: Connects the new head unit to the Silverado’s factory wiring without cutting.
- Speaker Adapters: Ensure aftermarket speakers fit securely in factory mounts.
- Sound Deadening Mats: Reduce road noise and vibrations for clearer audio.
- Antenna Adapter: Maintains AM/FM reception with the new head unit.
Brands like Metra and Scosche offer vehicle-specific kits for the 2011 Silverado, making installation hassle-free.
Planning Your 2011 Silverado Audio Upgrade
Before you buy components, plan your upgrade to match your budget, goals, and skill level. Follow these steps to ensure a successful project:
Step 1: Set Your Budget
Audio upgrades range from a few hundred to several thousand dollars. A basic setup with a new head unit and speakers might cost $300–$500, while a premium system with a subwoofer and amplifier could exceed $1,500. Decide how much you’re willing to spend and prioritize components accordingly. For example, invest in a quality head unit and speakers first, then add a subwoofer later if budget allows.
Step 2: Define Your Audio Goals
What do you want from your new system? If you prioritize connectivity, focus on a head unit with Apple CarPlay and Bluetooth. If bass is your thing, allocate funds for a powerful subwoofer and amplifier. Audiophiles might prefer component speakers for superior soundstaging. Knowing your goals helps you choose the right gear.
Step 3: Check Compatibility
The 2011 Silverado’s dash and speaker openings have specific sizes (double-DIN for the head unit, 6.5 inches for door speakers). Verify that your chosen components fit. Also, check if your truck has the Bose premium audio system, as it requires additional adapters to bypass the factory amplifier.
Step 4: Decide on DIY vs. Professional Installation
Installing a stereo system yourself saves money but requires time and technical know-how. If you’re comfortable with tools and wiring, a DIY install is rewarding. Otherwise, hire a professional to ensure a clean, reliable setup. Professional installation typically costs $100–$300, depending on complexity.
How to Install Your 2011 Silverado Stereo System
Ready to get started? This step-by-step guide covers a DIY installation for your head unit, speakers, and subwoofer. Always disconnect the battery before working on your vehicle’s electrical system to avoid shorts.
Tools You’ll Need
- Screwdrivers (Phillips and flathead)
- Panel removal tools
- Wire cutters/strippers
- Crimp tool
- Socket wrench set
- Electrical tape
- Multimeter (for testing connections)
Installing the Head Unit
- Remove the Factory Stereo: Use a panel removal tool to pry off the dash bezel around the stereo. Unscrew the factory head unit and disconnect its wiring harness and antenna.
- Connect the Wiring Harness Adapter: Attach the aftermarket head unit’s wiring to a vehicle-specific harness adapter. Match wires by color and secure with crimp connectors or solder.
- Mount the New Head Unit: Slide the new head unit into the dash using a mounting kit if needed. Secure it with screws and reconnect the wiring harness and antenna.
- Test and Finalize: Reconnect the battery, turn on the head unit, and test all functions (radio, Bluetooth, etc.). Snap the dash bezel back into place.
Replacing the Speakers
- Remove Door Panels: Pry off the door panel with a panel removal tool, starting at the bottom. Disconnect any wiring (e.g., power window controls) and lift the panel off.
- Remove Factory Speakers: Unscrew the old speakers and disconnect their wiring.
- Install New Speakers: Use speaker adapters if needed to fit aftermarket speakers. Connect the new speakers to the factory wiring or run new wires to an amplifier. Secure with screws.
- Test and Reassemble: Test the speakers, then reattach the door panels, ensuring all clips snap into place.
Adding a Subwoofer
- Choose a Location: Place the subwoofer under the rear seat or in the trunk for space efficiency.
- Run Power and Signal Cables: Route a power cable from the battery to the subwoofer’s amplifier, using a fuse for safety. Run RCA cables from the head unit to the amp for audio signals.
- Mount the Subwoofer: Secure the subwoofer box to prevent movement. Connect it to the amplifier.
- Test and Adjust: Power on the system and adjust the amplifier’s gain and crossover settings for balanced bass.
Installing Sound Deadening Material
Apply sound deadening mats (e.g., Dynamat) to door panels and the trunk to reduce vibrations and road noise. Cut the material to size, peel off the backing, and press it firmly onto clean metal surfaces. This step enhances audio clarity and creates a quieter cabin.
Top Product Recommendations for Your Silverado Stereo Upgrade
Choosing the right components can feel overwhelming with so many options. Here are some top picks tailored for the 2011 Silverado, based on performance, compatibility, and value:
- Head Unit: Kenwood DMX907S – Offers a 6.95-inch touchscreen, wireless Apple CarPlay, and customizable EQ settings.
- Speakers: JL Audio C2-650X – 6.5-inch coaxial speakers with silky highs and punchy mids, perfect for Silverado doors.
- Subwoofer: Rockford Fosgate P300-10 – A 10-inch powered subwoofer that fits under the rear seat and delivers deep bass.
- Amplifier: Pioneer GM-D8704 – A compact 4-channel amp with plenty of power for speakers and a subwoofer.
- Wiring Kit: Metra 70-2003 – A vehicle-specific harness adapter for seamless head unit installation.
These products balance quality and affordability, ensuring a premium audio experience without breaking the bank.
Troubleshooting Common Issues
Even with careful planning, you might encounter hiccups. Here’s how to address common problems:
- No Sound from Head Unit: Check wiring connections and ensure the harness adapter is secure. Verify the head unit’s settings (e.g., balance, fader).
- Speakers Sound Distorted: Confirm the speakers are wired correctly (positive to positive, negative to negative). Adjust the amplifier’s gain to prevent clipping.
- Subwoofer Not Working: Ensure the power cable is connected and fused properly. Check RCA cables and amplifier settings.
- Bluetooth Won’t Pair: Reset the head unit and your phone’s Bluetooth settings. Update the head unit’s firmware if available.
If issues persist, consult a professional installer or contact the component manufacturer’s support team.
Enhancing Your Audio Experience Further
Once your new system is installed, take it to the next level with these tips:
- Tune Your Equalizer: Adjust the head unit’s EQ settings to emphasize bass, mids, or treble based on your music preferences.
- Use High-Quality Audio Files: Stream lossless audio (e.g., FLAC or ALAC) or high-bitrate MP3s for better sound.
- Add a Backup Camera: Many aftermarket head units support backup cameras, improving safety and convenience.
- Maintain Your System: Clean speaker grilles and check wiring periodically to ensure long-term performance.
Cost Breakdown of a 2011 Silverado Stereo Upgrade
Understanding costs helps you budget effectively. Here’s a rough estimate for a mid-range setup:
- Head Unit: $200–$400
- Speakers (4): $100–$300
- Subwoofer: $150–$400
- Amplifier: $100–$250
- Wiring and Accessories: $50–$150
- Professional Installation (optional): $100–$300
Total: $600–$1,800, depending on components and labor. Shop sales or bundles to save money.
DIY vs. Professional Installation: Which Is Right for You?
Deciding between DIY and professional installation depends on your skills and priorities:
- DIY: Saves money and offers a sense of accomplishment. Ideal if you have tools and experience with car electronics. Expect 4–8 hours for a full install.
- Professional: Ensures a polished, reliable setup. Perfect if you lack time or confidence. Verify the installer’s expertise with Silverado audio systems.
Weigh the pros and cons to choose the best path for your project.
Maintaining Your New Audio System
Keep your stereo performing at its best with regular maintenance:
- Clean Components: Dust speakers and the head unit screen with a microfiber cloth.
- Check Connections: Inspect wiring annually for wear or looseness.
- Update Firmware: Download head unit updates from the manufacturer’s website to improve performance and compatibility.
- Protect from Extreme Temperatures: Park in shaded areas or use a sunshade to prevent heat damage to electronics.
Why the 2011 Silverado Is Perfect for an Audio Upgrade
The 2011 Silverado’s spacious cabin and straightforward dash design make it an excellent candidate for a stereo upgrade. Its double-DIN slot accommodates modern head units, and the door panels house 6.5-inch speakers without modification. Plus, the truck’s rugged build ensures your audio system withstands vibrations and rough roads. By upgrading, you enhance both your driving pleasure and the truck’s long-term value.
Conclusion
Upgrading your 2011 Silverado’s stereo system transforms your truck into a mobile soundstage, delivering powerful audio and modern features. By choosing the right head unit, speakers, subwoofer, and amplifier, you create a setup that suits your music taste and lifestyle. Whether you tackle the installation yourself or hire a pro, this guide equips you with the knowledge to succeed. Start planning your upgrade today, and enjoy every drive with a soundtrack that hits all the right notes.