The 2013 Ford F-150 is a powerhouse on the road, known for its rugged durability and versatile performance. But let’s be honest—its factory stereo system often leaves much to be desired. If you’re tired of lackluster sound quality, limited bass, or outdated features, upgrading your F-150’s audio system can breathe new life into your driving experience. This comprehensive guide walks you through everything you need to know to transform your truck’s stereo into a high-performance audio haven. From choosing the right components to step-by-step installation tips, we’ll help you achieve crystal-clear sound and powerful bass that matches the F-150’s bold personality.
Whether you’re a music enthusiast, a podcast lover, or someone who simply wants better audio for daily commutes, this guide is for you. Let’s dive into the world of car audio upgrades and explore how to elevate your 2013 F-150’s stereo system to the next level.
Contents
- Why Upgrade Your 2013 Ford F-150 Stereo?
- Key Components for Your F-150 Stereo Upgrade
- Planning Your 2013 F-150 Audio Upgrade
- Step-by-Step Guide to Upgrading Your 2013 F-150 Stereo
- Top Tips for a Successful F-150 Stereo Upgrade
- Common Mistakes to Avoid
- Budget vs. Premium Upgrades: What’s Right for You?
- Maintaining Your New Audio System
- Conclusion: Enjoy Your Upgraded F-150 Audio Experience
Why Upgrade Your 2013 Ford F-150 Stereo?
The stock audio system in the 2013 Ford F-150 gets the job done for basic needs, but it falls short for those who crave immersive sound. Factory speakers often lack depth, the bass feels weak, and older systems may not support modern features like Bluetooth, Apple CarPlay, or Android Auto. Upgrading your stereo system offers several benefits that enhance both your driving experience and the truck’s overall value.
First, a new stereo delivers superior sound quality. High-quality speakers, subwoofers, and amplifiers produce crisp highs, rich mids, and deep bass, making every song or podcast sound vibrant. Second, modern head units bring advanced connectivity options, such as seamless smartphone integration and USB ports, keeping you connected on the go. Third, a custom audio setup adds a personal touch to your truck, reflecting your style and preferences. Finally, a well-executed upgrade can boost your F-150’s resale value, appealing to buyers who value premium audio.
Before you start, consider your goals. Do you want a system that rivals a concert hall? Are you looking for budget-friendly improvements? Or do you need a balance of performance and affordability? Answering these questions will guide your choices and ensure you get the most out of your upgrade.
Key Components for Your F-150 Stereo Upgrade
A successful audio upgrade involves selecting the right components that work together to create a balanced, powerful system. Here’s a breakdown of the essential parts you’ll need for your 2013 Ford F-150 stereo upgrade, along with tips to choose the best options.
1. Head Unit (Stereo Receiver)
The head unit serves as the brain of your audio system, controlling inputs, outputs, and connectivity features. The stock head unit in the 2013 F-150 often lacks modern functionality, so replacing it with an aftermarket model is a great starting point.
Look for a head unit with:
- Bluetooth connectivity for hands-free calls and wireless streaming.
- Apple CarPlay and Android Auto for seamless smartphone integration.
- Touchscreen display for easy navigation.
- High-power output (measured in watts RMS) to drive your speakers effectively.
Popular brands like Pioneer, Kenwood, and Alpine offer double-DIN head units that fit perfectly in the F-150’s dashboard. For example, the Pioneer DMH-2660NEX provides a 6.8-inch touchscreen, Apple CarPlay, and Android Auto, making it a top choice for modern functionality. If you prefer a factory look, choose a head unit with a design that matches your truck’s interior.
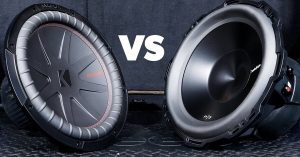
2. Speakers
Speakers are the heart of your audio system, directly responsible for sound quality. The 2013 F-150 typically comes with 6×8-inch speakers in the front and rear doors, which you can replace with aftermarket models for better performance.
Consider these factors when choosing speakers:
- Type: Component speakers offer superior sound clarity with separate tweeters and woofers, while coaxial (full-range) speakers are easier to install and more budget-friendly.
- Power handling: Match the speakers’ RMS power rating to your head unit or amplifier to avoid distortion.
- Material: Look for woofers made of polypropylene or mica for durability and tweeters made of silk or textile for smooth highs.
Brands like JL Audio, Focal, and Kicker produce high-quality speakers for the F-150. For instance, the Kicker KS Series 6×8-inch coaxial speakers deliver excellent sound clarity and handle up to 75 watts RMS, making them a solid choice for most setups.
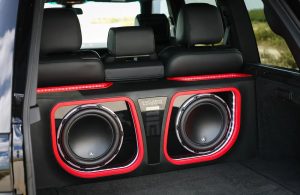
3. Subwoofer
A subwoofer adds the deep, rumbling bass that brings music to life. Without one, your audio system may feel incomplete, especially if you enjoy genres like hip-hop, EDM, or rock. Subwoofers come in various sizes (8-inch, 10-inch, 12-inch) and configurations (enclosed, powered, or component).
For the 2013 F-150, a compact subwoofer is ideal due to limited cabin space. Under-seat subwoofers, like the Rockford Fosgate P300-10, fit neatly behind the rear seats and deliver powerful bass without sacrificing legroom. If you have more space, a 12-inch subwoofer in a custom enclosure can provide earth-shaking lows.
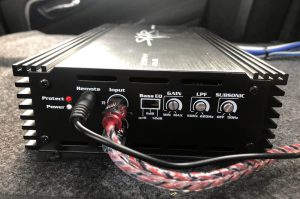
4. Amplifier
An amplifier boosts the power sent to your speakers and subwoofer, ensuring loud, distortion-free sound. Even high-quality speakers underperform without adequate power, so an amp is a must for serious upgrades.
Choose an amplifier based on:
- Channels: A 4-channel amp powers front and rear speakers, while a mono amp is designed for subwoofers.
- Power output: Match the amp’s RMS power to your speakers and subwoofer for optimal performance.
- Size: Compact amps, like the Alpine BBX-T600, fit easily under seats or in tight spaces.
5. Wiring and Accessories
Don’t overlook the small details that tie your system together. High-quality wiring kits, speaker adapters, and sound-deadening materials improve performance and simplify installation. For the 2013 F-150, you’ll need a wiring harness adapter (like the Metra 70-5521) to connect an aftermarket head unit to the factory wiring without cutting cables. Sound-deadening mats, such as Dynamat, reduce road noise and enhance audio clarity by minimizing vibrations.
Planning Your 2013 F-150 Audio Upgrade
Before you buy components or grab your tools, take time to plan your upgrade. A well-thought-out approach saves time, money, and frustration. Follow these steps to create a roadmap for your project.
Step 1: Set a Budget
Audio upgrades range from a few hundred dollars to several thousand, depending on your goals. A basic setup with a new head unit and speakers might cost $300–$500, while a premium system with a subwoofer and amplifier could exceed $1,500. Decide how much you’re willing to spend and prioritize components accordingly. For example, if your budget is tight, focus on high-quality speakers and a head unit before adding a subwoofer later.
Step 2: Assess Your Skill Level
Installing a stereo system requires basic tools (screwdrivers, panel removal tools, wire crimpers) and some technical know-how. If you’re comfortable with DIY projects, you can tackle the installation yourself. However, complex setups with amplifiers and custom subwoofer enclosures may require professional help. Be honest about your skills to avoid costly mistakes.
Step 3: Choose a Sound Profile
Think about the type of audio experience you want. Do you prefer bass-heavy sound for thumping beats? Or do you want balanced audio for classical music or podcasts? Your sound preferences will influence your choice of speakers, subwoofers, and amplifiers. For example, a bass-heavy setup might include a 12-inch subwoofer and a mono amplifier, while a balanced system might prioritize component speakers and a 4-channel amp.
Step 4: Check Compatibility
Ensure all components are compatible with your 2013 F-150. Verify speaker sizes (6×8 inches for doors), head unit dimensions (double-DIN), and power requirements. Also, confirm that your truck’s electrical system can handle the added load of an amplifier. If you’re unsure, consult a car audio professional or check online forums like F150Forum.com for model-specific advice.
Step-by-Step Guide to Upgrading Your 2013 F-150 Stereo
Ready to get started? This step-by-step guide walks you through the process of upgrading your 2013 Ford F-150’s stereo system. While specific steps vary based on your components, this overview covers the essentials for a typical installation.
Step 1: Gather Tools and Materials
You’ll need:
- Screwdrivers (Phillips and flathead)
- Panel removal tools
- Wire cutters/strippers
- Crimp connectors
- Wiring harness adapter
- Speaker adapters
- Sound-deadening material (optional)
- Socket wrench set
- Electrical tape
Double-check that you have all components, including the head unit, speakers, subwoofer, amplifier, and wiring kits.
Step 2: Disconnect the Battery
Safety comes first. Disconnect the negative terminal of your F-150’s battery to prevent electrical shorts during installation. Use a socket wrench to loosen the terminal and set it aside.
Step 3: Remove the Factory Head Unit
Start by removing the dashboard trim around the head unit. Use a panel removal tool to pry off the bezel carefully, avoiding damage to the plastic. Unscrew the factory head unit and disconnect its wiring harness and antenna cable. Attach the wiring harness adapter to your new head unit, then connect it to the truck’s wiring. Mount the new head unit in the dashboard and secure it with screws.
Step 4: Replace the Door Speakers
Remove the door panels by prying off the trim and unscrewing the panel. Disconnect the factory speakers and replace them with your aftermarket models, using speaker adapters if needed. Connect the new speakers to the wiring harness, ensuring a secure connection. Reattach the door panels and test the speakers to confirm they’re working.
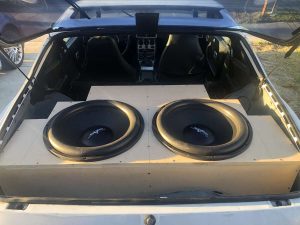
Step 5: Install the Subwoofer
If you’re adding a subwoofer, decide on its location—under the rear seats or in the cargo area. For an under-seat subwoofer, secure the enclosure in place and connect it to the amplifier or head unit. For a custom enclosure, ensure it’s properly mounted to prevent movement while driving. Run power and signal cables neatly, using zip ties to keep them organized.
Step 6: Install the Amplifier
Mount the amplifier in a well-ventilated area, such as under a seat or in the trunk. Connect the power cable to the battery (through a fuse for safety), ground the amp to a metal surface, and run RCA cables from the head unit to the amp. Connect the speakers and subwoofer to the amp’s outputs, following the manufacturer’s wiring diagram.
Step 7: Apply Sound-Deadening Material
For optimal sound quality, apply sound-deadening mats to the door panels, floor, and trunk. These materials reduce road noise and vibrations, allowing your speakers to perform at their best. Cut the mats to size and press them firmly into place.
Step 8: Test the System
Reconnect the battery and turn on your new audio system. Test each component—head unit, speakers, subwoofer, and amplifier—to ensure everything works correctly. Adjust the head unit’s equalizer settings to fine-tune the sound. If you notice issues like distortion or no sound, double-check your connections.
Step 9: Secure Loose Wires
Tidy up your installation by securing all cables with zip ties or tape. Loose wires can rattle or cause electrical issues over time. Ensure no cables interfere with the truck’s controls or moving parts.
Top Tips for a Successful F-150 Stereo Upgrade
To make your project a success, keep these tips in mind:
- Start small: If you’re new to car audio, begin with a head unit and speaker upgrade before tackling amplifiers and subwoofers.
- Research brands: Stick to reputable brands like JL Audio, Pioneer, and Rockford Fosgate for reliable performance.
- Read reviews: Check user reviews on sites like Crutchfield or Amazon to find components that match your needs.
- Watch tutorials: YouTube has countless videos on F-150 stereo installations, offering visual guidance.
- Test before finalizing: Always test components before reassembling the dashboard or door panels.
- Consider professional help: If the project feels overwhelming, a car audio shop can handle complex installations.
Common Mistakes to Avoid
Even experienced DIYers make mistakes. Here are pitfalls to watch out for:
- Mismatching components: Ensure your head unit, speakers, and amplifier are compatible in terms of power and impedance.
- Skipping sound-deadening: Without sound-deadening material, road noise can drown out your new system.
- Poor wiring: Low-quality or improperly connected wires can cause signal loss or electrical issues.
- Overloading the electrical system: High-powered amplifiers may require a capacitor or alternator upgrade.
- Rushing the job: Take your time to avoid damaging your truck’s interior or components.
Budget vs. Premium Upgrades: What’s Right for You?
Your budget plays a big role in determining the scope of your upgrade. Here’s a quick comparison of budget and premium options for the 2013 F-150.
Budget Upgrade ($300–$600)
- Head unit: Kenwood DPX504BT ($150)
- Speakers: Kicker DSC680 6×8-inch coaxial speakers ($100/pair)
- Accessories: Wiring harness, speaker adapters, basic wiring kit ($50–$100)
- Pros: Affordable, noticeable improvement in sound, easy to install
- Cons: Limited bass, no subwoofer, may need an amplifier for louder sound
Premium Upgrade ($1,500–$3,000)
- Head unit: Alpine iLX-W650 with Apple CarPlay ($300)
- Speakers: Focal Performance PS 165 component speakers ($400/pair)
- Subwoofer: JL Audio 10W3v3-4 in a custom enclosure ($500)
- Amplifier: Rockford Fosgate R500X1D mono amp ($250)
- Accessories: High-quality wiring kit, sound-deadening material, capacitor ($200)
- Pros: Concert-like sound, deep bass, modern features
- Cons: Higher cost, complex installation, may require professional help
Maintaining Your New Audio System
Once your new stereo is installed, proper maintenance keeps it performing at its best. Clean the head unit’s touchscreen with a microfiber cloth to prevent scratches. Avoid blasting the system at maximum volume for extended periods, as this can damage speakers or cause distortion. Regularly check wiring connections for wear or looseness, especially after long drives. If you live in a dusty area, use compressed air to clean speaker cones and prevent debris buildup.
Conclusion: Enjoy Your Upgraded F-150 Audio Experience
Upgrading your 2013 Ford F-150’s stereo system is a rewarding project that transforms your driving experience. With the right components, careful planning, and a bit of patience, you can achieve professional-grade sound that rivals high-end audio setups. Whether you’re cruising through the city or tackling off-road adventures, your new system will deliver the perfect soundtrack for every journey.
Ready to get started? Grab your tools, choose your components, and turn your F-150 into a rolling concert hall. Share your upgrade journey in the comments or on car audio forums to inspire other F-150 owners. Happy listening!