Car audio enthusiasts know the thrill of a booming sound system. A well-designed amplifier rack elevates the experience, ensuring your amps stay secure, cool, and stylish. MDF (Medium-Density Fiberboard) amp racks strike a perfect balance between affordability, ease of use, and durability. This guide dives into why MDF is a top choice, how to build your own amp rack, and tips for installation to optimize your car stereo system. By the end, you’ll have the know-how to create a custom solution tailored to your vehicle and audio needs.
Contents
- Why Choose MDF for Car Amp Racks?
- Benefits of Using an Amp Rack in Your Car
- Materials and Tools You’ll Need
- Step-by-Step Guide to Building an MDF Amp Rack
- Tips for Optimizing Your MDF Amp Rack
- MDF vs. Other Materials: A Quick Comparison
- Common Mistakes to Avoid
- Where to Buy MDF and Amp Rack Accessories
- Enhancing Your Car Audio Setup Beyond the Rack
- Real-World Inspiration: Amp Rack Success Stories
- Maintaining Your MDF Amp Rack
- Wrapping Up: Build Your Dream Audio Setup
Why Choose MDF for Car Amp Racks?
MDF stands out as a go-to material for car audio installations. Its smooth surface, uniform density, and workability make it ideal for crafting sturdy amp racks. Unlike plywood, MDF resists warping and splitting, delivering a clean, professional finish. Its affordability also appeals to DIYers on a budget. While materials like ABS plastic or aluminum offer heat dissipation benefits, MDF’s versatility and ease of customization keep it a favorite.
Another perk? MDF absorbs vibrations better than metal, reducing unwanted noise in your audio setup. Painting or covering MDF with vinyl or carpet enhances its look, blending seamlessly with your car’s interior. However, MDF isn’t perfect—it’s heavier than some alternatives and requires sealing to resist moisture. Weigh these factors when planning your build to ensure MDF suits your needs.
Benefits of Using an Amp Rack in Your Car
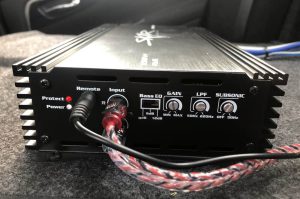
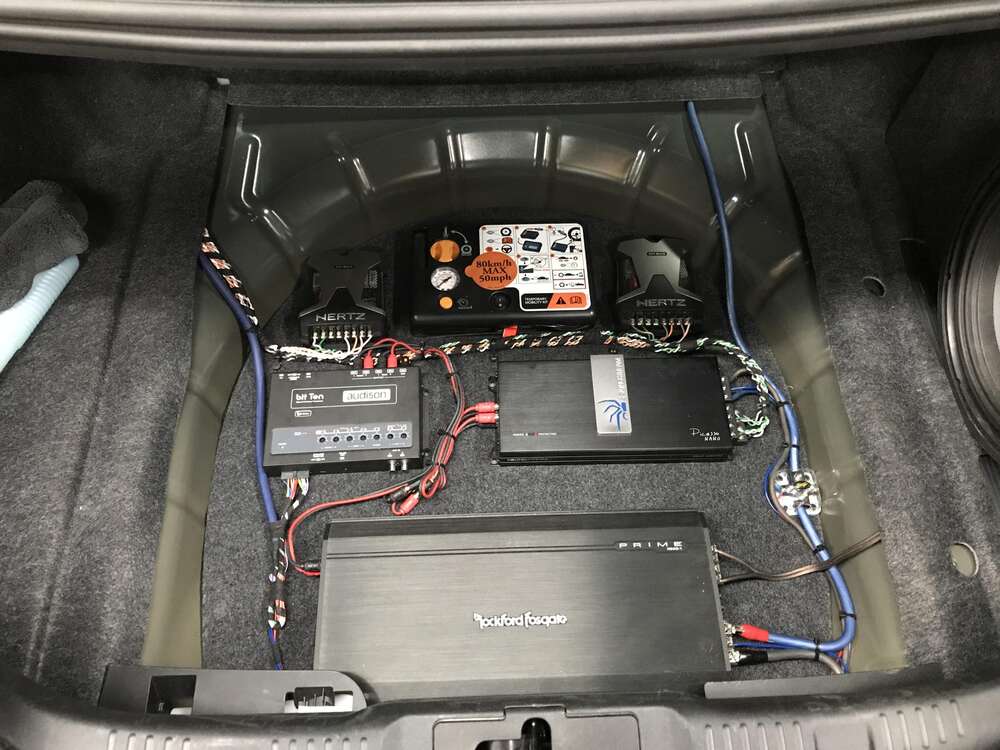
An amp rack does more than hold your amplifiers. It organizes wiring, protects equipment, and improves airflow to prevent overheating. A well-placed rack maximizes trunk space, keeping your setup tidy and accessible. For car audio competitors, a sleek amp rack showcases your system’s craftsmanship, potentially earning points for presentation.
Custom racks also allow precise amplifier placement, reducing strain on cables and connectors. By elevating amps off the car’s floor, racks minimize vibration damage, extending your equipment’s lifespan. Whether you’re a casual listener or a show competitor, an MDF amp rack enhances both performance and aesthetics.
Materials and Tools You’ll Need
Before diving into your build, gather the right supplies. Here’s a rundown of essentials:
- MDF Board: Opt for 1/2-inch or 3/4-inch thickness for durability. A 4×8-foot sheet works for most projects.
- Measuring Tape and Ruler: Precision matters for a snug fit.
- Circular Saw or Jigsaw: For cutting MDF to size.
- Drill and Bits: For mounting holes and securing screws.
- Screws and Threaded Inserts: To fasten amps and brackets.
- Sandpaper: Smooth edges for a polished look.
- Paint, Vinyl, or Carpet: For finishing touches.
- Mounting Straps or Brackets: Metra BS9BK straps or right-angle brackets work well.
- Screwdriver or Cordless Drill: Speeds up assembly.
- Safety Gear: Gloves, goggles, and a dust mask protect you during cutting.
Check your amplifier’s manual for mounting screw sizes. Some amps include screws, saving you a trip to the hardware store.
Step-by-Step Guide to Building an MDF Amp Rack
Ready to craft your amp rack? Follow these steps for a sturdy, professional-grade setup.
1. Plan Your Design
Start by measuring your trunk or mounting area. Note the dimensions of your amplifiers and any additional gear, like distribution blocks or DSP units. Sketch a layout to visualize the rack’s size and shape. Consider accessibility—ensure you can reach wiring and controls easily. If stacking multiple amps, leave space for airflow to prevent overheating.
For single-cab trucks or compact cars, a side-mounted or under-seat rack saves space. In larger vehicles, a flat rack on the trunk floor or a vertical setup against the rear seat works well. Tailor the design to your vehicle’s layout and audio goals.
2. Cut the MDF to Size
Using your measurements, mark the MDF with a pencil and ruler. Cut the board with a circular saw or jigsaw, keeping lines straight for a clean fit. For a two-tier rack, cut a base panel and a smaller top panel to stack amps. Sand the edges to remove splinters and ensure a smooth surface.
Pro tip: Double-check measurements before cutting. A snug fit prevents rattling and enhances stability.
3. Assemble the Rack
If building a multi-tier rack, attach vertical supports between the base and top panels. Use wood glue and screws for a secure bond. For added strength, incorporate metal brackets or corner braces. Drill pilot holes to prevent MDF from splitting. If mounting a single amp, a flat panel with raised edges may suffice.
Consider adding cutouts for cable routing. This keeps wiring tidy and reduces strain on connections. Use a hole saw or jigsaw for clean, precise openings.
4. Finish the Surface
MDF’s smooth surface takes paint, vinyl, or carpet well. For a sleek look, apply primer and spray paint in your desired color. Automotive-grade vinyl or charcoal carpet adds a professional touch and hides imperfections. Secure the covering with adhesive spray or staples, ensuring a tight fit. Seal exposed edges with caulk or edge banding to protect against moisture.
5. Mount the Amplifiers
Position your amps on the rack, marking screw holes with a pencil. Drill pilot holes and install threaded inserts or T-nuts for secure mounting. Avoid overtightening screws, as this can strip the MDF. If using metal straps, bend them to fit your rack’s contours and secure them with screws. Double-check that amps are level and firmly attached.
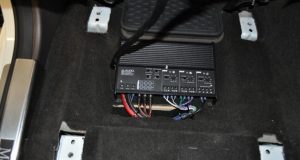
6. Install the Rack in Your Vehicle
Choose a mounting location that balances accessibility and space. Common spots include the trunk floor, side panels, or under seats. Secure the rack to your car’s frame or liner using self-tapping screws or bolts with locking nuts. For added stability, use rubber grommets to cushion vibrations. Ensure the rack doesn’t obstruct fold-down seats or cargo space.
Route power, ground, and signal cables neatly, using zip ties to prevent tangling. Connect the remote-on wire to a relay for seamless operation with your stereo. Test the system before finalizing the installation to catch any issues.
Tips for Optimizing Your MDF Amp Rack
- Prioritize Airflow: Elevate the rack slightly to allow air circulation. Consider adding small fans, like those from Sparked Innovations, for heavy-duty systems.
- Minimize Vibrations: Use rubber washers or foam padding between the rack and car frame to dampen bass-induced rattling.
- Plan for Upgrades: Build with extra space for future amps or accessories like crossovers or fuse blocks.
- Check Competition Rules: If competing, verify that your rack complies with event guidelines, such as MECA’s trunk class rules requiring a functional back seat.
- Test Fit Before Finishing: Dry-fit the rack in your car to ensure it fits perfectly before painting or covering.
MDF vs. Other Materials: A Quick Comparison
While MDF shines for its affordability and workability, other materials have their merits. Here’s how MDF stacks up:
- ABS Plastic: Lightweight and heat-resistant but pricier and harder to cut. Ideal for precision builds with a laser cutter.
- HDPE: Easy to work with and durable but less stiff than MDF. Great for threaded inserts.
- Aluminum: Excellent for heat dissipation and ventilation but tough to manipulate without specialized tools.
- Birch Plywood: Lighter and stronger than MDF but prone to splintering and more expensive.
MDF’s balance of cost, ease, and vibration dampening makes it a solid choice for most DIYers. If heat management is a priority, pair MDF with cooling fans or elevate amps for better airflow.
Common Mistakes to Avoid
Building an amp rack isn’t rocket science, but small oversights can derail your project. Steer clear of these pitfalls:
- Skipping Measurements: An ill-fitting rack wastes time and materials. Measure twice, cut once.
- Ignoring Weight: MDF is heavy, especially at 3/4-inch thickness. Ensure your car’s mounting points can handle the load.
- Neglecting Ventilation: Overheating shortens amp lifespan. Leave gaps for air circulation.
- Using Thin MDF: Anything less than 1/2-inch may flex under heavy amps, compromising stability.
- Overcomplicating the Design: Keep it simple for your first build. Fancy features can come later.
Where to Buy MDF and Amp Rack Accessories
Home Depot, Lowe’s, and lumber yards stock MDF sheets, often in 1/2-inch or 3/4-inch thicknesses. For pre-made racks, check Amazon for options like the Droppin HZ 2RACK or EVOLUTZenclosures Type 1, which support multiple amps. Specialty retailers like Jim’s Machineworx and LLJ Customs offer custom solutions for specific vehicles. Car audio forums, such as DIYMobileAudio.com, also provide inspiration and secondhand deals.
Enhancing Your Car Audio Setup Beyond the Rack
An amp rack is just one piece of the puzzle. To maximize your system’s performance, consider these upgrades:
- Sound Deadening: Apply 120-mil deadening material to the trunk and rear deck to reduce road noise and enhance bass.
- High-Output Alternator: Supports power-hungry amps without draining your battery.
- Quality Wiring: Use thick-gauge power and ground cables for efficient current flow.
- Subwoofer Enclosure: Pair your amps with a well-built box, like Down4Sound’s HD3, for thunderous bass.
Real-World Inspiration: Amp Rack Success Stories
Need ideas? Car audio enthusiasts on forums like DIYMobileAudio.com share stunning builds. One user crafted a 19mm expanded PVC rack with cable cutouts, leveling amps of different heights for a clean look. Another tucked a hinged rack into a Honda’s wheel well, preserving trunk space. These creative solutions prove that with planning, you can balance form and function.
For Ford F150 owners, Real Time Audio offers custom MDF racks designed for seamless integration. These builds highlight the importance of vehicle-specific designs, especially in trucks with limited space.
Maintaining Your MDF Amp Rack
To keep your rack in top shape, inspect it regularly. Tighten loose screws and check for signs of moisture damage. If exposed to humidity, reapply sealant to unprotected edges. Clean the surface with a damp cloth to remove dust, avoiding harsh chemicals that could damage the finish. If you notice amps running hot, add a cooling fan or reposition the rack for better ventilation.
Wrapping Up: Build Your Dream Audio Setup
An MDF amp rack transforms your car audio system, blending practicality with style. Its affordability, workability, and vibration-dampening properties make it a DIYer’s dream. By following this guide, you’ll craft a rack that secures your amps, optimizes performance, and turns heads at car shows. Whether you’re chasing deep bass or crystal-clear highs, a custom MDF rack sets the stage for an unforgettable listening experience.
Ready to get started? Grab your tools, measure your space, and let your creativity shine. Your perfect car audio setup is just a build away.