Radio reception problems can be frustrating when you’re driving. Often, these issues stem from a damaged or broken antenna. The good news is that replacing a car radio antenna is usually a straightforward process that many car owners can handle themselves.
This guide walks you through everything you need to know about car radio antennas – from identifying issues to step-by-step replacement instructions and troubleshooting tips.
Contents
- Why Your Car Antenna Matters
- Common Signs Your Car Antenna Needs Replacement
- Types of Car Antennas
- Tools You’ll Need for Antenna Replacement
- Step-by-Step Guide to Replacing a Car Radio Antenna
- Troubleshooting Common Antenna Issues
- Professional Replacement vs. DIY
- Choosing the Right Replacement Antenna
- Antenna Maintenance Tips
- Cost Considerations
- Future of Car Antennas
- Conclusion
Why Your Car Antenna Matters
A car radio antenna captures radio frequency signals from broadcast stations and delivers them to your car’s radio receiver. Without a properly functioning antenna, you’ll experience poor reception, static noise, or complete signal loss.
Radio antennas might seem like simple components, but they play a crucial role in your in-car entertainment. A quality antenna ensures clear reception even when you’re driving through areas with weaker signals.
Common Signs Your Car Antenna Needs Replacement
Before diving into replacement procedures, let’s identify some telltale signs that your antenna needs attention:
- Poor radio reception – Stations that used to come in clearly now sound fuzzy or cut out frequently
- Physical damage – Bent, broken, or missing antenna mast
- Rust or corrosion – Particularly at the base where the antenna connects to your vehicle
- Retractable antenna failure – Antenna won’t extend or retract properly
- Persistent static – Even when tuned to strong local stations
If you notice any of these issues, your antenna likely needs repair or replacement.
Types of Car Antennas
Car antennas come in several styles, each with different replacement procedures:
1. Mast Antennas
These traditional rod-style antennas extend from the vehicle’s exterior. They come in two main varieties:
- Fixed mast antennas – Permanent, non-retractable rods
- Power retractable antennas – Extend when the radio is on and retract when off
2. Window Antennas
These antennas are embedded within your windshield or rear window glass as thin wire elements or printed circuits.
3. Shark Fin Antennas
These streamlined, aerodynamic antennas are common on newer vehicles and often house multiple functions (radio, GPS, satellite radio).
4. Pillar Mount Antennas
These shorter, stubby antennas are mounted on the front or rear pillars of the vehicle.
Tools You’ll Need for Antenna Replacement
Gathering the right tools before starting makes the job much easier:
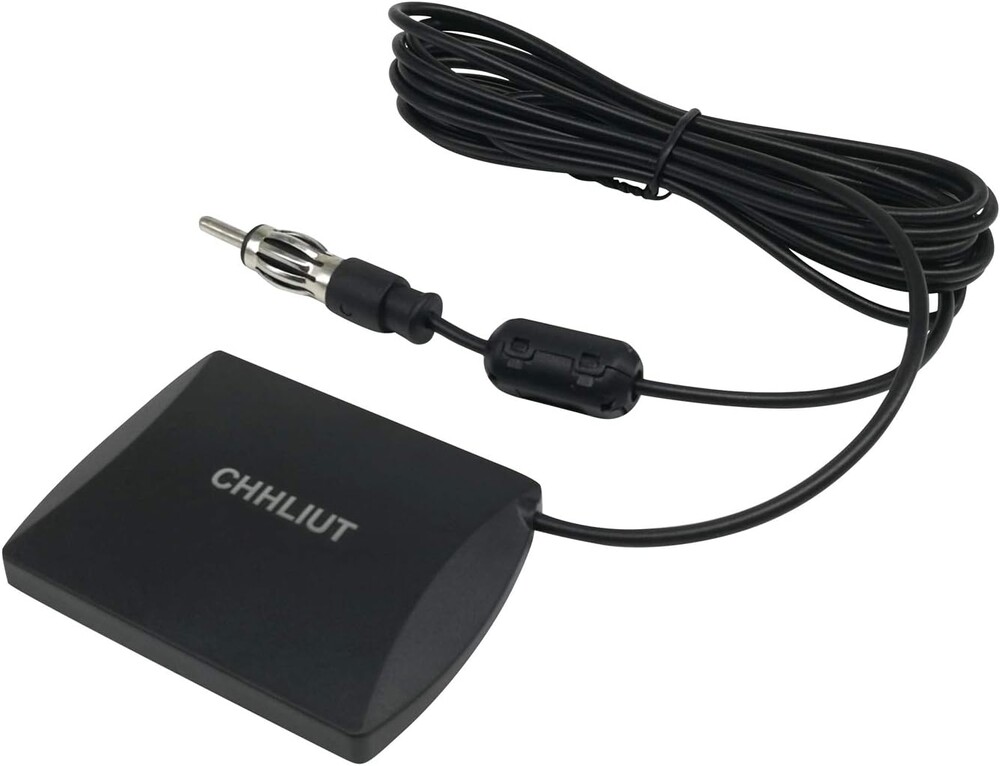
- Replacement antenna (make sure it’s compatible with your vehicle)
- Screwdriver set (Phillips and flathead)
- Socket wrench set
- Trim removal tools (for accessing interior panels)
- Electrical tape
- Wire cutters/strippers (if wiring needs modification)
- Owner’s manual (for reference)
- Anti-seize lubricant (for threaded connections)
- Multimeter (for testing electrical connections)
Step-by-Step Guide to Replacing a Car Radio Antenna
Before You Begin
- Purchase the correct replacement antenna – Check your vehicle’s make, model, and year to ensure compatibility. OEM (Original Equipment Manufacturer) parts work best, but quality aftermarket options can save you money.
- Park in a comfortable work area – Find a flat, well-lit space where you can work safely.
- Disconnect the battery – Safety first! Disconnect the negative terminal of your battery to prevent electrical shorts.
For Mast Antenna Replacement
Step 1: Remove the Old Antenna
- Locate your antenna. Common positions include the front fender, roof, or rear fender.
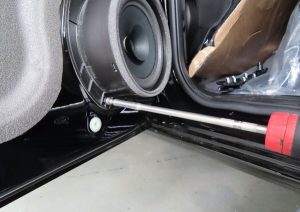
- For fender-mounted antennas, you might need to access the mounting nut from inside the vehicle. This could require removing interior trim panels, the glove compartment, or trunk liner depending on the antenna location.
- Once you have access, use a wrench to loosen the mounting nut that secures the antenna to the vehicle body.
- Carefully disconnect the antenna cable from the base. This usually involves unplugging a coaxial connector.
- Remove the entire antenna assembly from the vehicle.
Step 2: Install the New Antenna
- Feed the antenna cable through the same hole where the old antenna was mounted.
- Apply a small amount of anti-seize lubricant to the threads if the new antenna has a threaded mount.
- Position the new antenna base over the mounting hole.
- From inside the vehicle, secure the antenna by tightening the mounting nut. Don’t overtighten as this could damage the new antenna or your vehicle’s body.
- Connect the antenna cable to the coaxial connector.
- If the antenna has a separate mast piece, screw it into the base.
Step 3: Test and Finalize
- Reconnect your vehicle’s battery.
- Turn on your radio to test reception across several stations and frequencies.
- If everything works properly, replace any interior panels or trim pieces you removed.
For Window Antenna Repair
Window antennas typically can’t be fully replaced without professional help, but you can repair broken connections:
- Locate the antenna amplifier box (usually near the window edge).
- Check for loose connections between the amplifier and the antenna grid.
- Repair any broken grid lines with special conductive paint made for antenna repair (available at auto parts stores).
- Ensure the amplifier ground wire is properly connected.
For Shark Fin Antenna Replacement
- The shark fin cover usually pops off or unscrews from the base.
- Disconnect any wiring connectors.
- Remove mounting screws or bolts securing the base.
- Install the new shark fin base and reconnect all wiring.
- Secure the outer cover.
Troubleshooting Common Antenna Issues
Poor Reception After Replacement
- Check all cable connections for tightness
- Ensure the antenna mast is fully extended or properly screwed in
- Verify the antenna ground connection is secure
- Make sure you’ve installed an antenna compatible with your radio frequencies
Antenna Won’t Extend or Retract (Power Antennas)
- Check the antenna fuse (usually in the main fuse box)
- Listen for the antenna motor – if you hear it working but the antenna doesn’t move, the gears might be stripped
- Inspect for obstructions or damage to the antenna housing
Static or Intermittent Reception
- Look for loose connections at the antenna base
- Check for cable damage along the antenna wire path
- Test for interference from other electronic devices
- Ensure the antenna cable isn’t pinched or kinked
Professional Replacement vs. DIY
While many antenna replacements are DIY-friendly, some situations call for professional help:
Consider DIY when:
- You have basic mechanical skills and tools
- The antenna is easily accessible
- It’s a simple mast-type replacement
- You’re comfortable removing some interior panels
Seek professional help when:
- The antenna is integrated with other systems (GPS, satellite radio)
- Replacement requires extensive dashboard or interior disassembly
- Your vehicle has a complex infotainment system
- The antenna is embedded in glass or other difficult locations
Professional installation typically costs between $50-150 for labor, plus parts.
Choosing the Right Replacement Antenna
Not all antennas perform equally. Consider these factors when selecting a replacement:
Reception Quality
Higher-quality antennas often feature better signal capture capabilities. This is particularly important if you live in areas with weak radio signals or frequently travel through such regions.
Material and Durability
Antennas face harsh conditions – rain, sun, car washes, and potential physical impacts. Stainless steel and high-grade aluminum antennas typically last longer than cheaper alternatives.
Aesthetics
Consider how the antenna affects your vehicle’s appearance. Some drivers prefer shorter, less noticeable options, while others don’t mind traditional mast antennas.
FM vs. AM Performance
Some aftermarket antennas optimize for FM reception at the expense of AM, or vice versa. If you frequently listen to both, ensure your replacement handles both signal types well.
Additional Features
Many modern antennas include:
- Built-in amplifiers to boost signal strength
- Multi-band reception (AM/FM/HD Radio)
- Weather-resistant coatings
- Anti-theft designs
Antenna Maintenance Tips
Once you’ve installed your new antenna, proper maintenance helps extend its lifespan:
- Regular inspection – Check occasionally for corrosion or damage
- Gentle cleaning – Wipe down the antenna mast with a soft cloth
- Retract when necessary – If you have a manual retractable antenna, lower it before entering low-clearance areas or car washes
- Avoid extreme bending – Don’t force the antenna mast beyond its designed range of motion
- Winter care – In icy conditions, avoid forcing a frozen retractable antenna
Cost Considerations
Replacement antenna costs vary widely based on type and vehicle:
- Basic replacement masts: $10-30
- Complete fixed antenna assemblies: $20-50
- Power retractable antenna systems: $50-200
- OEM shark fin antennas: $70-300
- Premium aftermarket antennas: $30-100
Factor in additional costs for specialized tools or professional installation if needed.
Future of Car Antennas
As vehicle technology evolves, so do antennas:
- Many newer vehicles integrate antennas into other components like mirrors, spoilers, or window glass
- Digital radio standards require different antenna designs than traditional AM/FM
- Combination antennas now handle multiple functions (radio, cellular, GPS, satellite)
- Some manufacturers are developing “invisible” antenna technologies embedded within body panels
For older vehicles, aftermarket upgrades can bring modern antenna technology to classic cars.
Conclusion
Replacing a car radio antenna is often a simple DIY project that can dramatically improve your driving experience. With proper tools, compatible parts, and careful work, you can restore clear reception to your car audio system in just an hour or two.
Remember that antenna issues sometimes indicate problems with the radio unit itself. If reception problems persist after replacing your antenna, consider having your entire radio system inspected.
Whether you choose to tackle this project yourself or seek professional help, upgrading a damaged antenna is well worth the effort for uninterrupted music, news, and entertainment on the road.