A well-tuned car stereo transforms your driving experience, delivering crisp highs, rich mids, and deep bass. Whether you’re cruising through the city or embarking on a road trip, crystal-clear audio makes every moment more enjoyable. Tuning a car stereo isn’t just for audiophiles—it’s a practical skill anyone can master with the right steps. This guide walks you through the process of tuning your car stereo for optimal sound quality, ensuring every note hits perfectly. Let’s dive in and explore how to achieve audio perfection in your vehicle.
Contents
- Why Tuning Your Car Stereo Matters
- Tools You’ll Need
- Step 1: Understand Your Car’s Acoustics
- Step 2: Reset Your Stereo to Factory Settings
- Step 3: Adjust the Balance and Fade
- Step 4: Fine-Tune the Equalizer (EQ)
- Step 5: Set the Crossover for Subwoofers
- Step 6: Adjust Time Alignment
- Step 7: Optimize Volume and Gain
- Step 8: Test and Refine
- Common Mistakes to Avoid
- Advanced Tips for Audiophiles
- Maintaining Your Tuned Stereo
- Conclusion
Why Tuning Your Car Stereo Matters
A car stereo fresh from the factory often sounds flat or unbalanced. Manufacturers set default audio settings to appeal to a broad audience, but these settings rarely maximize your system’s potential. Tuning your stereo tailors the sound to your preferences, your car’s acoustics, and your music taste. Proper tuning enhances clarity, eliminates distortion, and creates an immersive listening experience. Plus, it ensures you get the most out of your speakers, amplifier, and subwoofer, if installed. By investing a little time, you unlock a world of vibrant sound.
Tools You’ll Need
Before you start, gather a few essentials to make the tuning process smoother:
- Your car’s stereo manual: This provides specific instructions for navigating your head unit’s settings.
- A test track playlist: Choose songs with a mix of vocals, instruments, and bass-heavy beats to evaluate sound quality.
- A sound meter app (optional): Apps like Decibel X help measure volume levels for balanced output.
- A notepad: Jot down settings as you tweak them for easy reference.
With these tools in hand, you’re ready to fine-tune your car audio system.
Step 1: Understand Your Car’s Acoustics
Every car has unique acoustics based on its size, shape, and materials. A compact sedan sounds different from an SUV or a convertible. Hard surfaces like glass reflect sound, while soft surfaces like upholstery absorb it. Before tweaking settings, listen to a familiar song and note any issues. Do the highs sound shrill? Is the bass muddy? Identifying these quirks helps you focus your adjustments. For example, a car with lots of glass might need less treble to avoid harshness, while a plush interior might require a bass boost.
Take a moment to park in a quiet area. This minimizes road noise and lets you hear the stereo clearly. Close the windows and turn off the engine to eliminate vibrations. Now, you’re set to evaluate your system’s raw sound.
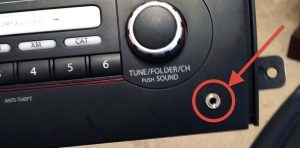
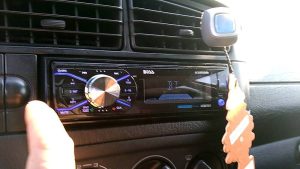
Step 2: Reset Your Stereo to Factory Settings
Start with a clean slate. Resetting your stereo erases any previous tweaks that might skew your tuning. Check your manual to locate the reset option—usually found in the audio or system settings menu. This step ensures you’re working with neutral settings, making it easier to dial in the perfect sound.
After resetting, play a test track at moderate volume. Listen for balance across frequencies. If the sound feels off, don’t worry—you’ll address this in the next steps.
Step 3: Adjust the Balance and Fade
Balance and fade controls direct sound to different speakers, creating a centered audio stage. Balance adjusts the left-to-right speaker output, while fade controls the front-to-back distribution. For the best experience, position the sound as if you’re at a live concert, with the audio centered around the driver’s seat.
Sit in the driver’s seat and play a vocal-heavy track. Navigate to the balance settings and shift the sound until it feels evenly distributed between the left and right speakers. Next, tweak the fade to prioritize the front speakers slightly, as rear speakers often muddy the soundstage. Test different settings until the vocals feel like they’re coming from directly in front of you. This creates a natural, immersive effect.
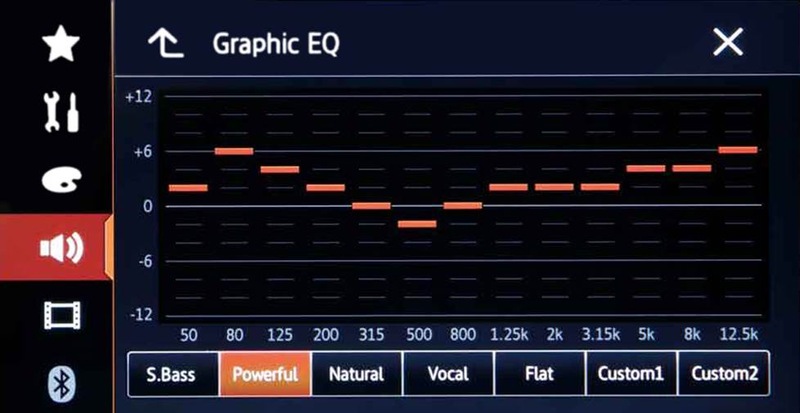
Step 4: Fine-Tune the Equalizer (EQ)
The equalizer is your most powerful tool for shaping sound. It lets you boost or cut specific frequency bands—low (bass), mid, and high (treble)—to match your preferences and car’s acoustics. Most car stereos offer a graphic equalizer with preset options like “Rock,” “Pop,” or “Jazz.” While presets are a starting point, custom settings yield better results.
Begin with the EQ flat (all bands at zero). Play a track with strong bass, clear vocals, and sharp cymbals. Adjust the low frequencies (20Hz–250Hz) to enhance bass without overpowering mids. Boosting around 100Hz adds punch, but too much causes distortion. Next, tweak the mid frequencies (250Hz–4kHz) to clarify vocals and instruments. A slight boost around 1kHz often improves presence. Finally, adjust the high frequencies (4kHz–20kHz) for crispness. A small boost at 8kHz enhances clarity, but excessive treble sounds piercing.
Test your settings with different genres—hip-hop, classical, rock—to ensure versatility. If your stereo lacks a custom EQ, experiment with presets and note which one sounds closest to your ideal.
Step 5: Set the Crossover for Subwoofers
If your system includes a subwoofer, the crossover setting is critical. The crossover determines which frequencies go to the subwoofer and which go to the main speakers. This prevents overlap, ensuring clean bass and clear mids.
Check your stereo or amplifier for crossover settings, typically labeled as “Low-Pass Filter” (LPF) for the subwoofer and “High-Pass Filter” (HPF) for the main speakers. Set the LPF around 80Hz to send only deep bass to the subwoofer. Set the HPF slightly above this (around 100Hz) to keep low frequencies away from the main speakers. Play a bass-heavy track and adjust until the subwoofer blends seamlessly with the rest of the system. The bass should feel powerful but not boomy.
Step 6: Adjust Time Alignment
Time alignment ensures sound from all speakers reaches your ears simultaneously, creating a cohesive soundstage. Since speakers are at different distances from the driver, sound can arrive slightly out of sync. Many modern car stereos offer time alignment settings to fix this.
Access the time alignment menu and input the approximate distance from each speaker to the driver’s seat. The system delays sound from closer speakers to sync with farther ones. Test a track with distinct left-right panning, like a live recording. Adjust until the sound feels centered and natural, as if the band is performing in front of you.
Step 7: Optimize Volume and Gain
Volume and gain settings impact clarity and prevent distortion. Gain controls the input signal strength to your amplifier or speakers. Too high, and you’ll hear clipping; too low, and the sound lacks punch.
Start by setting your head unit’s volume to about 75% of its maximum. Adjust the amplifier’s gain until the sound is loud but clean. Play a dynamic track and listen for distortion. If you hear crackling, lower the gain slightly. Use a sound meter app to ensure consistent output across speakers, aiming for around 80–85 decibels for safe, clear listening.
Step 8: Test and Refine
Tuning isn’t a one-and-done process. Test your settings with a variety of music genres and driving conditions. Play a jazz track to check vocal clarity, a rock song for guitar riffs, and an EDM track for bass response. Drive on different roads to see how road noise affects the sound. If the bass feels weak on highways, tweak the low frequencies. If vocals get lost in city traffic, boost the mids slightly.
Keep your notepad handy to track changes. This helps you revert to previous settings if something doesn’t work. Over time, you’ll find the sweet spot that suits your taste.
Common Mistakes to Avoid
Even seasoned tuners make mistakes. Avoid these pitfalls for the best results:
- Over-boosting bass: Too much bass drowns out mids and causes distortion. Aim for balance.
- Ignoring road noise: Test settings while driving to account for real-world conditions.
- Skipping the manual: Your stereo’s unique features can make or break the tuning process.
- Neglecting speaker quality: No amount of tuning fixes low-quality speakers. Upgrade if needed.
Advanced Tips for Audiophiles
If you’re chasing next-level sound, consider these tweaks:
- Sound deadening: Add damping materials to doors and floors to reduce vibrations and improve clarity.
- Upgrade components: High-quality speakers, amplifiers, and digital signal processors (DSPs) elevate performance.
- Use reference tracks: Audiophile-grade recordings reveal subtle flaws in your setup.
- Experiment with DSP: Advanced systems let you fine-tune phase, crossover slopes, and EQ curves for precision.
Maintaining Your Tuned Stereo
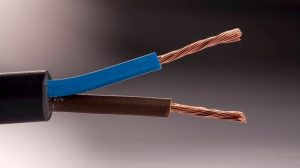
Once you’ve tuned your stereo, maintain it to keep the sound pristine. Clean speakers regularly to remove dust. Check wiring for wear, especially in older cars. Update your playlist with high-quality audio files—MP3s at 320kbps or lossless formats like FLAC deliver the best results. Periodically revisit your settings, as speaker performance can change over time.
Conclusion
Tuning a car stereo unlocks its full potential, turning your vehicle into a rolling concert hall. By understanding your car’s acoustics, resetting the system, and carefully adjusting balance, EQ, crossover, and time alignment, you create a personalized audio experience. Test your settings, avoid common mistakes, and consider advanced tweaks for even better results. With patience and practice, you’ll enjoy every drive with sound that rivals high-end home systems. Grab your playlist, hit the road, and let the music shine.