Car audio systems enhance our driving experience with quality sound, but they can sometimes malfunction. When your car amplifier stops working correctly, a simple reset might solve the problem. This guide walks you through the process of resetting your car amplifier safely and effectively.
Contents
- Why You Might Need to Reset Your Car Amplifier
- Understanding How Car Amplifiers Work
- Safety First: Precautions Before Resetting
- Essential Tools for Resetting Your Car Amplifier
- Step-by-Step Guide to Reset Your Car Amplifier
- Troubleshooting If Reset Doesn’t Work
- When to Seek Professional Help
- Preventing Future Amplifier Problems
- Understanding Common Car Amplifier Issues
- The Benefits of Proper Amplifier Maintenance
- Conclusion
Why You Might Need to Reset Your Car Amplifier
Car amplifiers can encounter various issues that affect their performance. You might need a reset if:
- Your amp has suddenly stopped producing sound
- You hear distorted audio or unusual noise
- The protection mode light stays on
- The amp overheats frequently
- You’ve recently changed your car battery
- The system randomly shuts off during operation
- You notice inconsistent power delivery to your speakers
Before spending money on repairs or replacements, try resetting your amplifier—it often fixes these common problems in minutes.
Understanding How Car Amplifiers Work
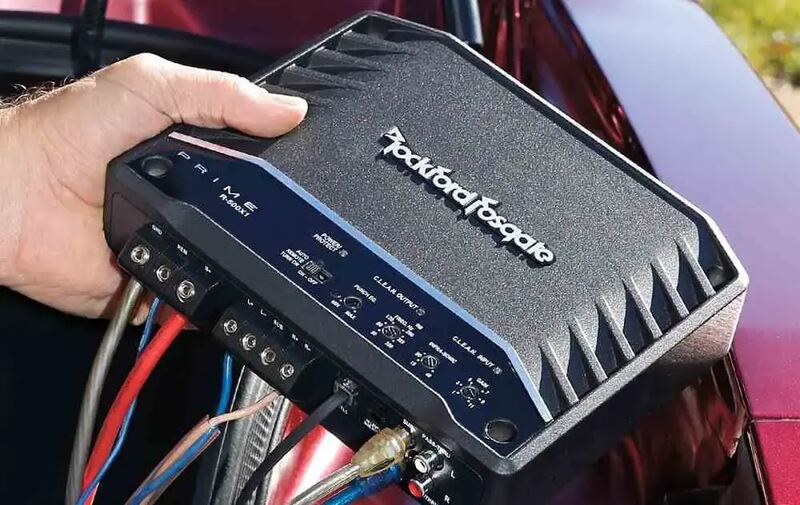
Before diving into the reset process, it helps to understand what your car amplifier actually does. The amplifier takes the low-level audio signal from your head unit (radio) and boosts it to drive your speakers. It requires both power connections and audio signal inputs to function correctly.
Car amps typically feature:
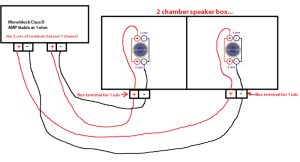
- Power terminals (12V+, ground, and remote turn-on)
- RCA inputs for audio signals
- Speaker output terminals
- Protection circuitry
- Gain and crossover controls
When the amp detects issues like short circuits, overheating, or voltage problems, its protection mode activates to prevent damage. A reset can clear these protection triggers and restore normal operation.
Safety First: Precautions Before Resetting
Safety should always be your priority when working with car electronics. Take these precautions:
- Park your vehicle in a safe location with plenty of space to work
- Turn off the engine completely
- Disconnect the negative terminal of your car battery
- Wait at least 30 seconds before proceeding
- Have proper tools ready (screwdrivers, pliers, flashlight)
- Avoid touching multiple terminals simultaneously
- Work with dry hands in a dry environment
Skipping these safety steps could result in electrical shorts, damage to components, or even personal injury.
Essential Tools for Resetting Your Car Amplifier
You’ll need a few basic tools to reset your car amplifier properly:
- Basic hand tools (screwdrivers, wrenches)
- Flashlight or work light
- Gloves (optional but recommended)
- Multimeter (helpful but not required)
- Owner’s manual for your specific amplifier
- Clean, lint-free cloth
- Battery terminal cleaner (if necessary)
Having these tools ready will make the reset process smoother and help you address any related issues you might discover.
Step-by-Step Guide to Reset Your Car Amplifier
Step 1: Locate Your Amplifier
Car amplifiers are typically installed in the trunk, under seats, or behind interior panels. Check common locations like:
- In the trunk (often against the rear seat backrest)
- Under front or rear seats
- In side panels of the trunk
- In custom-built enclosures
If you didn’t install the system yourself, you might need to search a bit. Look for power cables running from your battery—they often lead to the amplifier location.
Step 2: Power Down the System
Before touching any components:
- Turn off your car stereo completely
- Remove the key from the ignition
- Disconnect the negative terminal of your car battery using a wrench
- Wait at least 30 seconds for any residual power to dissipate
This power-down sequence prevents electrical surges or shorts during the reset process.
Step 3: Inspect the Amplifier Connections
With power disconnected, check all connections to your amplifier:
- Power wire (typically a thick red wire)
- Ground wire (usually black)
- Remote turn-on wire (smaller blue or white wire)
- RCA audio input cables
- Speaker wires
Look for loose connections, corrosion, or damaged wires. Loose connections are common causes of amplifier problems. Make sure all connections are clean and secure.
Step 4: Reset the Amplifier
The exact reset method varies by amplifier brand and model. Try these common approaches:
Method A: Power Cycle Reset
- With the battery disconnected, press and hold the power button on your car stereo for 10-15 seconds
- This drains any remaining power in the system
- Release the button and wait another 10-15 seconds
- Reconnect the battery negative terminal
Method B: Factory Reset Button
- Some amplifiers have a dedicated reset button (check your owner’s manual)
- The button might be small and recessed, requiring a paperclip or small tool
- Press and hold this button for 5-10 seconds
- Release the button to complete the reset
Method C: Fuse Removal Reset
- Locate the fuse on your amplifier (usually on the amp body)
- Remove the fuse carefully with fuse pullers or small pliers
- Wait 30 seconds
- Reinsert the fuse firmly
Method D: Complete Power Disconnect
- Disconnect all wires from the amplifier (take photos first to remember the connections)
- Wait 10-15 minutes for internal capacitors to discharge completely
- Reconnect all wires carefully, ensuring proper polarity
- Double-check all connections before restoring power
Step 5: Restore Power and Test
After completing the reset:
- Double-check all connections
- Reconnect the negative battery terminal
- Turn on your car without starting the engine
- Power on your stereo at a low volume
- Check if the amplifier powers up properly (look for status lights)
- Gradually increase volume to test performance
Listen carefully for any unusual sounds or distortion that might indicate ongoing issues.
Troubleshooting If Reset Doesn’t Work
If your amplifier still isn’t working correctly after a reset, try these troubleshooting steps:
Check Fuses
Car amplifiers typically have built-in fuses and may also connect to fuses in your car’s fuse box. Check:
- Inline fuse on the power wire near the battery
- Fuses on the amplifier body
- Related fuses in your vehicle’s fuse panel
Replace any blown fuses with the exact same amperage rating.
Verify Power Supply
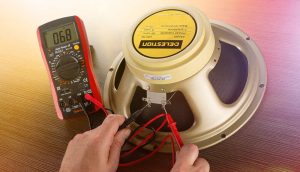
Use a multimeter to check voltage at the amplifier:
- Set your multimeter to DC voltage (20V range)
- Check voltage between the positive terminal and ground (should read around 12-14.4V)
- Check the remote turn-on wire with the stereo on (should show 12V)
No voltage means a power supply issue rather than an amplifier problem.
Inspect Ground Connection
A poor ground connection causes many amplifier issues:
- Locate the ground wire connection to your vehicle’s chassis
- Remove the connection and clean the contact area
- Ensure the ground wire connects directly to bare metal (not paint or plastic)
- Reconnect and tighten securely
Test With Different Audio Source
Connect a different audio source to determine if the problem is with your head unit:
- Use a portable music player with a headphone-to-RCA adapter
- Connect directly to your amplifier’s inputs
- Test playback to see if the amplifier works with the alternative source
Check Speaker Connections
Speaker wiring problems can trigger protection mode:
- Inspect all speaker wires for damage
- Ensure no bare wires are touching (causing shorts)
- Temporarily disconnect speakers and see if the amp powers up
- Reconnect speakers one by one to identify problematic connections
When to Seek Professional Help
While many amplifier issues can be resolved with a reset, some problems require professional attention. Consider consulting a car audio specialist if:
- You’ve tried all reset methods without success
- The amplifier shows signs of physical damage
- You smell burning or see leaking components
- The amplifier repeatedly enters protection mode immediately after reset
- You’re uncomfortable working with car electronics
Professional technicians have specialized equipment to diagnose complex electrical issues and can perform repairs beyond simple resets.
Preventing Future Amplifier Problems
Once your amplifier is working again, these maintenance practices will help prevent future issues:
- Keep your audio system at reasonable volume levels to prevent overheating
- Install your amplifier in a well-ventilated area
- Clean connections periodically to prevent corrosion
- Secure all wiring to prevent damage from movement or vibration
- Use appropriate gauge power wire for your amplifier’s requirements
- Consider a capacitor for high-power systems to stabilize voltage
- Protect your amplifier from moisture and extreme temperatures
Regular checks of your audio system can catch minor issues before they become major problems.
Understanding Common Car Amplifier Issues
Knowing the common problems can help you identify when a reset is appropriate:
Protection Mode Cycling When an amplifier repeatedly enters and exits protection mode, it usually indicates:
- Overheating due to inadequate ventilation
- Impedance mismatches between amp and speakers
- Unstable power supply
- Internal component failure
Distorted Sound Distortion suggests:
- Incorrect gain settings
- Clipping due to excessive input signal
- Speaker damage
- Ground loop interference
No Sound Output Complete silence could mean:
- Failed power connections
- Blown internal fuses
- Remote wire issues
- Signal input problems
Intermittent Operation If your amp works sometimes but not others:
- Loose connections are likely
- Thermal issues might be occurring
- Voltage fluctuations could be happening
The Benefits of Proper Amplifier Maintenance
Regular maintenance offers several advantages:
- Extended lifespan of your audio components
- Consistent sound quality
- Prevention of more expensive repairs
- Protection of connected speakers
- Reliable performance in various conditions
Simple maintenance takes minutes but can save hundreds in repair costs.
Conclusion
Resetting your car amplifier is often the first and most effective step in troubleshooting audio system problems. By following this guide, you can often resolve issues without expensive repairs or replacements. Remember to prioritize safety, work methodically, and consult professionals when necessary.
With proper care and occasional resets when needed, your car amplifier will provide years of quality sound enhancement for your driving experience. Keep this guide handy for those moments when your audio system needs a fresh start—you’ll be back to enjoying your favorite music in no time.