Upgrading your car’s audio system delivers a thrilling boost to your driving experience. A factory stereo often lacks the power to produce deep bass or crystal-clear sound. By adding an amplifier and subwoofer, you transform your vehicle into a rolling concert hall. This guide walks you through the process step-by-step, ensuring you achieve a professional-grade sound system without breaking the bank. Whether you’re a car audio newbie or a seasoned enthusiast, this article provides practical tips, expert advice, and easy-to-follow instructions to enhance your car’s audio performance.
Contents
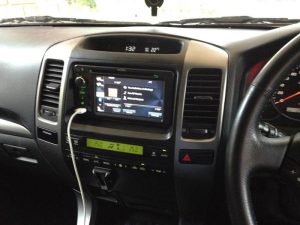
Why Upgrade Your Factory Stereo?
Factory car stereos prioritize cost-efficiency over sound quality. They often deliver flat, underwhelming audio that struggles with bass-heavy tracks or high-volume playback. An amplifier boosts the signal, providing cleaner, more powerful sound. A subwoofer, meanwhile, handles low-frequency bass, adding depth and richness to your music. Together, they create a balanced, immersive listening experience that makes every drive more enjoyable.
Beyond sound quality, upgrading your car audio system increases your vehicle’s resale value. A well-installed aftermarket audio setup appeals to buyers who value premium entertainment. Plus, the process teaches you valuable skills, like wiring and system integration, that you can apply to future car projects.
Tools and Materials You’ll Need
Before diving into the installation, gather the necessary tools and materials. Having everything on hand saves time and prevents frustration during the process. Here’s what you need:
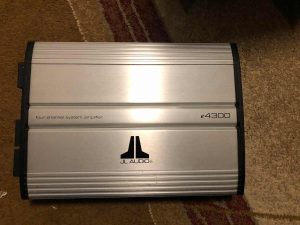
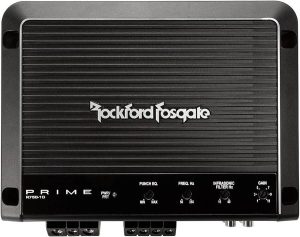
- Amplifier: Choose a compact model with enough power (measured in watts) to match your subwoofer and speakers.
- Subwoofer: Select a subwoofer size (8”, 10”, or 12”) based on your vehicle’s space and bass preferences.
- Wiring Kit: Includes power cables, ground wires, RCA cables, and remote turn-on wires.
- Line Output Converter (LOC): Converts the factory stereo’s speaker-level output to a low-level signal for the amplifier.
- Screwdrivers and Wrenches: For removing panels and securing components.
- Wire Cutters and Strippers: To trim and prepare wires.
- Electrical Tape and Zip Ties: For securing and organizing wires.
- Crimping Tool: To attach connectors to wires.
- Panel Removal Tools: To safely pry off interior panels without damage.
- Multimeter: To test electrical connections.
- Sound Deadening Material (optional): Reduces vibrations and rattles for cleaner sound.
Pro tip: Invest in a high-quality wiring kit. Cheap cables can cause signal loss or electrical issues, compromising your audio performance.
Step-by-Step Guide to Adding an Amplifier and Subwoofer
Follow these steps to integrate an amplifier and subwoofer into your factory car stereo. Take your time, double-check connections, and prioritize safety to achieve the best results.
Step 1: Plan Your Installation
Start by mapping out your setup. Decide where to mount the amplifier and subwoofer. Common amplifier locations include under a seat, in the trunk, or on the back of a rear seat. Subwoofers typically go in the trunk or cargo area, either in a sealed or ported enclosure for optimal bass output.
Consider your vehicle’s layout. Ensure the amplifier has enough ventilation to prevent overheating. For the subwoofer, measure the available space to confirm your chosen size fits comfortably. Sketch a wiring diagram to visualize how cables will run from the battery to the amplifier and subwoofer. A clear plan minimizes mistakes and keeps your installation tidy.
Step 2: Disconnect the Battery
Safety comes first. Disconnect the negative terminal of your car’s battery to prevent electrical shocks or short circuits. Use a wrench to loosen the terminal clamp, then tuck the cable away to avoid accidental contact. This step ensures you work on the electrical system without risk.
Step 3: Install the Line Output Converter (LOC)
Since most factory stereos lack RCA outputs, a line output converter bridges the gap. The LOC taps into the rear speaker wires and converts their signal for the amplifier. Locate the speaker wires behind your head unit or near the rear speakers. Use a wiring diagram specific to your car model to identify the correct wires (available online or in your vehicle’s manual).
Strip a small section of the speaker wires, then connect them to the LOC’s input terminals. Secure the connections with electrical tape. Run RCA cables from the LOC’s output to the amplifier’s input. Mount the LOC in a hidden spot, like behind the dashboard or under a seat, using zip ties or adhesive.
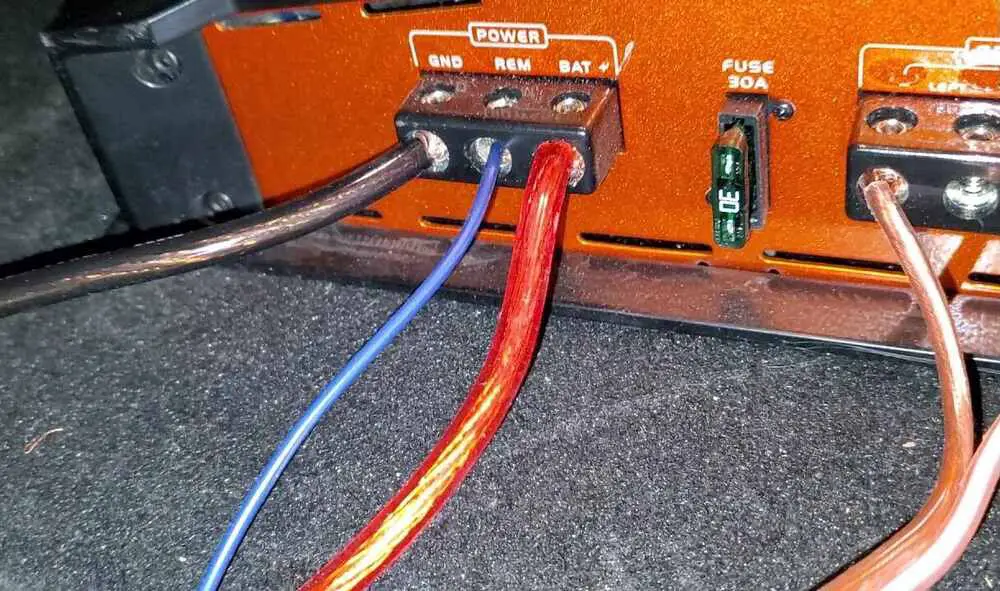
Step 4: Run Power and Ground Wires
The amplifier needs a direct power source from the car’s battery. Run a power cable from the battery’s positive terminal through the firewall (a rubber grommet in the engine bay) into the vehicle’s interior. Route the cable along the car’s frame, avoiding sharp edges or moving parts. Secure it with zip ties for a clean look.
Inside the vehicle, connect the power cable to the amplifier’s power input. Next, attach a ground wire to the amplifier’s ground terminal. Find a nearby metal surface, like a bolt in the trunk, and sand it down to bare metal for a solid connection. Secure the ground wire to this point with a ring terminal and bolt. A proper ground prevents noise and ensures optimal performance.
Step 5: Connect the Remote Turn-On Wire
The remote turn-on wire tells the amplifier to power on when the stereo starts. Connect one end to the amplifier’s remote terminal and the other to the factory stereo’s remote wire or a switched power source (like an accessory fuse). If your stereo lacks a remote wire, tap into a fuse that activates with the ignition using a fuse tap.
Step 6: Mount the Amplifier and Subwoofer
Secure the amplifier in its chosen location using screws or mounting brackets. Ensure it’s stable and won’t shift while driving. For the subwoofer, place it in its enclosure and mount it in the trunk or cargo area. If using a powered subwoofer (with a built-in amp), connect it directly to the LOC and power source, skipping the separate amplifier step.
Double-check that both components are firmly in place. Loose equipment can rattle or become damaged, affecting sound quality and safety.
Step 7: Connect the Subwoofer to the Amplifier
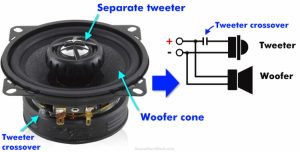
Run speaker wire from the amplifier’s output terminals to the subwoofer’s input. If your subwoofer has dual voice coils, follow the manufacturer’s wiring diagram to match the amplifier’s impedance (measured in ohms). Secure all connections with crimp connectors or terminal blocks to prevent signal loss.
Step 8: Reconnect the Battery and Test the System
Reconnect the negative battery terminal. Turn on your car and stereo to test the system. Play a bass-heavy track to check the subwoofer’s output. Adjust the amplifier’s gain, crossover, and bass boost settings to fine-tune the sound. The gain controls the input sensitivity, the crossover filters out high frequencies, and the bass boost enhances low-end output. Start with low settings and gradually increase until the sound is balanced without distortion.
If you hear no sound, check all connections, especially the LOC and ground wire. Use a multimeter to verify voltage at the amplifier’s power terminal. Persistent issues may require consulting a professional car audio installer.
Step 9: Secure and Organize Wires
Once the system works perfectly, tidy up the installation. Bundle excess wires with zip ties and tuck them out of sight. Apply sound deadening material to the trunk or subwoofer enclosure to reduce vibrations and rattles. A clean setup not only looks professional but also prevents wear on cables over time.
Tips for Optimizing Your Car Audio System
To get the most out of your new setup, follow these expert tips:
- Tune the Amplifier Properly: Overdriving the gain causes clipping, which distorts sound and damages speakers. Set the gain to match the stereo’s output for clean audio.
- Choose the Right Subwoofer Enclosure: Sealed boxes deliver tight, accurate bass, while ported boxes produce louder, boomy bass. Pick based on your music preferences.
- Upgrade Other Components: Pair your amp and sub with aftermarket speakers or a high-output head unit for a fully balanced system.
- Soundproof Your Vehicle: Add sound deadening mats to doors and the trunk to minimize road noise and enhance bass clarity.
- Test with Different Music Genres: Play a variety of tracks (rock, hip-hop, classical) to ensure the system performs well across frequencies.
Common Mistakes to Avoid
Even experienced installers make errors. Steer clear of these pitfalls to ensure a smooth upgrade:
- Skipping the LOC: Without a line output converter, the amplifier won’t receive a proper signal, resulting in weak or no sound.
- Poor Grounding: A loose or corroded ground connection causes noise, hum, or amplifier failure.
- Overloading the Electrical System: High-powered amps draw significant current. If your car’s alternator or battery struggles, consider upgrading them.
- Ignoring Impedance Matching: Mismatched amplifier and subwoofer impedance reduces efficiency and risks equipment damage.
- Rushing the Installation: Take your time to secure connections and test the system. Hasty work leads to costly fixes later.
Benefits of a Professional Installation
While a DIY approach saves money, professional installers offer expertise and precision. They ensure seamless integration with your factory stereo, optimize sound settings, and handle complex wiring challenges. If your vehicle has advanced electronics (like a CAN bus system), a pro can prevent issues that might trip error codes or drain the battery. Consider hiring a professional if you’re unsure about any step or want a flawless finish.
Maintenance Tips for Your Audio System
To keep your amplifier and subwoofer performing at their best, follow these maintenance tips:
- Check Connections Regularly: Inspect wires and terminals for corrosion or looseness every few months.
- Clean the Subwoofer: Dust and debris can accumulate on the cone, affecting sound quality. Wipe it gently with a dry cloth.
- Monitor Amplifier Temperature: If the amp feels excessively hot, improve ventilation or reduce the gain.
- Update Firmware: Some modern amplifiers have firmware updates for improved performance. Check the manufacturer’s website periodically.
Conclusion
Adding an amplifier and subwoofer to your factory car stereo unlocks a world of rich, powerful sound. By following this guide, you can achieve a high-quality audio upgrade without replacing your entire head unit. Plan carefully, invest in quality components, and take your time with the installation. The result? A driving experience that feels like a front-row seat at your favorite concert. Ready to crank up the bass? Grab your tools and start transforming your car’s audio today!