Has your car stereo lost its punch? One day you’re cruising with powerful music filling your vehicle, and the next, you notice your speakers just don’t hit the same. This frustrating issue affects many car audio enthusiasts and casual listeners alike.
If your car stereo isn’t as loud as it used to be, something has changed in your audio system. The good news? Most volume problems can be fixed without replacing your entire setup. This guide walks you through every possible cause and solution to bring back that satisfying sound you’ve been missing.
Contents
Common Reasons Your Car Stereo Lost Volume
When your car stereo suddenly loses power or gradually becomes quieter over time, several factors could be responsible:
1. Audio Settings Have Changed
Often, the simplest explanation is the correct one. Your audio settings might have been accidentally adjusted. This happens more than you’d think – a passenger changing settings, accidental button presses, or even automatic resets after battery disconnection.
Quick Fixes:
- Check the volume knob itself first (it seems obvious, but worth confirming)
- Verify equalizer (EQ) settings haven’t been set to minimize bass or treble
- Make sure balance and fader controls are centered
- Look for any “loudness” or “bass boost” features that might be turned off
- Reset your head unit to factory settings if necessary
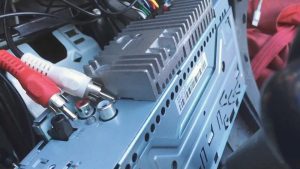
2. Amplifier Issues
The amplifier is the heart of your audio system’s power. When it’s not performing correctly, volume suffers significantly.
Potential Amplifier Problems:
- Overheating (amplifiers have protection circuits that reduce output when hot)
- Loose power or ground connections
- Internal component failures
- Blown fuses within the amplifier
- Improper gain settings
To check your amplifier, look for status lights (many have indicators showing when they’re in protection mode), inspect all connections, and verify the cooling system is working correctly.
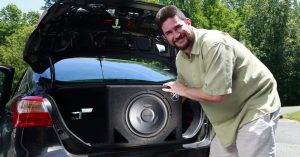
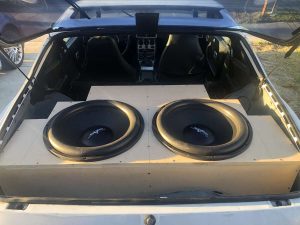
3. Speaker Damage
Speakers naturally degrade over time, especially in the harsh environment of a vehicle with temperature fluctuations and vibration.
Signs of Speaker Damage:
- Distortion at higher volumes
- “Buzzing” or “rattling” sounds
- Uneven sound between speakers
- Visible damage to speaker cones or surrounds
Physical inspection is the best way to identify speaker issues. Look for tears in the cone material, deteriorated foam surrounds, or voice coils that have separated from the cone.
4. Wiring Problems
Your audio system is only as good as its connections. Wiring issues are common culprits behind volume loss.
Common Wiring Issues:
- Loose connections at speakers, amplifier, or head unit
- Corroded terminals
- Partially damaged wires (nicks, cuts, or pinches)
- Ground loops causing interference
- Power wire issues limiting current to amplifiers
Checking connections requires patience and methodical testing of each connection point in your system.
5. Head Unit Failure
The head unit (your car stereo’s main control unit) contains numerous electronic components that can fail over time.
Head Unit Problems That Cause Volume Loss:
- Failing output circuits
- Damaged volume control mechanism
- Software glitches
- Internal component damage from power surges
- Water or moisture damage
Testing with a different head unit can help determine if yours is the problem.
6. Battery or Alternator Issues
Your vehicle’s electrical system powers your audio equipment. When it’s compromised, audio performance suffers.
Electrical System Problems:
- Battery with low capacity
- Failing alternator not providing enough charging power
- Voltage drops during playback, especially at high volumes
- Corroded battery terminals limiting current flow
A multimeter can help diagnose these electrical issues by measuring voltage during idle and while playing music.
Detailed Troubleshooting Steps
Now let’s dive into a systematic approach to diagnosing and fixing your car stereo volume problems:
Step 1: Verify Basic Settings
Before assuming hardware failures, check these basic settings:
- Volume Limiter: Many head units have maximum volume settings that can be configured. Check your stereo’s settings menu for “volume limit” or similar options.
- Audio Source Quality: Switch between different audio sources (radio, USB, Bluetooth, etc.) to see if the volume issue affects all sources or just one.
- Phone Volume Settings: If using a connected smartphone, make sure both the phone’s media volume and the app’s volume are turned up.
- Test Different Content: Play various songs or audio files to rule out issues with specific recordings.
- Audio Enhancement Features: Some stereos have sound enhancement features that might be disabled. Look for settings like “Sound Retriever,” “Loudness,” or “Bass Boost.”
Step 2: Check External Factors
Sometimes the issue isn’t with your audio system at all:
- Road Noise: Has something changed with your vehicle’s sound insulation? More road noise can make your stereo seem quieter.
- Hearing Changes: Be honest with yourself – has your hearing changed? This is especially relevant if you haven’t had a hearing check in several years.
- Vehicle Changes: New tires with different tread patterns or modifications to your exhaust system can increase ambient noise levels.
Step 3: Inspect Your Speakers
Speaker problems often develop gradually:
- Visual Inspection: Remove speaker grilles and look for visible damage like tears or separated parts.
- Touch Test: Gently press on speaker cones (with the system off) to feel for proper resistance and movement.
- Listen Up Close: Play music at low volume and listen closely to each speaker for abnormal sounds.
- Impedance Test: If you have a multimeter, measure speaker impedance to check for electrical issues.
- Swap Test: If you have multiple identical speakers, try swapping positions to see if problems follow specific speakers.
Step 4: Examine Your Wiring
Wiring issues can be tricky to spot:
- Connection Check: Ensure all connections are tight and free of corrosion at the head unit, amplifier, and speakers.
- Wire Condition: Look for pinched, frayed, or damaged wires along their routes.
- Ground Connections: Poor grounds can severely limit power delivery. Clean all ground connections and ensure they’re secured to bare metal.
- Power Wire Voltage Drop: Test voltage at both ends of power wires during high-volume playback to identify resistance issues.
- Speaker Wire Quality: Undersized or damaged speaker wire can limit power delivery to speakers.
Step 5: Evaluate Your Amplifier
If your system includes an external amplifier:
- Protection Mode: Many amps have indicator lights that show when they’re in protection mode due to issues like overheating or electrical problems.
- Heat Check: After playing music for 15-20 minutes, carefully check if your amplifier is excessively hot.
- Gain Settings: Improper gain settings can limit output. Check your amplifier’s manual for correct adjustment procedures.
- Internal Fuses: Most amplifiers have internal fuses separate from your vehicle’s fuse box. Check these for failure.
- Power Requirements: Ensure your electrical system can handle your amplifier’s demands. Voltage drops during playback indicate insufficient power.
Step 6: Test Your Head Unit
The source of your audio could be the problem:
- Factory Reset: Many head units have reset procedures that can resolve software glitches.
- Firmware Update: Check if your head unit manufacturer offers firmware updates that might address performance issues.
- Output Testing: If possible, connect your head unit to different speakers to verify its output capability.
- Bypass Test: Try connecting an external source directly to your amplifier (if applicable) to determine if the head unit is limiting volume.
Step 7: Check Your Vehicle’s Electrical System
Low power can cause surprising audio issues:
- Battery Voltage: Measure battery voltage with the engine off and again with it running. You should see approximately 12-12.6V when off and 13.8-14.4V when running.
- Load Test: Have your battery professionally load-tested to verify its capacity.
- Alternator Output: Measure voltage at the battery with the engine running and audio playing at high volume. If voltage drops below 13V, your alternator may be struggling.
- Big Three Upgrade: Consider upgrading your vehicle’s main power cables (battery positive to alternator, battery negative to chassis, and engine block to chassis) if you have a high-power system.
Advanced Solutions for Persistent Volume Problems
If basic troubleshooting doesn’t resolve your issue, consider these more involved solutions:
Audio System Upgrades
Sometimes the most effective solution is improving your system:
- Add or Upgrade Amplifiers: Factory systems often lack power. An external amplifier can dramatically improve volume and clarity.
- Speaker Upgrades: Higher efficiency speakers can produce more volume from the same power.
- Sound Deadening: Adding sound deadening material to your vehicle reduces road noise, making your system sound louder without increasing actual volume.
- Digital Signal Processor (DSP): A DSP can optimize your audio signal, improving perceived loudness without increasing amplifier power.
Professional Diagnosis
When all else fails, professional help can save time and frustration:
- Shop Diagnostics: Car audio specialists have testing equipment to pinpoint electrical and signal issues.
- System Tuning: Professional tuning can maximize your system’s performance, often revealing hidden volume potential.
- Comprehensive Electrical Testing: Pros can perform advanced electrical system testing that might reveal underlying issues.
Preventing Future Volume Loss
Once you’ve fixed your current issue, prevent future problems with these practices:
- Regular Cleaning: Dust and debris can affect connections and component performance. Clean your system periodically.
- Proper Volume Habits: Avoid constant maximum volume use, which stresses components.
- Electrical System Maintenance: Keep your battery and alternator in good condition with regular checks.
- Protection From Elements: Minimize exposure to extreme temperatures and moisture.
- Quality Installations: When adding new components, use proper gauge wiring and secure mounting techniques.
System-Specific Troubleshooting
Different audio systems require different approaches:
Factory Audio Systems
Factory systems have unique characteristics:
- Speed-Sensitive Volume: Many factory systems adjust volume based on vehicle speed. Check if this feature is functioning correctly.
- Audio Limiters: Manufacturers often include volume limiting to protect factory speakers. Some aftermarket devices can bypass these limits.
- Integration Issues: If you’ve added aftermarket components to a factory system, interface issues could be causing volume problems.
Aftermarket Systems
Custom systems face different challenges:
- Compatibility: Not all components work optimally together. Impedance mismatches and power handling differences can cause performance issues.
- Installation Quality: Improper installation is the leading cause of performance problems in aftermarket systems.
- System Design: Sometimes the original system design doesn’t account for your listening preferences or vehicle acoustics.
When to Replace Components
Knowing when to repair versus replace can save money and frustration:
- Speakers: Replace if you see physical damage or measure incorrect impedance.
- Amplifiers: Consider replacement if protection circuits frequently engage despite proper installation and cooling.
- Head Units: Replace if output testing confirms reduced performance across all sources and settings.
- Wiring: Always replace damaged wiring rather than attempting repairs with splices.
Conclusion
A car stereo that’s not as loud as it used to be is frustrating but fixable. By following this systematic troubleshooting approach, you can identify and resolve the root cause of your volume loss. Whether it’s a simple settings adjustment or a component that needs replacement, restoring your system’s performance will bring back the enjoyment of your driving experience.
Remember that audio systems are complex, and sometimes multiple factors contribute to reduced volume. Take your time with diagnosis, and don’t hesitate to seek professional help for particularly challenging issues.
Have you experienced volume loss in your car stereo? What solution worked for you? Share your experience in the comments below to help fellow audio enthusiasts!