Engine noise in your car stereo can ruin your driving experience. That annoying whine, hum, or static often creeps through your speakers, drowning out your favorite tunes. Fortunately, you can eliminate this interference with practical steps and a bit of know-how. This guide dives deep into identifying the causes of engine noise, offering actionable solutions, and ensuring your car audio system delivers crystal-clear sound. Whether you’re a DIY enthusiast or seeking professional help, you’ll find everything you need to restore your stereo’s performance. Let’s get started.
Contents
- Understanding Engine Noise in Car Stereos
- Step 1: Diagnose the Source of the Noise
- Step 2: Fix Grounding Issues
- Step 3: Tackle Alternator Whine
- Step 4: Optimize Wiring and Cable Management
- Step 5: Correct Installation Errors
- Step 6: Use Noise Suppression Devices
- Step 7: Advanced Fixes for Persistent Noise
- Step 8: Prevent Future Engine Noise
- Final Thoughts
Understanding Engine Noise in Car Stereos
Engine noise, often called alternator whine or ground loop interference, manifests as a high-pitched hum or buzzing that syncs with your engine’s RPM. When you accelerate, the noise gets louder; when you idle, it softens. This interference stems from electrical issues within your car’s audio system. Knowing the root causes helps you tackle the problem effectively.
Common Causes of Engine Noise
Several factors contribute to engine noise in car stereos. Here’s a breakdown of the most frequent culprits:
- Grounding Issues: Poor grounding creates ground loops, where multiple ground points in the audio system cause electrical interference.
- Alternator Interference: The alternator generates electrical noise as it charges the battery, which can infiltrate the stereo system.
- Faulty Wiring: Damaged or low-quality RCA cables, power cables, or speaker wires can pick up electromagnetic interference (EMI).
- Improper Installation: Incorrectly installed amplifiers, head units, or other components can introduce noise.
- External Interference: Nearby electrical components, like ignition systems or fuel pumps, emit EMI that affects the stereo.
Understanding these causes sets the stage for targeted solutions. Let’s explore how to diagnose and fix the issue step by step.
Step 1: Diagnose the Source of the Noise
Before diving into fixes, pinpoint the source of the engine noise. A systematic approach saves time and ensures you address the right problem.
Test the Stereo System
Start by isolating the noise. Turn on your car and stereo, then listen carefully. Does the noise change with engine speed? If so, alternator whine is likely the issue. If the noise persists even when the engine is off, the problem might lie within the audio components or wiring.
Next, adjust the volume. If the noise stays constant regardless of volume, the issue is likely in the power or ground connections. If the noise increases with volume, check the RCA cables or signal path.
Check the Components
Test each component in your audio system:
- Head Unit: Disconnect the RCA cables from the head unit. If the noise stops, the head unit is likely fine, and the issue lies downstream (e.g., amplifier or wiring).
- Amplifier: Bypass the amplifier by connecting the head unit directly to the speakers. If the noise disappears, the amplifier or its wiring is the culprit.
- Speakers: Inspect speaker connections for loose or damaged wires.
This process narrows down the problem, guiding you toward the right fix.
Step 2: Fix Grounding Issues
Grounding problems are a leading cause of engine noise. A solid ground connection ensures your audio system operates without interference.
Choose a Proper Ground Point
Select a clean, unpainted metal surface on the car’s chassis for grounding. The closer the ground point to the audio component, the better. Avoid grounding to painted surfaces or areas with rust, as they impede electrical flow.
Upgrade Ground Wires
Use high-quality, thick gauge ground wires (e.g., 8-gauge or thicker) to minimize resistance. Ensure all connections are tight and secure. Sand down the grounding area to remove any corrosion or debris.
Eliminate Ground Loops
Ground loops occur when multiple components have different ground points, creating a circuit for interference. To fix this:
- Ground all audio components (head unit, amplifier, etc.) to a single point on the chassis.
- Use a ground loop isolator if rewiring isn’t feasible. This device breaks the loop, reducing noise.
Proper grounding significantly reduces engine noise, but other issues may persist. Let’s move on to addressing alternator interference.
Step 3: Tackle Alternator Whine
Alternator whine is a common issue in car audio systems. The alternator generates electrical noise that travels through the power lines, infiltrating your stereo.
Install a Noise Filter
A noise filter, also called a power line filter, suppresses alternator noise. Install it between the battery and the audio component’s power input. Choose a filter rated for your system’s amperage to ensure compatibility.
Upgrade Power Cables
Low-quality or undersized power cables can amplify alternator noise. Use oxygen-free copper (OFC) cables with adequate gauge (e.g., 4-gauge for amplifiers). Keep power cables as short as possible to reduce EMI pickup.
Check the Alternator
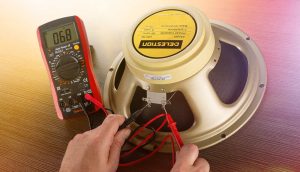
A faulty alternator can produce excessive noise. Have a mechanic test it with a multimeter to ensure it’s functioning correctly. If the alternator is old or damaged, replacing it may resolve the issue.
By addressing alternator whine, you’re one step closer to a noise-free stereo. Next, let’s focus on wiring improvements.
Step 4: Optimize Wiring and Cable Management
Faulty or poorly routed wiring is a major source of engine noise. Proper cable selection and routing minimize interference.
Use High-Quality RCA Cables
RCA cables transmit audio signals between the head unit and amplifier. Low-quality cables with poor shielding pick up EMI. Invest in double- or triple-shielded RCA cables to block interference. Avoid coiling excess cable, as it acts like an antenna for noise.
Separate Power and Signal Cables
Run power cables and RCA cables on opposite sides of the car. For example, route power cables along the driver’s side and RCA cables along the passenger’s side. This separation reduces crosstalk and EMI.
Inspect and Replace Damaged Wires
Check all cables for fraying, cuts, or exposed wires. Replace any damaged cables immediately. Use heat-shrink tubing or electrical tape to protect connections from moisture and vibration.
Proper wiring ensures clean signal transmission, but installation errors can still cause noise. Let’s address those next.
Step 5: Correct Installation Errors
Improperly installed audio components can introduce noise. Double-check your setup to ensure everything is installed correctly.
Secure Component Mounting
Vibration from loose components can cause electrical interference. Mount the head unit, amplifier, and other devices securely using brackets or screws. Use rubber grommets to dampen vibrations.
Verify Amplifier Settings
Incorrect amplifier settings, like excessive gain, can amplify noise. Set the gain properly by:
- Turning the gain to minimum.
- Playing music at 75% of the head unit’s maximum volume.
- Slowly increasing the gain until you hear distortion, then backing off slightly.
Check for Interference from Other Devices
Nearby electrical components, like GPS units or phone chargers, can introduce noise. Test the stereo with these devices unplugged. If the noise stops, relocate or replace the offending device.
A well-installed system minimizes noise, but sometimes external solutions are needed. Let’s explore additional tools.
Step 6: Use Noise Suppression Devices
When basic fixes don’t fully eliminate engine noise, noise suppression devices offer a quick solution.
Ground Loop Isolators
These affordable devices connect between the head unit and amplifier, breaking ground loops. They’re easy to install and work well for mild interference.
Line Output Converters
If your head unit lacks RCA outputs, a line output converter (LOC) adapts speaker-level signals to RCA. Choose a high-quality LOC with built-in noise filtering for best results.
Ferrite Chokes
Ferrite chokes, or snap-on ferrite beads, clip onto power or RCA cables to block EMI. Place them near the component’s input for maximum effectiveness.
These devices are great stopgaps, but long-term solutions involve addressing the root causes. Let’s look at advanced fixes.
Step 7: Advanced Fixes for Persistent Noise
If engine noise persists, consider these advanced solutions. They require more expertise but deliver lasting results.
Upgrade the Car’s Electrical System
A weak battery or alternator can exacerbate noise. Upgrade to a high-capacity battery or a higher-output alternator to stabilize the electrical system. Add a capacitor to smooth out power fluctuations for high-powered audio systems.
Shield Sensitive Components
Wrap sensitive cables or components in EMI shielding tape or conduit. This blocks external interference from ignition systems or other electronics.
Consult a Professional
If DIY fixes don’t work, a professional car audio technician can diagnose and resolve complex issues. They have specialized tools, like oscilloscopes, to pinpoint interference sources.
These advanced steps ensure your stereo performs at its best. Now, let’s discuss prevention to keep noise at bay.
Step 8: Prevent Future Engine Noise
Preventing engine noise is easier than fixing it. Follow these tips to maintain a clean audio system:
- Regularly inspect wiring and connections for wear.
- Use high-quality components from reputable brands.
- Avoid running cables near high-current devices like fuel pumps.
- Test new installations thoroughly before finalizing them.
Proactive maintenance keeps your stereo sounding pristine. Let’s wrap up with some final thoughts.
Final Thoughts
Engine noise in your car stereo is frustrating, but it’s fixable. By diagnosing the problem, addressing grounding issues, optimizing wiring, and using noise suppression tools, you can enjoy clear, high-quality sound. Start with simple fixes like checking grounds and cables, then move to advanced solutions if needed. If all else fails, a professional can help. With patience and the right approach, your car’s audio system will deliver the performance you deserve.
Take action today. Test your stereo, inspect your wiring, and implement these solutions. Your next drive could be filled with nothing but your favorite music, free from annoying engine noise.
FAQs
Q: Why does engine noise get louder when I accelerate?
A: The noise syncs with the alternator’s RPM, which increases as you accelerate, producing more electrical interference.
Q: Can a bad battery cause engine noise?
A: Yes, a weak battery can destabilize the electrical system, amplifying noise in the stereo.
Q: Are noise filters always effective?
A: Noise filters work well for alternator whine but may not resolve grounding or wiring issues.
Q: How do I know if my amplifier is causing the noise?
A: Bypass the amplifier and connect the head unit directly to the speakers. If the noise stops, the amplifier or its wiring is the issue.
Q: Is it worth hiring a professional for car stereo noise?
A: For complex issues or if DIY fixes fail, a professional can save time and ensure a permanent solution.

