Imagine unlocking your car with a button press, no fumbling for keys in the rain. Keyless entry systems bring convenience, security, and a modern touch to any vehicle. Whether you drive an older model or want to upgrade your current ride, installing a keyless entry system is a manageable DIY project. This guide walks you through the process, offering clear steps, practical tips, and essential tools to get the job done. By the end, you’ll have a fully functional keyless entry system, boosting your car’s functionality and your peace of mind.
Keyless entry, also known as remote central locking, allows you to lock or unlock your car doors using a remote fob. Some systems even include features like trunk release or panic buttons. Installing one yourself saves money compared to professional installation, which can cost hundreds. Plus, you gain the satisfaction of upgrading your vehicle with your own hands. Ready to dive in? Let’s explore how to install a keyless entry system on your car.
Contents
Why Install a Keyless Entry System?
Before jumping into the steps, consider why a keyless entry system is worth your time. First, it enhances convenience. No more struggling with keys when your hands are full. Second, it improves security. Many systems include rolling codes, making it harder for thieves to intercept signals. Third, it adds value to your car. A modern keyless system can make an older vehicle feel fresh, potentially increasing its resale value.
Keyless entry also offers peace of mind. Imagine locking your car from across the parking lot, knowing it’s secure. Some systems integrate with alarms, adding an extra layer of protection. With these benefits in mind, let’s gather the tools and materials you’ll need.
Tools and Materials Needed
Preparation is key to a smooth installation. Gather these tools and materials before starting:
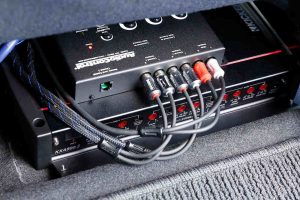
- Keyless entry system kit: Choose a reliable brand like Viper, Avital, or Python. Ensure it’s compatible with your car’s make and model.
- Screwdrivers: Both Phillips and flathead for removing panels and screws.
- Wire strippers and crimpers: For preparing and connecting wires.
- Electrical tape: To insulate connections and prevent shorts.
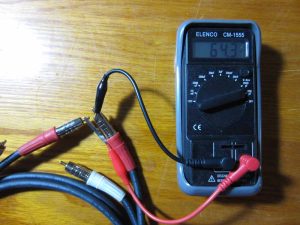
- Multimeter: To test electrical connections and ensure proper voltage.
- Drill and bits: For mounting components if needed.
- Zip ties: To organize and secure wiring.
- Socket wrench set: For removing bolts or brackets.
- Panel removal tool: To safely pry off interior panels without damage.
- Owner’s manual: For reference on your car’s wiring and door lock system.
- Safety gloves and goggles: To protect yourself during installation.
Check your keyless entry kit for additional requirements, like specific connectors or fuses. Double-check that your car’s power door locks are functional, as most kits rely on existing lock actuators. If your car lacks power locks, you may need to install actuators, which adds complexity but is still doable.
Step-by-Step Guide to Installing Keyless Entry
Follow these steps to install your keyless entry system. Take your time, and don’t rush—precision ensures a reliable setup.
Step 1: Read the Manual and Plan Your Approach
Start by reading the keyless entry system’s manual thoroughly. Each kit has unique wiring diagrams and instructions. Cross-reference these with your car’s owner’s manual to understand its electrical system. Identify where you’ll mount the control module, typically under the dashboard or in the driver’s side footwell. Plan your wiring routes to keep them hidden and protected from moving parts.
Next, disconnect your car’s battery. This prevents electrical shocks and protects your vehicle’s electronics. Use a socket wrench to loosen the negative terminal and set it aside. Safety comes first, so double-check that the battery is fully disconnected before proceeding.
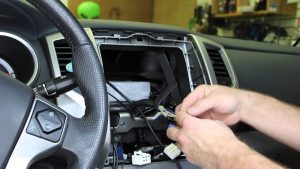
Step 2: Remove Interior Panels
Access your car’s wiring by removing interior panels. Use a panel removal tool to gently pry off the driver’s side door panel and dashboard trim. Work carefully to avoid breaking clips or scratching surfaces. Place screws and clips in a labeled container to keep track of them.
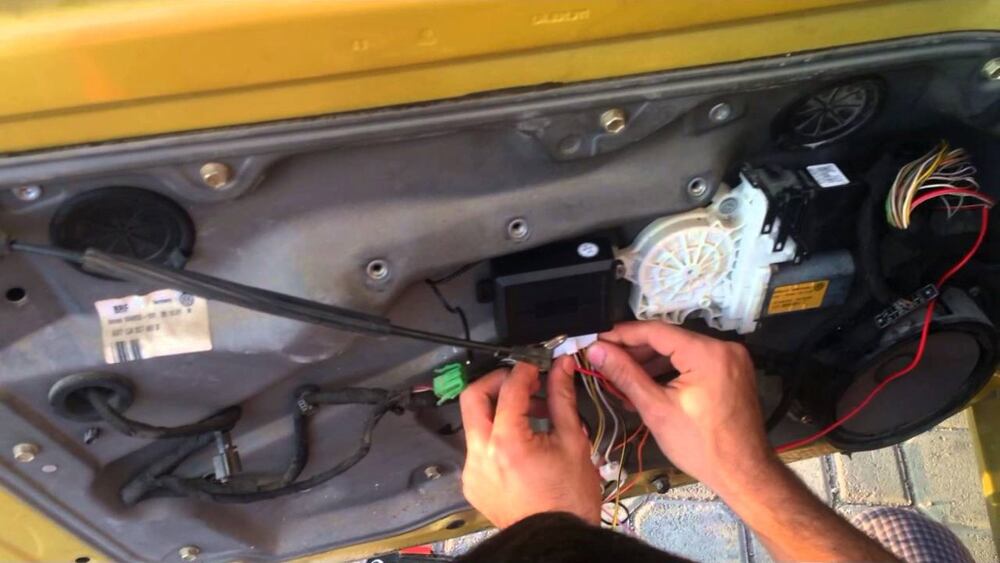
If your kit requires access to the door lock actuators, remove the door’s inner panel. These actuators are small motors that control the locking mechanism. Locate them near the lock assembly, usually attached to a rod or cable. Take photos of the setup for reference when reassembling.
Step 3: Mount the Control Module
Find a secure spot for the control module, away from heat sources or moving parts. Under the dashboard is ideal, as it’s accessible yet hidden. Use the provided mounting hardware or double-sided tape to secure the module. Ensure it’s stable and won’t rattle while driving.
Route the module’s antenna to an open area, like near the windshield, for better signal reception. Avoid tucking it behind metal, as this can weaken the remote’s range. Use zip ties to keep wires neat and prevent them from interfering with pedals or other components.
Step 4: Connect the Wiring
Now comes the critical part: wiring the system. Your kit’s manual will include a wiring diagram. Follow it closely, matching each wire to its corresponding connection. Here’s a general breakdown:
- Power wire: Connects to a constant 12V source, like the battery or fuse box.
- Ground wire: Attaches to a metal part of the car’s chassis for a solid ground.
- Lock/unlock wires: Tie into the door lock actuators. Use a multimeter to identify the correct wires in your car’s harness.
- Accessory wires: May connect to features like trunk release or parking lights, if supported.
Strip each wire carefully, exposing about ¼ inch of copper. Use crimp connectors or solder for secure connections, then wrap them with electrical tape to prevent shorts. Test each connection with a multimeter to confirm proper voltage and continuity.
If your car lacks power locks, install actuators from your kit. Mount them inside the door, connecting them to the lock rod. This requires drilling holes and securing the actuator with screws, so measure twice to avoid mistakes.
Step 5: Test the System
Reconnect the car’s battery and test the keyless entry system before reassembling. Press the lock and unlock buttons on the remote. Listen for the actuators to engage and watch the locks move. If the system includes features like trunk release, test those too.
If the system doesn’t work, double-check your connections. Loose wires or incorrect wiring are common culprits. Use the multimeter to verify power and ground connections. Consult the kit’s troubleshooting guide for specific issues, like weak signal range or unresponsive remotes.
Step 6: Reassemble and Finalize
Once the system works perfectly, reassemble your car. Reattach door panels, dashboard trim, and any removed components. Ensure all clips and screws are secure to prevent rattles. Tuck wires away using zip ties, keeping them clear of moving parts like pedals or the steering column.
Program any additional remotes according to the kit’s instructions. Some systems require pressing a sequence of buttons or entering a code. Test all remotes to confirm they work from a reasonable distance, typically 50–100 feet.
Step 7: Enjoy Your Keyless Entry
With everything installed, take a moment to appreciate your work. Lock and unlock your car with the remote, marveling at the convenience. Store the manual and any spare parts in a safe place for future reference. If your system includes a panic button or alarm, test these features in a safe environment to understand how they work.
Tips for a Successful Installation
To ensure your keyless entry system performs reliably, keep these tips in mind:
- Choose a quality kit: Invest in a reputable brand with good reviews. Cheap kits may fail quickly or lack clear instructions.
- Work in a clean space: A garage or shaded driveway keeps tools organized and protects your car from the elements.
- Take breaks: If you feel frustrated, step away for a few minutes. Rushing leads to mistakes.
- Label wires: Use masking tape to mark wires during installation, making it easier to troubleshoot later.
- Check compatibility: Confirm the kit matches your car’s lock system to avoid extra work, like installing actuators.
- Test thoroughly: Verify all features before reassembling to catch issues early.
Common Challenges and Solutions
Even with careful planning, you might hit snags. Here are common issues and how to fix them:
- Remote doesn’t work: Check the remote’s battery and reprogram it. Ensure the antenna is properly positioned.
- Locks don’t engage: Verify actuator connections and test for power with a multimeter. You may have wired the lock/unlock signals incorrectly.
- Weak signal range: Relocate the antenna to a less obstructed area, away from metal surfaces.
- Electrical issues: Double-check the ground connection. A poor ground can cause erratic behavior.
If problems persist, consult online forums or YouTube tutorials for your specific kit or car model. Many DIYers share detailed fixes for common issues.
Maintaining Your Keyless Entry System
To keep your system running smoothly, perform regular maintenance. Replace remote batteries every 1–2 years, or sooner if the signal weakens. Inspect wiring annually for wear or loose connections, especially in harsh climates. Clean the remote fob to prevent button malfunctions, using a damp cloth and mild soap.
If you upgrade your car’s security later, like adding an alarm or GPS tracker, ensure the keyless system integrates seamlessly. Some kits allow you to expand features, so check the manual for compatibility.
Cost of Installing Keyless Entry
A quality keyless entry kit costs $50–$150, depending on features like alarm integration or trunk release. Professional installation can run $200–$500, making DIY a budget-friendly choice. If your car needs actuators, budget an extra $20–$50 per door. Factor in tools if you don’t already own them, though many are common for automotive projects.
By doing it yourself, you save significantly while gaining valuable skills. The investment pays off every time you unlock your car with ease.
Is Keyless Entry Right for Your Car?
Keyless entry suits most vehicles, from classic cars to modern SUVs. Older models without power locks require more work, but the upgrade is transformative. If you frequently carry groceries, kids, or gear, the convenience is a game-changer. Even if you plan to sell your car soon, keyless entry boosts its appeal without breaking the bank.
Consider your comfort with DIY projects. If you’re handy with tools and enjoy learning, this project is rewarding. For complex vehicles, like luxury models with advanced electronics, consult a professional to avoid damaging sensitive systems.
Final Thoughts
Installing a keyless entry system transforms how you interact with your car. With a few tools, a quality kit, and patience, you can complete this upgrade in a weekend. The result? A vehicle that’s more convenient, secure, and modern—all thanks to your efforts. Follow the steps, test thoroughly, and enjoy the perks of keyless entry.
Ready to start? Grab your tools, pick a kit, and unlock a new level of automotive convenience. Your car—and your daily routine—will thank you.