Are you getting distorted sound from your car stereo system? The problem might be improper amp gain settings. Setting your amplifier gain correctly is crucial for achieving crystal-clear audio without damaging your equipment. Many car audio enthusiasts mistake the gain control for a volume knob, but it serves a completely different purpose.
This guide walks you through the entire process of setting your amp gain properly, whether you have basic tools or professional audio equipment. We’ll cover everything from understanding what gain actually does to step-by-step methods for dialing in the perfect settings for your specific setup.
Contents
- What Is Amplifier Gain?
- Why Proper Gain Setting Matters
- Tools You’ll Need for Setting Amp Gain
- Step-by-Step: Setting Amp Gain by Ear (Basic Method)
- Setting Amp Gain Using a Multimeter (Voltage Method)
- Professional Method: Using an Oscilloscope
- Setting Gain for Multi-Amp Systems
- Common Mistakes to Avoid When Setting Amp Gain
- How to Know if Your Gain Is Set Wrong
- Gain Setting for Specific Scenarios
- Fine-Tuning After Setting Gain
- Troubleshooting Common Issues After Setting Gain
- Maintaining Your Sound System After Setting Gain
- Conclusion
- Frequently Asked Questions About Setting Amp Gain
What Is Amplifier Gain?
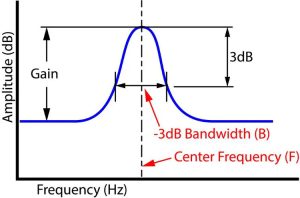
Amplifier gain controls how much the amplifier boosts the input signal from your head unit. Think of it as setting the sensitivity of your amplifier to the incoming signal. The gain isn’t meant to adjust volume—that’s what your head unit’s volume control is for.
When set correctly, gain ensures your amplifier produces the maximum clean power output without clipping or distortion. When set incorrectly, you risk:
- Distorted sound
- Premature speaker failure
- Amplifier overheating
- Reduced system lifespan
Let’s clear up a common misconception: turning up the gain doesn’t give you more power. Your amplifier has a fixed maximum power output. The gain simply matches the input sensitivity to your head unit’s output voltage.
Why Proper Gain Setting Matters
Setting your amp gain correctly creates the foundation for a great-sounding car audio system. Here’s why it’s so important:
- Clean Sound Production: Proper gain settings prevent distortion and clipping, delivering clear audio across all frequencies.
- Equipment Protection: Correct gain settings protect both your amplifier and speakers from damage caused by sending clipped signals.
- Noise Reduction: Well-adjusted gain minimizes system noise, eliminating annoying hiss or buzz from your speakers.
- Optimal Power Use: The right settings ensure your amplifier operates efficiently within its designed power range.
Tools You’ll Need for Setting Amp Gain
You can set your amp gain using several methods, ranging from basic (no tools) to professional. The tools you might need include:
- For basic method: Your ears and music you’re familiar with
- For voltage method: Digital multimeter (DMM)
- For professional method: Oscilloscope or distortion detector
- General tools: Small screwdriver for adjusting gain knobs
Optional but helpful tools include:
- Test tone CD or audio files (40Hz for subwoofers, 1kHz for full-range speakers)
- SPL meter for reference levels
Step-by-Step: Setting Amp Gain by Ear (Basic Method)
If you don’t have measuring equipment, you can still get decent results using just your ears:
- Start with minimum settings:
- Turn the gain control on your amp all the way down
- Set all EQ settings to flat or neutral
- Disable any bass boost features
- Prepare your head unit:
- Set the volume to about 75% of maximum
- Choose music you know well with a good mix of frequencies
- Adjust the gain gradually:
- Slowly turn up the gain until you hear distortion
- When you notice the sound becoming harsh or fuzzy, back off until the distortion disappears
- Reduce the gain slightly more for a safety margin
- Fine-tune across different songs:
- Test with various music styles
- Pay attention to bass-heavy sections that might reveal distortion
While this method isn’t precise, it’s better than random settings and can work well for casual listeners.
Setting Amp Gain Using a Multimeter (Voltage Method)
This method is more accurate and recommended for most installations:
- Calculate your target voltage using this formula: Target Voltage = √(RMS Power × Speaker Impedance) For example, if you have a 500-watt RMS amp connected to a 4-ohm subwoofer: Target Voltage = √(500 × 4) = √2000 = 44.7 volts
- Prepare your system:
- Disconnect speakers from the amplifier (connect the multimeter directly to the amp outputs)
- Set all EQ settings to flat
- Turn off all sound enhancement features
- Have a 0dB test tone ready (40Hz for subs, 1kHz for speakers)
- Connect your multimeter:
- Set the multimeter to measure AC voltage
- Connect the leads to the speaker outputs on your amplifier
- Play the test tone and measure:
- Set head unit volume to about 75% of maximum
- Play the test tone
- Slowly turn up the gain while watching the multimeter
- Stop when you reach your calculated target voltage
- Secure the settings:
- Once you’ve reached the target voltage, the gain is properly set
- Mark the position with a marker or take a photo for reference
This method ensures your amplifier delivers its rated power without clipping.
Professional Method: Using an Oscilloscope
For audiophiles seeking perfection, an oscilloscope provides the most precise way to set gain:
- Connect the oscilloscope to your amplifier’s speaker outputs
- Play a test tone (typically 40Hz for subwoofers or 1kHz for full-range)
- Observe the waveform:
- A perfect sine wave indicates clean output
- Flattened peaks indicate clipping/distortion
- Adjust the gain until you see the waveform just starting to clip, then back off slightly
An oscilloscope shows exactly what’s happening with your signal, making it the gold standard for setting gain.
Setting Gain for Multi-Amp Systems
If you have multiple amplifiers (like separate amps for subwoofers and component speakers), you’ll need to balance them:
- Set each amplifier individually using one of the methods above
- Level matching:
- Play music with a balanced mix of frequencies
- Adjust the gains of each amplifier relative to each other until you achieve the desired sound balance
- The subwoofer amp might need slightly higher gain than calculated to match the perception of bass
- Use the head unit’s fader and balance for fine adjustments between channels
Getting the crossover points right between amplifiers is just as important as setting the gains properly.
Common Mistakes to Avoid When Setting Amp Gain
Many car audio problems stem from these gain-setting errors:
- Using gain as a volume control: The gain is not for adjusting volume. Set it once correctly and use your head unit for volume changes.
- Setting gain with the bass boost on: Always set gain with all sound enhancements off, then add bass boost afterward if needed (and readjust gain).
- Using compressed music for setup: MP3s and streaming music are often compressed. Use uncompressed music or test tones for accurate setup.
- Setting and forgetting: Environmental factors and component aging can affect your system. Check your gain settings yearly.
- Cranking it up because it sounds “weak”: If your system sounds underpowered after proper gain setting, you need more powerful components, not higher gain.
How to Know if Your Gain Is Set Wrong
Your system will tell you if your gain needs adjustment. Watch for these signs:
- Distorted sound at higher volumes
- Amplifier overheating
- Protection mode triggering
- Speakers producing “mechanical” noises
- Hissing or buzzing noises
- Speakers blowing frequently
If you notice any of these issues, it’s time to revisit your gain settings.
Gain Setting for Specific Scenarios
Different setups might require special consideration:
Setting Gain for Subwoofers
Subwoofers handle the most power in your system and are most prone to showing gain-setting errors:
- Use a 40Hz test tone for setup
- Consider setting the gain slightly below maximum clean power to give your subwoofer headroom
- If using a bass boost feature, set it before finalizing gain settings
Setting Gain for SQ (Sound Quality) Builds
For audiophile-grade systems focused on sound quality:
- Use the voltage method at minimum
- Consider investing in an oscilloscope for perfect settings
- Set gains slightly lower than maximum for cleaner sound
- Pay attention to phase alignment between components
Setting Gain for SPL (Sound Pressure Level) Competition
For maximum volume in competitions:
- You might set gains slightly higher, accepting some distortion for maximum output
- Consider using a clipping indicator to find the absolute limit
- Remember that competition settings aren’t ideal for daily listening
Fine-Tuning After Setting Gain
Once your gains are set properly, these additional adjustments will optimize your system:
- Time alignment: If your head unit offers this feature, use it to ensure sound from all speakers reaches your ears simultaneously
- EQ adjustment: Now you can safely use the equalizer to fine-tune frequency response
- Bass boost: If you want more bass, you can now engage bass boost features, but be conservative
- Crossover settings: Set high-pass and low-pass filters to direct the right frequencies to the right speakers
Remember that major changes to these settings might require you to check your gain settings again.
Troubleshooting Common Issues After Setting Gain
Even with careful setup, you might encounter some issues:
Problem: Still Getting Distortion at High Volumes
Solution: Your head unit might be clipping before reaching the volume level you used for setup. Try setting gain with the head unit at a slightly lower volume.
Problem: System Sounds Weak or Underpowered
Solution: Your expectations might exceed your equipment’s capabilities. Consider upgrading amplifiers or speakers rather than compensating with improper gain.
Problem: Alternator Whine or Noise
Solution: This usually indicates a grounding issue, not a gain problem. Check all ground connections and consider a ground loop isolator.
Problem: Amplifier Goes into Protection Mode
Solution: Lower your gain setting further. Your amp might be working too hard and overheating, or you might have an impedance mismatch.
Maintaining Your Sound System After Setting Gain
Once you’ve achieved optimal sound, maintain your settings with these practices:
- Mark your gain positions with a paint marker
- Take photos of your settings for reference
- Check connections periodically for corrosion or loosening
- Repeat the gain-setting process if you change any major components
- Clean your amplifier’s cooling fins to prevent overheating
Conclusion
Setting your amp gain correctly is a fundamental step for getting the best sound from your car audio system. While it might seem technical, the benefits of properly set gain are immediately noticeable: cleaner sound, protected equipment, and optimal performance.
Whether you use the basic ear method, a multimeter, or professional equipment, taking the time to set your gain properly will reward you with better sound quality and longer-lasting components. Your car audio system represents a significant investment—protect it with proper setup.
Remember that gain setting isn’t a one-time task. As your system components age or if you make changes to your setup, revisiting your gain settings ensures continued optimal performance. Your ears will thank you, and so will your equipment.
Frequently Asked Questions About Setting Amp Gain
Q: Should I set the gain with the bass boost on or off?
A: Always set the gain with bass boost OFF. After setting gain properly, you can engage bass boost if desired, but you might need to reduce the gain afterward.
Q: How often should I check my amp gain settings?
A: Check your settings annually or whenever you change components in your system (head unit, speakers, etc.).
Q: If I set my gain correctly, why do I still need a subsonic filter?
A: Gain setting and subsonic filters serve different purposes. The subsonic filter blocks ultra-low frequencies that your system can’t reproduce but that still consume power and can cause damage.
Q: What’s better for setting gain: music or test tones?
A: Test tones provide more consistent and accurate results, but familiar, uncompressed music works well for fine-tuning after the initial setup.
Q: Does setting the gain affect my amplifier’s power output?
A: No, your amplifier’s maximum power output is fixed. The gain simply determines at what input level the amplifier reaches its maximum output.