Testing a subwoofer without an amplifier might sound tricky, but it’s entirely possible with the right tools and techniques. Whether you’re troubleshooting a car audio system, checking a used subwoofer before buying, or simply curious about your sub’s condition, this guide walks you through practical methods to test a subwoofer without an amp. By following these steps, you’ll confirm whether your subwoofer works and avoid unnecessary repairs or purchases. Let’s dive into the process, explore why testing matters, and cover everything you need to know to get clear, reliable results.
Contents
- Why Test a Subwoofer Without an Amplifier?
- Tools You’ll Need to Test a Subwoofer
- Step 1: Inspect the Subwoofer Physically
- Step 2: Test the Subwoofer with a Multimeter
- Step 3: Perform the 9V Battery Test
- Step 4: Test with a Smartphone or Audio Source
- Step 5: Check Wiring and Connections
- Troubleshooting Common Subwoofer Problems
- Tips for Accurate Testing
- When to Use an Amplifier for Testing
- Benefits of Testing a Subwoofer Without an Amp
- Common Mistakes to Avoid
- How to Maintain Your Subwoofer
- When to Seek Professional Help
- Choosing a Replacement Subwoofer
- Testing Subwoofers Before Buying Used
- FAQs About Testing a Subwoofer Without an Amplifier
- Conclusion
Why Test a Subwoofer Without an Amplifier?
Subwoofers deliver the deep, booming bass that brings music and movies to life. However, issues like blown coils, damaged cones, or faulty wiring can render them useless. Testing without an amplifier saves time and money, especially if you don’t have an amp handy or want to avoid connecting a potentially defective sub to your system. This approach also helps when buying secondhand subwoofers, ensuring you don’t end up with a dud. Plus, it’s a great way to diagnose problems before investing in professional repairs or replacements.
Testing a subwoofer without an amp involves checking its physical condition, electrical integrity, and sound output. You’ll use simple tools like a multimeter, a 9V battery, or even a smartphone to get the job done. Each method offers unique insights into the subwoofer’s health, so let’s break them down step by step.
Tools You’ll Need to Test a Subwoofer
Before starting, gather these tools to make testing smooth and effective:
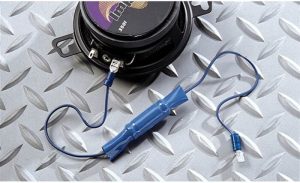
- Multimeter: Measures resistance and continuity to check the subwoofer’s voice coil.
- 9V Battery: Creates a small electrical charge to test cone movement.
- Speaker Wire or Test Leads: Connects the battery or multimeter to the subwoofer terminals.
- Smartphone or Audio Source: Plays low-frequency tones to test sound output (optional).
- Screwdriver or Allen Wrench: Removes the subwoofer from its enclosure if needed.
- Low-Frequency Test Tone (20-50 Hz): Available online or through apps for audio testing.
Having these tools ready ensures you can perform multiple tests to confirm the subwoofer’s condition. If you don’t own a multimeter, consider borrowing one or buying an affordable model—they’re invaluable for car audio troubleshooting.
Step 1: Inspect the Subwoofer Physically
Start with a visual and tactile inspection. A damaged subwoofer often shows obvious signs of wear or failure. Here’s what to look for:
- Cone Damage: Check the cone (the large, circular part that moves) for tears, cracks, or dents. Even small tears can distort sound or cause rattling.
- Surround Condition: The rubber or foam ring around the cone, called the surround, should be intact and flexible. Brittle or torn surrounds reduce performance.
- Dust Cap: Ensure the dust cap (the center of the cone) isn’t dented or detached.
- Spider and Voice Coil: If accessible, inspect the spider (the flexible material beneath the cone) for tears. The voice coil, located behind the cone, shouldn’t show signs of burning or melting.
Gently press the cone with both hands to feel for smooth movement. Grinding, scraping, or sticking suggests a damaged voice coil or debris in the gap. A healthy subwoofer cone moves freely without unusual noises. This quick check helps identify physical issues before moving to electrical tests.
Step 2: Test the Subwoofer with a Multimeter
A multimeter is your best friend for testing a subwoofer’s electrical health. It measures the voice coil’s resistance (impedance) and checks for continuity. Follow these steps:
- Set Up the Multimeter: Turn the multimeter to the resistance (ohms, Ω) setting, typically 200 ohms for subwoofers.
- Disconnect the Subwoofer: Remove any wires connected to the subwoofer’s positive and negative terminals to avoid interference.
- Measure Resistance: Touch the multimeter’s red probe to the positive terminal and the black probe to the negative terminal. Note the reading.
- Interpret the Results:
- A reading close to the subwoofer’s rated impedance (e.g., 4 ohms or 8 ohms) indicates a healthy voice coil.
- A reading of 0 ohms or a fluctuating number suggests a shorted coil.
- An “infinite” or no reading means an open circuit, indicating a broken coil or disconnected wire.
For dual voice coil (DVC) subwoofers, test each coil separately by connecting the probes to the respective positive and negative terminals. If one coil reads correctly but the other doesn’t, the subwoofer may still function but at reduced capacity. This test confirms whether the subwoofer’s electrical components are intact.
Step 3: Perform the 9V Battery Test
The 9V battery test is a simple, effective way to check if the subwoofer’s cone moves properly. Here’s how to do it:
- Prepare the Battery and Wires: Grab a 9V battery and two short pieces of speaker wire or test leads.
- Connect the Wires: Attach one wire to the battery’s positive terminal and another to the negative terminal.
- Touch the Terminals: Briefly touch the free end of the positive wire to the subwoofer’s positive terminal and the negative wire to the negative terminal.
- Observe Cone Movement: The cone should move inward or outward with a slight “pop” sound. Reverse the connections to see the cone move in the opposite direction.
If the cone doesn’t move or makes a scratchy noise, the voice coil may be damaged or stuck. Be cautious—don’t hold the connection for more than a second to avoid damaging the coil. This test verifies that the subwoofer’s mechanical components respond to an electrical signal.
Step 4: Test with a Smartphone or Audio Source
If you want to hear the subwoofer in action, use a smartphone or another low-power audio source to play test tones. This method doesn’t replicate an amplifier’s power but can reveal basic functionality. Here’s the process:
- Find a Low-Frequency Test Tone: Download a 20-50 Hz test tone from a website or use an app like “Tone Generator” or “Frequency Sound Generator.”
- Connect the Subwoofer: Use speaker wire to connect the subwoofer’s terminals to the headphone jack of your smartphone or audio device. You may need a 3.5mm-to-RCA adapter or similar connector.
- Play the Tone: Set the volume to a low level and play the test tone. Listen for clear, deep bass without distortion or rattling.
- Check for Issues: If the subwoofer produces weak sound, crackling, or no sound at all, it may have a damaged coil, cone, or internal connection.
This test mimics real-world use, letting you assess the subwoofer’s sound quality. Keep the volume low to prevent overloading the subwoofer or damaging your audio device.
Step 5: Check Wiring and Connections
Faulty wiring can make a good subwoofer seem broken. Inspect all connections for these common issues:
- Loose Terminals: Ensure the subwoofer’s terminals are secure and not corroded.
- Damaged Wires: Look for frayed or broken speaker wires leading to the subwoofer.
- Enclosure Issues: If the subwoofer is in a box, check for loose screws or air leaks that could affect sound quality.
For car audio systems, trace the wiring from the subwoofer to the amp (if present) to confirm everything is intact. Tighten or replace any questionable connections before retesting.
Troubleshooting Common Subwoofer Problems
If your tests reveal issues, here’s how to address common problems:
- No Cone Movement: A lack of movement during the battery test or multimeter reading of infinite ohms suggests a blown voice coil. Replacement or professional repair is often necessary.
- Distorted Sound: Crackling or buzzing during the audio test points to a torn cone, damaged surround, or debris in the voice coil gap. Inspect and repair or replace the subwoofer.
- Weak Bass: If the subwoofer plays but lacks power, check for a partially blown coil or improper wiring. For DVC subwoofers, one coil may be functional while the other is damaged.
- Rattling Noises: Loose enclosure parts, a damaged spider, or debris can cause rattling. Tighten screws or clean the subwoofer to resolve this.
Understanding these issues helps you decide whether to repair, replace, or seek professional help.
Tips for Accurate Testing
To ensure reliable results, keep these tips in mind:
- Test in a Quiet Environment: Background noise can mask subtle sounds or distortions.
- Use Proper Tools: A low-quality multimeter or weak battery may give inaccurate readings.
- Double-Check Connections: Loose or incorrect wiring can skew test results.
- Test Multiple Times: Run each test twice to confirm findings, especially if results seem unusual.
These practices increase your confidence in the subwoofer’s condition and prevent misdiagnosis.
When to Use an Amplifier for Testing
While this guide focuses on testing without an amp, connecting the subwoofer to an amplifier provides the most accurate assessment of its performance. If you have access to an amp after initial tests, hook it up to confirm the subwoofer’s sound quality under normal conditions. Ensure the amp’s settings (gain, crossover, etc.) match the subwoofer’s specifications to avoid damage.
Benefits of Testing a Subwoofer Without an Amp
Testing without an amplifier offers several advantages:
- Cost-Effective: No need to buy or borrow an amp for diagnostics.
- Quick Results: Simple tools like a multimeter or battery deliver fast answers.
- Safe Troubleshooting: Avoid risking your amplifier by connecting it to a faulty subwoofer.
- Portability: Test anywhere without lugging around heavy audio equipment.
These benefits make non-amp testing ideal for DIY enthusiasts, car audio hobbyists, and anyone on a budget.
Common Mistakes to Avoid
Steer clear of these pitfalls to protect your subwoofer and get accurate results:
- Overloading with the Battery Test: Holding the 9V battery connection too long can burn out the voice coil.
- Ignoring Physical Damage: A subwoofer with a torn cone or surround won’t perform well, even if the coil is intact.
- Using High Volume with a Smartphone: Excessive volume from an audio source can damage both the subwoofer and the device.
- Misreading Multimeter Results: Ensure the multimeter is set to the correct range to avoid false readings.
By avoiding these errors, you’ll test efficiently and keep your equipment safe.
How to Maintain Your Subwoofer
Once you’ve confirmed your subwoofer works, maintain it to extend its lifespan:
- Keep It Clean: Dust and debris can accumulate on the cone or in the voice coil gap. Use a soft brush or compressed air to clean it.
- Avoid Overpowering: Match the subwoofer to an amplifier with compatible power ratings to prevent damage.
- Check Enclosures Regularly: Ensure the subwoofer box is sealed or ported correctly for optimal sound.
- Store Properly: If not in use, store the subwoofer in a dry, cool place to prevent surround degradation.
Regular maintenance reduces the need for frequent testing and keeps your bass sounding crisp.
When to Seek Professional Help
If your subwoofer fails multiple tests or shows complex issues like a burnt voice coil or damaged spider, consider professional repair. Car audio shops and speaker repair services can re-cone subwoofers, replace voice coils, or diagnose intricate problems. For high-end subwoofers, repair often costs less than replacement. However, if the subwoofer is inexpensive or severely damaged, buying a new one might be more practical.
Choosing a Replacement Subwoofer
If testing reveals your subwoofer is beyond repair, selecting a replacement involves a few key factors:
- Impedance (Ohms): Match the new subwoofer’s impedance to your amplifier for compatibility.
- Power Handling (RMS): Choose a subwoofer with an RMS rating that aligns with your amp’s output.
- Size: Ensure the subwoofer fits your enclosure or vehicle space.
- Brand and Quality: Opt for reputable brands known for durability and sound quality.
Researching these specs ensures your new subwoofer performs well and integrates seamlessly with your audio system.
Testing Subwoofers Before Buying Used
When buying a used subwo0303woofer, always test it first. Use the multimeter, battery, and audio source methods to verify its condition. Ask the seller to demonstrate the subwoofer with an amplifier if possible. Check for physical damage and listen for distortions. Testing upfront prevents you from wasting money on a faulty unit.
FAQs About Testing a Subwoofer Without an Amplifier
Can I test a subwoofer with a regular battery?
A 9V battery works best for the cone movement test. Other batteries, like AA or AAA, may not provide enough voltage to move the cone effectively.
What does a blown subwoofer sound like?
A blown subwoofer may produce no sound, distorted bass, crackling, or rattling noises due to a damaged voice coil or cone.
Can I use a laptop to test a subwoofer?
Yes, a laptop with a headphone jack can play low-frequency test tones, similar to a smartphone. Use caution to avoid high volumes.
How do I know if my subwoofer is dual voice coil?
Check for two sets of positive and negative terminals. Test each pair with a multimeter to confirm separate voice coils.
Is it safe to test a subwoofer with a 9V battery?
Yes, if done briefly (1-2 seconds). Prolonged connection can damage the voice coil.
Conclusion
Testing a subwoofer without an amplifier is straightforward and empowering. By using a multimeter, 9V battery, or smartphone, you can diagnose issues, verify functionality, and make informed decisions about repairs or replacements. These methods save time, protect your audio system, and ensure you get the booming bass you love. Regular testing and maintenance keep your subwoofer performing at its best, whether in a car, home theater, or portable setup. Grab your tools, follow these steps, and take control of your audio experience today.