Are you looking to upgrade your car’s audio system but don’t have the factory harness? Don’t worry! Wiring a car stereo without a harness is completely doable with some basic knowledge and the right tools. This comprehensive guide will walk you through the entire process step by step, helping you avoid costly professional installation fees while achieving great results.
Contents
Why You Might Need to Wire Without a Harness
There are several reasons why you might find yourself wiring a car stereo without the factory harness:
- You’re installing an aftermarket stereo in an older vehicle
- The original harness is damaged or missing
- Your car uses a non-standard connection system
- You’re working with a budget installation
- You prefer a custom wiring solution
Whatever your reason, this guide will help you complete the job safely and effectively.
Essential Tools and Materials
Before starting your wiring project, gather these important items:
- Wire strippers/cutters
- Electrical tape or heat shrink tubing
- Soldering iron and solder (recommended for best connections)
- Crimp connectors (if not soldering)
- Digital multimeter
- Screwdrivers (Phillips and flathead)
- Panel removal tools
- Wire diagram for your specific vehicle
- 12V test light
- Electrical connector clips
Understanding Car Stereo Wiring Colors
Car stereo wiring follows a standard color code system, which makes identifying the right wires much easier. Here’s a breakdown of the typical color codes:
Power Wires:
- Yellow: Constant 12V power (always on)
- Red: Switched 12V power (on with ignition)
- Black: Ground connection
Speaker Wires:
- White: Left front speaker (+)
- White/Black stripe: Left front speaker (-)
- Gray: Right front speaker (+)
- Gray/Black stripe: Right front speaker (-)
- Green: Left rear speaker (+)
- Green/Black stripe: Left rear speaker (-)
- Purple: Right rear speaker (+)
- Purple/Black stripe: Right rear speaker (-)
Other Common Wires:
- Blue: Power antenna or amplifier remote turn-on
- Orange: Illumination (dims with headlights)
- Brown: Mute wire (when phone calls come in)
Keep in mind that while these colors are standard for aftermarket stereos, your vehicle’s factory wiring might use different colors. That’s why having your vehicle’s specific wiring diagram is so valuable.
Step-by-Step Wiring Process
Step 1: Disconnect the Battery
Safety first! Always disconnect the negative terminal of your car battery before starting any electrical work. This prevents shorts, sparks, and potential damage to your car’s electrical system or the new stereo.
- Locate your car battery (usually under the hood)
- Use a wrench to loosen the negative terminal (marked with a “-” symbol)
- Pull the cable away from the terminal and secure it to prevent accidental reconnection
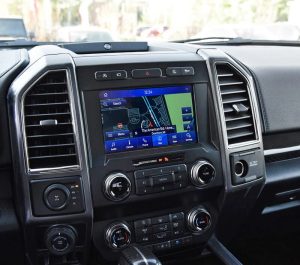
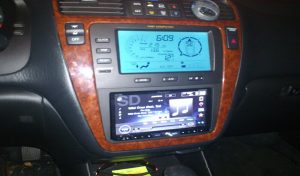
Step 2: Remove the Factory Stereo
Next, you’ll need to remove the existing stereo unit:
- Use panel removal tools to carefully pry off the trim panels around the stereo
- Remove any screws securing the stereo in place
- Slide the stereo out from the dash (most units either slide out or are held in by spring clips)
- Disconnect any cables attached to the back of the factory unit
Step 3: Identify the Vehicle’s Wiring
This is where the real work begins:
- Examine the wires coming from your vehicle’s dash
- If there’s an existing connector plug, you’ll need to cut it off to access the individual wires
- Strip about 1/2 inch of insulation from each wire end
- Use your vehicle’s wiring diagram to identify each wire’s function
- If you don’t have a diagram, use a multimeter or test light to identify power wires
Step 4: Test and Identify Wires
If you don’t have a wiring diagram, here’s how to identify key wires:
For Power Wires:
- Reconnect the car battery temporarily
- Turn the car to accessory position (without starting engine)
- Use your multimeter set to DC volts (typically 20V scale)
- Touch the black probe to a metal part of the car (ground)
- Touch the red probe to each wire
- Constant power wire (yellow) will show 12V all the time
- Switched power wire (red) will show 12V only when ignition is on
- Disconnect the battery again after testing
For Speaker Wires:
- Use a 9V battery and test light or multimeter
- Connect one end of the battery to one wire
- Touch the other battery terminal to another wire
- If the speakers make a popping sound, you’ve found a pair
- Label each wire to remember which is which
Step 5: Prepare the New Stereo Wires
Now prepare the wires on your new aftermarket stereo:
- Remove about 1/2 inch of insulation from each wire
- Group wires by function (power, ground, speakers, etc.)
- If your new stereo came with a wiring harness adapter, you can simply match colors
Step 6: Connect the Wires
There are two main methods for connecting stereo wires:
Method 1: Soldering (Recommended)
- Twist each matching wire pair together (car wire to stereo wire)
- Heat the connection with a soldering iron
- Apply solder until it flows through the connection
- Let cool completely
- Cover with heat shrink tubing or electrical tape
Method 2: Crimp Connectors
- Insert matched wire pairs into appropriate crimp connectors
- Use crimping tool to securely fasten the connector
- Pull gently on each connection to ensure it’s secure
- Cover with electrical tape for extra protection
Step 7: Connect Ground Wire Properly
The ground connection is crucial for proper stereo operation:
- Find a clean metal surface behind the dash
- Scrape away any paint or coatings to expose bare metal
- Connect the black ground wire using a ring terminal and screw
- Ensure the connection is tight and secure
Step 8: Test Before Final Installation
Before fully installing the stereo in the dash:
- Reconnect the car battery
- Turn on the ignition to test if the stereo powers up
- Test each speaker by playing audio
- Check all other functions (USB, Bluetooth, etc.)
- If something doesn’t work, recheck your wiring connections
Step 9: Secure and Finalize the Installation
Once everything tests properly:
- Bundle the wires neatly using zip ties
- Wrap exposed connections with electrical tape
- Secure any loose wires to prevent rattling
- Slide the stereo into the mounting bracket or dash opening
- Replace any screws and trim panels
Troubleshooting Common Wiring Issues
Even with careful installation, you might encounter some problems. Here are solutions for common issues:
No Power to the Stereo
- Check the fuse in the car’s fuse box
- Verify that the constant and switched power wires are connected correctly
- Test for voltage at the power wire connections
- Ensure the ground wire has a solid connection
Stereo Works But No Sound
- Check speaker wire connections
- Verify that the balance and fade controls aren’t set to one side
- Make sure the mute function isn’t activated
- Check if external amplifiers (if any) are powered on
Radio Reception Issues
- Check the antenna connection
- Ensure the antenna power wire is connected (if applicable)
- Test the antenna with a different radio if possible
Display Lights But No Function
- Check that the correct constant and switched power wires are connected
- Verify that the stereo’s reset button hasn’t been pressed
- Ensure compatible installation for your vehicle model
Advanced Wiring Options
For those wanting to take their installation further:
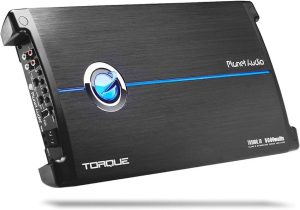
Adding an Amplifier
- Connect the blue amplifier remote wire from the stereo to the amp’s remote terminal
- Run dedicated power directly from the battery to the amplifier (with appropriate fuse)
- Use high-quality RCA cables from the stereo preouts to the amplifier inputs
- Ground the amplifier to the vehicle chassis near the installation location
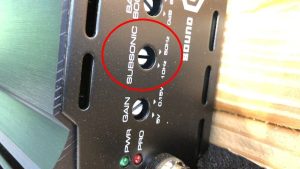
Adding a Subwoofer
- Connect to amplifier outputs using appropriate gauge speaker wire
- Follow proper polarity (+ to + and – to -)
- Mount in appropriate enclosure designed for your vehicle
- Adjust crossover settings on the amplifier or stereo
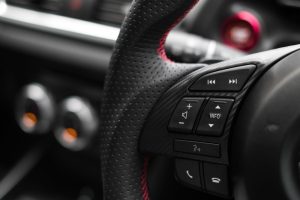
Steering Wheel Controls
- Purchase a steering wheel control adapter compatible with your vehicle
- Follow the adapter’s specific wiring instructions
- Program the adapter according to manufacturer specifications
Safety Considerations and Best Practices
Remember these important safety tips:
- Always disconnect the battery before working on car electronics
- Use proper wire gauge for all connections (typically 16-18 gauge for speakers)
- Install an inline fuse on the constant power wire (within 18 inches of the battery)
- Never use electrical tape alone for permanent connections
- Avoid running wires near moving parts or heat sources
- Secure all wires to prevent rattling or interference with driving controls
When to Consider Professional Installation
While DIY installation can save money, consider professional help if:
- Your vehicle has complex factory integration systems
- You’re installing very expensive equipment
- Your car has advanced safety features tied to the audio system
- You lack the necessary tools or experience
- You encounter problems you can’t solve
Final Thoughts
Wiring a car stereo without a harness requires patience and attention to detail, but the satisfaction of completing the job yourself makes it worthwhile. By following this guide, you can achieve professional-quality results while gaining valuable experience with automotive electronics.
Remember that every vehicle is different, so always consult resources specific to your make and model when available. Take your time with each step, double-check your connections, and soon you’ll be enjoying your new car audio system.
If you found this guide helpful, check out our other automotive DIY guides for more tips on upgrading your vehicle’s systems!