Upgrading your car’s audio system can transform your driving experience, delivering crisp highs, rich mids, and booming bass. However, integrating aftermarket amplifiers and subwoofers with a factory head unit often requires a line output converter (LOC) to bridge the gap. The AudioControl LC7i stands out as a top choice for car audio enthusiasts, thanks to its six-channel capability, AccuBASS technology, and seamless integration with factory systems. This comprehensive guide walks you through the LC7i installation process, complete with a detailed wiring diagram, practical tips, and troubleshooting advice to ensure your audio upgrade shines.
Whether you’re a seasoned installer or a DIY newbie, this step-by-step tutorial simplifies the process. By the end, you’ll have a clear understanding of how to wire the LC7i, optimize its settings, and achieve a professional-grade sound system in your vehicle. Let’s dive in and get your car audio system pumping!
Contents
- Why Choose the AudioControl LC7i?
- Tools and Materials for LC7i Installation
- Step-by-Step LC7i Installation Guide
- LC7i Wiring Diagram
- Troubleshooting Common LC7i Installation Issues
- Tips for a Professional LC7i Installation
- Benefits of Adding the LC7i to Your Car Audio System
- Frequently Asked Questions (FAQs)
- Conclusion
Why Choose the AudioControl LC7i?
The AudioControl LC7i serves as a powerful tool for upgrading factory audio systems without replacing the stock head unit. This six-channel line output converter takes high-level speaker outputs from your factory stereo and converts them into low-level RCA signals suitable for aftermarket amplifiers. Its standout features make it a favorite among car audio enthusiasts:
- Six-Channel Flexibility: The LC7i handles front, rear, and subwoofer channels, offering versatility for complex audio setups.
- AccuBASS Technology: This patented feature restores bass frequencies that factory systems often roll off at higher volumes, ensuring deep, powerful low-end performance.
- GTO Signal Sense: The LC7i automatically detects input signals and turns on, eliminating the need for a remote turn-on wire in many cases.
- AutoMode Circuitry: If your factory system lacks a dedicated subwoofer output, AutoMode routes rear channel signals to the subwoofer channel, simplifying installation.
- Adjustable Gain Controls: Fine-tune output levels for each channel to match your amplifiers and achieve balanced sound.
These features make the LC7i ideal for anyone looking to add aftermarket amplifiers, speakers, or subwoofers while retaining the factory head unit’s functionality, such as Bluetooth, navigation, or steering wheel controls. Now, let’s gather the tools and materials you’ll need for a smooth installation.
Tools and Materials for LC7i Installation
Preparation sets the stage for a successful install. Before you start, collect these tools and materials to streamline the process:
- AudioControl LC7i Line Output Converter
- Wire cutters/strippers
- Crimping tool
- Soldering iron and solder (optional for secure connections)
- Electrical tape or heat-shrink tubing
- Multimeter (for testing connections)
- Screwdriver set (Phillips and flathead)
- Panel removal tools (to access factory wiring without damage)
- Speaker wire (16-18 AWG for speaker-level inputs)
- RCA cables (for connecting to amplifiers)
- Power and ground wire (12-16 AWG for LC7i power)
- 2A inline fuse and fuse holder (for power wire)
- Wire connectors (butt connectors, T-taps, or Posi-Taps)
- Zip ties (for cable management)
- Vehicle-specific wiring diagram (available from sources like Crutchfield or Metra Online)
Having these items on hand minimizes interruptions. Double-check your vehicle’s wiring diagram to identify speaker, power, and ground locations specific to your car’s make and model. Ready? Let’s move on to the installation steps.
Step-by-Step LC7i Installation Guide
Follow these steps to install the AudioControl LC7i in your vehicle. Each step includes practical tips to ensure a clean, reliable setup.
Step 1: Plan Your Installation
Before touching any wires, map out your audio system’s layout. Decide where to mount the LC7i, ensuring it’s secure, accessible, and protected from spills or damage. Common locations include under the passenger seat, in the trunk near amplifiers, or behind the dashboard. Consider these factors:
- Accessibility: You’ll need to adjust the LC7i’s gain and AccuBASS controls, so choose a spot where you can reach the top panel.
- Ventilation: The LC7i generates minimal heat, but avoid cramped spaces to ensure longevity.
- Wiring Routes: Plan how speaker wires, RCA cables, and power lines will run to avoid interference with vehicle electronics.
Sketch a rough wiring diagram tailored to your setup, noting which factory speaker wires connect to each LC7i input channel (front, rear, subwoofer). This planning saves time and reduces errors.
Step 2: Disconnect the Battery
Safety comes first. Disconnect your vehicle’s negative battery terminal to prevent electrical shorts or damage during installation. Use a wrench to loosen the terminal and secure it away from the battery post. This step protects both you and your car’s electronics.
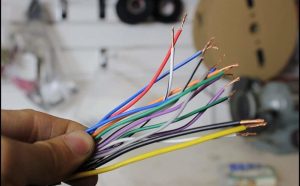
Step 3: Locate Factory Speaker Wires
Identify the speaker-level outputs from your factory head unit or amplifier. These high-level signals feed into the LC7i’s inputs. Refer to your vehicle’s wiring diagram to find the correct wires, typically located:
- Behind the Head Unit: For systems without a factory amplifier, tap into speaker wires at the back of the stock radio.
- At the Factory Amplifier: If your vehicle has a factory amp (common in premium audio systems), source speaker wires at the amp’s output. Check locations like under the dash, behind the glovebox, or in the trunk.
- At the Speakers: In some cases, tapping wires directly at the door speakers or rear deck simplifies the process.
Use a multimeter to confirm positive and negative polarity for each speaker wire. Label wires (e.g., “Front Left +,” “Rear Right -”) with tape to avoid confusion during connection.
Step 4: Connect Speaker-Level Inputs to the LC7i
The LC7i has six speaker-level input channels, organized into three pairs: Channel 1 (front), Channel 2 (rear), and Channel 3 (subwoofer). Follow these steps to connect the factory speaker wires:
- Strip the Wires: Use wire strippers to remove about 1/4 inch of insulation from the ends of your factory speaker wires and the LC7i’s input wires.
- Match Polarity: Connect the positive (+) and negative (-) speaker wires from your factory system to the corresponding LC7i input terminals. For example:
- Front left speaker (+/-) to Channel 1 left (+/-)
- Front right speaker (+/-) to Channel 1 right (+/-)
- Rear left speaker (+/-) to Channel 2 left (+/-)
- Rear right speaker (+/-) to Channel 2 right (+/-)
- Subwoofer (+/-) to Channel 3 left/right (+/-)
- Secure Connections: Use crimp connectors, solder, or Posi-Taps to join the wires. Insulate connections with electrical tape or heat-shrink tubing to prevent shorts.
- Summing Jumpers (Optional): If your factory system lacks a subwoofer output, open the LC7i’s top cover and set the internal summing jumpers to combine front and rear signals into a full-range output. Refer to the LC7i manual for jumper settings.
If your factory system only has front and rear outputs, the LC7i’s AutoMode feature automatically routes rear signals to Channel 3 for subwoofer use. This eliminates the need for manual jumper adjustments in many cases.
Step 5: Connect Power, Ground, and Remote Wires
The LC7i requires power to operate. Connect the power, ground, and remote wires as follows:
- Power (+12V): Run a 12-16 AWG wire from the LC7i’s +12V terminal to a fused power source, such as the battery or a distribution block. Install a 2A inline fuse within 18 inches of the power source to protect the circuit.
- Ground: Connect a 12-16 AWG wire from the LC7i’s ground terminal to a clean, bare metal chassis point. Scrape away paint or rust to ensure a solid connection. Avoid factory ground points with multiple devices, as they can introduce noise.
- Remote In (Optional): If your factory system doesn’t support GTO Signal Sense, connect a remote turn-on wire from the head unit or a switched 12V source to the LC7i’s Remote In terminal.
- Remote Out: The LC7i’s Remote Out terminal provides a 12V signal to turn on your aftermarket amplifiers. Connect this to the amplifiers’ remote input terminals.
Test connections with a multimeter to confirm proper voltage and continuity before proceeding.
Step 6: Connect RCA Outputs to Amplifiers
The LC7i converts speaker-level inputs into RCA preamp outputs for your amplifiers. Use high-quality RCA cables to connect the LC7i’s outputs to your amps:
- Channel 1 (Main): Connect to the front speaker amplifier or a full-range amp.
- Channel 2: Connect to the rear speaker amplifier.
- Channel 3: Connect to the subwoofer amplifier.
If using a single amplifier, you may only need the Main output. For multi-amp setups, distribute RCA cables accordingly. Secure cables with zip ties to prevent loose connections or interference.
Step 7: Mount the LC7i
Secure the LC7i in your chosen location using the provided mounting brackets or double-sided tape. Ensure it’s stable and won’t shift while driving. Keep the top panel accessible for adjustments during tuning.
Step 8: Reconnect the Battery and Test the System
Reconnect the vehicle’s negative battery terminal. Turn on the ignition and test the system:
- Power Check: Confirm the LC7i’s power LED illuminates (red).
- Signal Test: Play music through the factory head unit and verify sound from all speakers and the subwoofer.
- Polarity Check: Ensure no speakers are out of phase (muffled or weak sound). Swap positive/negative wires if needed.
If the LC7i doesn’t power on, double-check power and ground connections. If no sound outputs, verify input connections and ensure the head unit is sending a signal.
Step 9: Tune the LC7i
Optimize sound quality by adjusting the LC7i’s settings:
- Set Factory Stereo Volume: Play music and set the head unit to 3/4 of its maximum volume.
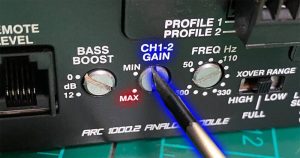
- Adjust Output Levels: Turn the LC7i’s gain knobs (under the top cover) until the “Maximized” LED flickers occasionally. This matches the LC7i’s output to your amplifiers.
- Fine-Tune AccuBASS: If bass weakens at higher volumes, adjust the AccuBASS threshold and level controls to restore low-end punch. Turn the threshold knob clockwise until bass feels balanced.
- Amplifier Gains: Adjust your amplifiers’ gain settings to prevent clipping or distortion. Use a test tone and multimeter for precise tuning.
Test the system across various music genres to ensure balanced sound. Make small adjustments to achieve clarity and depth.
Step 10: Secure Wiring and Finalize Installation
Organize and secure all wiring with zip ties and electrical tape. Tuck cables away from moving parts or sharp edges to prevent damage. Double-check connections for stability. Reinstall any removed panels or trim pieces for a clean finish.
LC7i Wiring Diagram
Below is a simplified wiring diagram to guide your LC7i installation:
Factory Head Unit/Amplifier
  ├── Front Left (+/-)  → LC7i Channel 1 Left (+/-)
  ├── Front Right (+/-) → LC7i Channel 1 Right (+/-)
  ├── Rear Left (+/-)   → LC7i Channel 2 Left (+/-)
  ├── Rear Right (+/-)  → LC7i Channel 2 Right (+/-)
  └── Subwoofer (+/-)   → LC7i Channel 3 Left/Right (+/-)

LC7i Power Connections
  ├── +12V → Battery/Distribution Block (2A Fuse)
  ├── Ground → Chassis Ground
  ├── Remote In → Head Unit/Switched 12V (Optional)
  └── Remote Out → Amplifier Remote Inputs

LC7i RCA Outputs
  ├── Channel 1 (Main) → Front Amplifier
  ├── Channel 2 → Rear Amplifier
  └── Channel 3 → Subwoofer Amplifier
This diagram assumes a typical setup. Adjust based on your vehicle’s wiring and audio configuration. For detailed schematics, consult the LC7i manual or AudioControl’s website.
Troubleshooting Common LC7i Installation Issues
Even with careful planning, issues can arise. Here are common problems and solutions:
- No Power to LC7i: Check the power wire, fuse, and ground connection. Ensure the ground point is clean and secure. Verify the Remote In wire (if used) receives 12V when the head unit is on.
- No Sound Output: Confirm speaker-level inputs are connected to the correct LC7i channels. Test input signals with a multimeter. Ensure RCA cables are securely plugged into amplifiers.
- Weak Bass: Adjust AccuBASS settings. Check subwoofer wiring polarity. If using AutoMode, verify rear speaker inputs are active.
- Noise or Hiss: Relocate the ground point to a cleaner chassis spot. Use shielded RCA cables and route them away from power wires. Check for loose connections.
- Channel Imbalance: Swap left and right inputs/outputs to isolate the issue. Verify factory speaker wires are correctly paired with LC7i inputs.
For persistent issues, contact AudioControl’s mobile audio support at 425-777-7723 or support@audiocontrolmobile.com. Their team offers expert guidance for tricky installations.
Tips for a Professional LC7i Installation
Elevate your setup with these pro tips:
- Use Quality Cables: Invest in shielded RCA cables and oxygen-free copper speaker wire to minimize signal loss and interference.
- Label Everything: Mark wires and cables during installation to simplify troubleshooting or future upgrades.
- Test Incrementally: Check connections at each step (e.g., after wiring inputs, then outputs) to catch issues early.
- Consult Vehicle Forums: Sites like CarAudio.com, DIYMobileAudio.com, or vehicle-specific forums (e.g., TacomaWorld, Mustang6G) offer wiring insights for your car’s audio system.
- Consider the ACR-1 Remote: The optional AudioControl ACR-1 wired remote lets you adjust subwoofer output from the driver’s seat, perfect for on-the-fly tuning.
Benefits of Adding the LC7i to Your Car Audio System
Integrating the LC7i unlocks several advantages:
- Enhanced Sound Quality: Clean RCA outputs ensure your amplifiers receive a strong, noise-free signal.
- Factory Integration: Retain OEM head unit features like steering wheel controls, Bluetooth, and navigation.
- Bass Restoration: AccuBASS counters factory bass roll-off, delivering consistent low-end performance.
- Scalability: Six channels support multi-amp setups, letting you expand your system over time.
- Ease of Use: GTO Signal Sense and AutoMode simplify installation, even in complex factory systems.
These benefits make the LC7i a worthwhile investment for anyone serious about car audio.
Frequently Asked Questions (FAQs)
Do I need an LC7i if my head unit has RCA outputs?
If your aftermarket head unit has preamp RCA outputs, you likely don’t need the LC7i. However, it can still enhance sound quality by providing cleaner signals and AccuBASS for subwoofer performance.
Can I install the LC7i with a factory amplifier?
Yes, tap into the factory amplifier’s speaker-level outputs to feed the LC7i. Avoid connecting between the head unit and factory amp, as this bypasses the amp’s processing.
What wire gauge should I use for the LC7i’s power?
Use 12-16 AWG for power and ground. The LC7i draws about 350mA, so a 2A fuse suffices. Avoid oversized wire (e.g., 4 AWG) to prevent connection issues.
How do I know if I need to sum channels?
If your factory system lacks a subwoofer output or has separate tweeter/midrange signals, use the LC7i’s summing jumpers to combine inputs into a full-range output. Check the manual for jumper settings.
Why is my LC7i not outputting sound to Channel 3?
Ensure Channel 3 inputs are connected (if not using AutoMode). If summed, verify jumper settings. Test input signals and RCA connections to the subwoofer amp.
Conclusion
Installing the AudioControl LC7i transforms your factory audio system into a high-performance powerhouse, seamlessly integrating aftermarket amplifiers and subwoofers. By following this step-by-step guide, you can wire the LC7i with confidence, tune it for optimal sound, and troubleshoot any hiccups along the way. The LC7i’s AccuBASS, GTO Signal Sense, and six-channel flexibility make it a game-changer for car audio upgrades.
Take your time, double-check connections, and leverage resources like the LC7i manual or AudioControl’s support team for guidance. With the right tools and a bit of patience, you’ll enjoy crystal-clear audio and heart-pounding bass on every drive. Ready to elevate your car’s sound system? Grab your LC7i, roll up your sleeves, and let the music take over!
For more car audio tips, wiring diagrams, and product reviews, explore AutoStereoGuide.com. Share your LC7i installation experience in the comments below or join the conversation on car audio forums to connect with fellow enthusiasts. Happy installing!