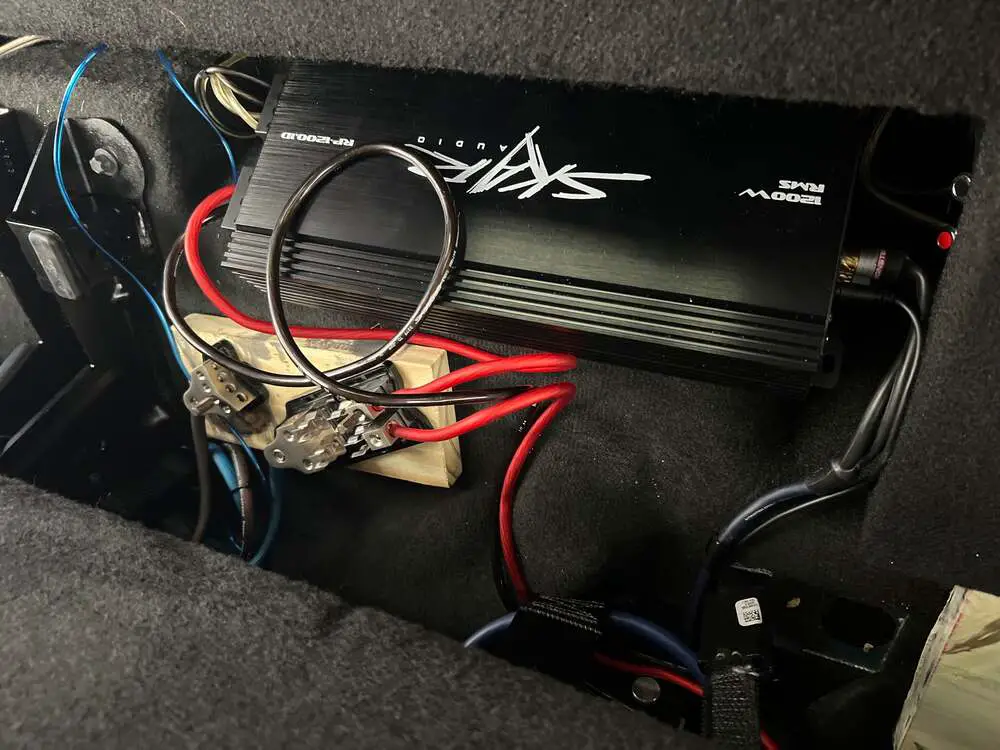
The Skar RP-1200.1D Monoblock Class D MOSFET Amplifier delivers a powerhouse performance, pumping out over 1,200 watts of RMS power at 1 ohm. This makes it an ideal choice for car audio enthusiasts looking to drive a single 1,200-watt subwoofer or a pair of 600-watt subwoofers. However, unlocking its full potential requires a proper installation, and that starts with understanding the Skar RP-1200.1 wiring diagram. This guide breaks down the wiring process step by step, ensuring you achieve booming bass and crystal-clear sound quality in your vehicle. Whether you’re a seasoned installer or a first-time DIYer, this article provides actionable insights to make your car audio system shine.
Contents
- Why Proper Wiring Matters for the Skar RP-1200.1
- Understanding the Skar RP-1200.1 Wiring Diagram
- Step-by-Step Installation Process
- Tuning Your Skar RP-1200.1 for Optimal Performance
- Troubleshooting Common Wiring Issues
- Tips for Maximizing Your Skar RP-1200.1 Performance
- Why Choose the Skar RP-1200.1?
- Conclusion
Why Proper Wiring Matters for the Skar RP-1200.1
A well-executed wiring setup ensures your amplifier operates efficiently, delivers maximum power, and avoids common issues like overheating or unwanted noise. The Skar RP-1200.1, with its high-speed MOSFET power supply and advanced PCB board layout, demands precise connections to perform at its best. Incorrect wiring can lead to voltage drops, distorted audio, or even damage to your equipment. By following the wiring diagram and best practices, you create a stable foundation for your car audio system, allowing the amplifier to push your subwoofers to their limits while maintaining reliability.
This guide covers the essential components of the Skar RP-1200.1 wiring diagram, including power connections, grounding, remote turn-on, signal inputs, and speaker wiring. It also offers tips for tuning your system and troubleshooting potential issues. Let’s dive into the process and get your car audio setup roaring.
Understanding the Skar RP-1200.1 Wiring Diagram
The wiring diagram for the Skar RP-1200.1 serves as a roadmap for connecting the amplifier to your car’s electrical system and audio components. Each connection plays a critical role in ensuring the amplifier functions correctly. Below, we explore the key elements of the wiring diagram and how to execute them properly.
Power Connections: Fueling the Amplifier
The Skar RP-1200.1 requires a direct connection to your car’s battery to ensure a consistent and robust power supply. This connection powers the amplifier’s high-performance components, allowing it to deliver clean, powerful bass. To achieve this, use a high-quality 4-gauge oxygen-free copper (OFC) power wire to minimize voltage drops and prevent overheating. Run the power wire from the positive terminal of the battery to the amplifier’s +12V input, ensuring you install a 150-amp fuse within 18 inches of the battery to protect the system from electrical faults.
When routing the power wire, avoid sharp edges or hot surfaces in the vehicle that could damage the insulation. Use grommets when passing the wire through the firewall to maintain a secure and safe connection. A properly installed power wire ensures the Skar RP-1200.1 receives the energy it needs to drive your subwoofers without interruption.
Grounding: Establishing a Stable Foundation
Grounding forms the backbone of a noise-free audio system. The Skar RP-1200.1 requires a solid ground connection to a clean, unpainted metal surface on your vehicle’s chassis. Choose a grounding point close to the amplifier to reduce the risk of ground loops, which can introduce humming or buzzing into your audio. Scrape away any paint, rust, or debris from the grounding point to ensure a strong electrical connection.
Use a 4-gauge OFC ground wire to connect the amplifier’s GND terminal to the grounding point. Secure the connection tightly to prevent it from loosening over time due to vehicle vibrations. A reliable ground connection eliminates unwanted noise and allows the amplifier to operate at peak performance, delivering clean and powerful sound to your subwoofers.
Remote Turn-On Wire: Activating the Amplifier
The remote turn-on wire acts as the amplifier’s on/off switch, signaling it to power up when you turn on your car’s stereo head unit. Typically, this wire is a thin, 18-gauge wire that connects the amplifier’s REM terminal to the remote turn-on lead on your head unit (often a blue or blue/white wire). Check your head unit’s manual to locate the correct lead.
When connecting the remote turn-on wire, ensure it’s routed away from power wires to avoid electrical interference. A clean connection here ensures the Skar RP-1200.1 powers on seamlessly with your stereo, providing a smooth listening experience every time you start your car.
Signal Input: Feeding Audio to the Amplifier
The Skar RP-1200.1 uses RCA cables to receive audio signals from your car’s head unit. These cables carry the preamp signal that the amplifier boosts to drive your subwoofers. Connect high-quality, shielded RCA cables from the head unit’s subwoofer output to the amplifier’s RCA input jacks. If your head unit lacks a dedicated subwoofer output, you may need a line output converter to adapt speaker-level outputs to RCA.
Route RCA cables along the opposite side of the vehicle from the power wire to prevent noise pickup. For example, run the power wire along the driver’s side and RCA cables along the passenger’s side. This separation minimizes interference, ensuring the audio signal remains clean and undistorted.
Speaker Wiring: Connecting Subwoofers
The Skar RP-1200.1 features two sets of speaker terminals, but these are internally connected, as it’s a monoblock amplifier. This design simplifies wiring, especially when connecting multiple subwoofers. Use 12-gauge or thicker speaker wire to connect your subwoofer(s) to the amplifier’s speaker terminals. Ensure the positive (+) and negative (-) terminals on the amplifier match the corresponding terminals on your subwoofer(s).
When wiring multiple subwoofers, pay attention to the impedance (ohms) to ensure compatibility with the amplifier. The Skar RP-1200.1 is 1-ohm stable, meaning it can handle a 1-ohm load for maximum power output. For example, two 2-ohm dual voice coil (DVC) subwoofers can be wired in parallel to achieve a 1-ohm load. Refer to Skar Audio’s wiring guides for specific configurations to achieve the desired impedance. Always double-check polarity to avoid phase cancellation, which can weaken bass output.
Step-by-Step Installation Process
Now that you understand the components of the wiring diagram, let’s walk through the installation process to bring your Skar RP-1200.1 to life.
Step 1: Gather Tools and Materials
Before starting, collect the necessary tools and materials:
- 4-gauge OFC power and ground wires
- 150-amp ANL fuse and fuse holder
- 18-gauge remote turn-on wire
- 12-gauge speaker wire
- High-quality RCA cables
- Wire cutters/strippers
- Crimping tool
- Screwdrivers and wrenches
- Multimeter
- Electrical tape and zip ties
Having everything on hand streamlines the process and prevents delays.
Step 2: Disconnect the Battery
Safety comes first. Disconnect the negative terminal of your car’s battery to prevent electrical shocks or short circuits during installation. This step protects both you and your equipment.
Step 3: Mount the Amplifier
Choose a secure location for the Skar RP-1200.1, such as under a seat, in the trunk, or on a custom amp rack. Ensure the area has adequate ventilation to prevent overheating. Use the amplifier’s mounting holes to secure it to the vehicle with screws or bolts. A stable mount reduces vibrations and ensures long-term reliability.
Step 4: Run Power and Ground Wires
Route the 4-gauge power wire from the battery to the amplifier, installing the 150-amp fuse holder near the battery. Connect the power wire to the amplifier’s +12V terminal. Next, attach the 4-gauge ground wire from the amplifier’s GND terminal to a clean metal surface on the chassis. Secure all connections tightly and use zip ties to keep wires organized.
Step 5: Connect the Remote Turn-On Wire
Run the 18-gauge remote turn-on wire from the amplifier’s REM terminal to the head unit’s remote turn-on lead. Secure the connection with crimp connectors or solder for durability. Keep the wire away from power cables to avoid interference.
Step 6: Install RCA and Speaker Wires
Connect RCA cables from the head unit to the amplifier’s RCA inputs, routing them along the opposite side of the power wire. Then, wire your subwoofer(s) to the amplifier’s speaker terminals, ensuring correct polarity and impedance. Use Skar Audio’s wiring guides to configure the subwoofers for a 1-ohm load if desired.
Step 7: Double-Check Connections
Before powering up, inspect all connections for security and accuracy. Verify the polarity of speaker wires, tightness of terminals, and proper fuse installation. Use a multimeter to check for continuity and ensure no short circuits exist.
Step 8: Reconnect the Battery
Reconnect the negative battery terminal and insert the 150-amp fuse into the fuse holder. Power on your car’s stereo to test the system. If the amplifier doesn’t turn on, recheck the remote turn-on wire and ground connection.
Tuning Your Skar RP-1200.1 for Optimal Performance
After wiring the amplifier, tuning ensures your system delivers the best sound quality. Follow these steps to fine-tune the Skar RP-1200.1:
Set the Gain Properly
The gain knob controls the input sensitivity of the amplifier. Use a multimeter and a 50 Hz test tone to set the gain accurately. Adjust the gain until the amplifier outputs the target voltage for your subwoofer’s RMS rating (e.g., 34.6V for 1,200 watts at 1 ohm). Proper gain setting prevents clipping, protects your subwoofers, and ensures clean bass.
Adjust the Low-Pass Filter
The low-pass filter (LPF) allows only frequencies below a set point to reach your subwoofers. Set the LPF to around 80 Hz for most subwoofers, adjusting based on your listening preferences. This keeps higher frequencies from reaching the subwoofers, improving bass clarity.
Configure the Subsonic Filter
The subsonic filter blocks ultra-low frequencies that subwoofers can’t reproduce efficiently. Set it to 20-30 Hz to protect your subwoofers from overexcursion and improve power efficiency. This setting enhances bass response while preventing damage.
Fine-Tune Bass Boost and EQ
The Skar RP-1200.1 includes a bass boost feature, but use it sparingly to avoid distortion. Start with the bass boost at 0 dB and increase slightly if needed. Adjust your head unit’s equalizer to balance the subwoofer output with your mids and highs, creating a cohesive soundstage.
Troubleshooting Common Wiring Issues
Even with careful installation, issues can arise. Here are common problems and solutions:
- No Power: Check the fuse, remote turn-on wire, and ground connection. Ensure the battery is charged and connections are tight.
- Noise or Humming: Verify the ground point is clean and secure. Reroute RCA cables away from power wires to reduce interference.
- Weak Bass: Confirm the subwoofers are wired to a 1-ohm load for maximum power. Check gain and crossover settings.
- Amplifier Overheating: Ensure proper ventilation and verify the impedance isn’t below 1 ohm, as this can strain the amplifier.
If problems persist, consult Skar Audio’s support team or a professional installer.
Tips for Maximizing Your Skar RP-1200.1 Performance
To get the most out of your amplifier, consider these additional tips:
- Upgrade Your Electrical System: High-power amplifiers like the Skar RP-1200.1 demand a robust electrical system. Add a high-output alternator or a secondary battery for stable power delivery.
- Use Quality Wiring Kits: Invest in an OFC wiring kit from brands like KnuConceptz or Sky High Car Audio for better conductivity and reliability.
- Break In Subwoofers: Play music at moderate volumes for 20-30 hours to break in new subwoofers, improving their performance and longevity.
- Regular Maintenance: Periodically check connections for corrosion or loosening, especially in humid or salty environments.
Why Choose the Skar RP-1200.1?
The Skar RP-1200.1 stands out for its combination of power, affordability, and reliability. Its 1-ohm stability, compact design, and four-way protection circuitry make it a top choice for budget-conscious audio enthusiasts. Whether you’re building a daily driver setup or a competition-grade system, this amplifier delivers hard-hitting bass without breaking the bank. Pair it with Skar Audio subwoofers like the SDR or EVL series for a matched system that maximizes performance.
Conclusion
Installing the Skar RP-1200.1 amplifier transforms your car audio experience, delivering powerful, clean bass that elevates every drive. By following the wiring diagram and this step-by-step guide, you ensure a safe, efficient, and high-performing setup. From power and ground connections to tuning the gain and crossovers, each step plays a vital role in achieving optimal sound quality. Take your time, double-check connections, and tune the system to your preferences. With the Skar RP-1200.1, your car becomes a rolling concert hall, ready to impress with every beat.
For more details, refer to the Skar Audio RP-1200.1D owner’s manual or visit Skar Audio’s official website for wiring guides and support. Ready to crank up the volume? Start wiring today and unleash the full potential of your car audio system!