Getting the perfect sound in your car isn’t just about buying expensive speakers or a premium stereo system. Understanding how to properly set your car’s equalizer can transform an average listening experience into an exceptional one. Many drivers overlook this crucial step, missing out on the full potential of their car audio system.
Contents
- Why Your Car Equalizer Settings Matter
- Understanding Your Car’s Equalizer
- Step-by-Step Guide to Setting Your Car Equalizer
- Common Car Equalizer Mistakes to Avoid
- Advanced Tips for Audiophile-Quality Car Sound
- How Different Music Genres Benefit from Specific EQ Settings
- When to Consider Professional Calibration
- Final Thoughts: Enjoy the Journey
Why Your Car Equalizer Settings Matter
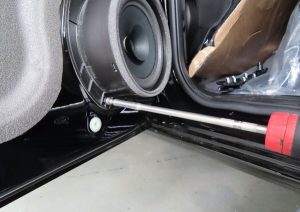
Your car presents unique acoustic challenges. The confined space, various reflective surfaces, and background road noise all affect how you hear music. The equalizer serves as your tool to overcome these obstacles, helping you achieve balanced, clear sound tailored to your specific vehicle.
The dashboard, windows, seats, and even passengers absorb and reflect sound waves differently. An accurately adjusted equalizer compensates for these factors, bringing out the best in your music regardless of the driving conditions.
Understanding Your Car’s Equalizer
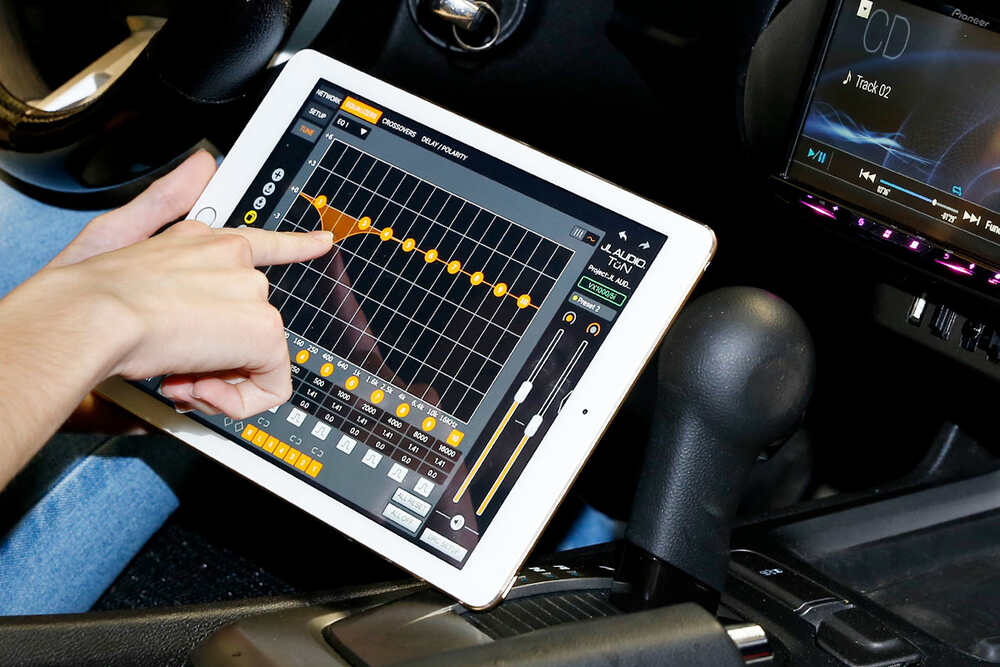
Car equalizers come in different forms. Basic systems offer simple bass and treble controls, while advanced setups include multi-band graphic equalizers with sliders for different frequency ranges. Digital systems now often feature parametric equalizers through touchscreen interfaces or smartphone apps.
Types of Car Equalizers
- Basic Tone Controls: Simple bass and treble adjustments
- Graphic Equalizers: Multiple frequency band sliders (typically 5-31 bands)
- Parametric Equalizers: Precise control over specific frequencies, bandwidth, and level
- Digital/App-Based Equalizers: Modern systems with preset options and customizable profiles
Key Frequency Ranges Explained
Understanding these frequency ranges helps you make targeted adjustments:
- Sub-bass (20-60 Hz): The deepest bass notes and beats
- Bass (60-250 Hz): The foundation of most music; gives warmth and fullness
- Lower midrange (250-500 Hz): Male vocals, guitar, and bass line definition
- Midrange (500-2000 Hz): Most vocal and instrumental fundamentals
- Upper midrange (2-4 kHz): Presence and clarity for vocals and instruments
- Treble (4-12 kHz): Details, cymbals, high notes, and sparkle
- Upper treble (12-20 kHz): Air and shimmer in recordings
Step-by-Step Guide to Setting Your Car Equalizer
Step 1: Start With a Clean Slate
Reset all equalizer settings to zero or flat position. This gives you a neutral starting point without any previous adjustments affecting your new settings.
Turn off any sound enhancement features like “bass boost,” “virtual surround,” or “loudness.” These processed effects can mask the true sound of your system and make proper equalization difficult.
Step 2: Choose Reference Tracks
Select 3-5 songs you know extremely well across different genres. The best reference tracks have:
- Clear vocals
- Full frequency range (bass, midrange, and treble elements)
- Dynamic range (quiet and loud parts)
- Good recording quality
Familiar tracks help you identify when something sounds right or wrong because you already know how they should sound.
Step 3: Set the Volume to a Moderate Level
Adjust your volume to about 70-80% of maximum. This level should be loud enough to hear details but not so loud that the speakers distort. Your ears also fatigue at very high volumes, making accurate adjustments difficult.
Remember that equalizer settings can affect the overall volume, so you might need to readjust as you make changes.
Step 4: Adjust the Bass (60-250 Hz)
Start with the bass frequencies since they form the foundation of your sound:
- Too much bass makes music sound boomy or muddy
- Too little bass makes music sound thin and lifeless
- Just right bass provides depth without overwhelming other elements
For most car systems, a slight boost in the 60-80 Hz range adds satisfying depth without muddiness. However, if your speakers are small or lack subwoofers, excessive bass boost can damage them.
Step 5: Fine-tune the Midrange (250-2000 Hz)
The midrange contains most musical information including vocals:
- The lower midrange (250-500 Hz) affects the fullness of male vocals and guitars
- The core midrange (500-1000 Hz) handles most vocal fundamentals
- The upper midrange (1-2 kHz) controls clarity and presence
Many car systems benefit from a slight dip around 300-500 Hz to reduce the “boxy” sound that cars naturally create due to their interior dimensions. A small boost around 1-2 kHz can improve vocal clarity, especially helpful when competing with road noise.
Step 6: Adjust the Treble (2-12 kHz)
Treble settings control detail and brightness:
- The lower treble (2-4 kHz) affects vocal presence and intelligibility
- The mid treble (4-8 kHz) handles cymbal sounds and string instrument detail
- The upper treble (8-12 kHz) provides air and sparkle
Car environments often absorb high frequencies, so a gentle boost in the 8-10 kHz range can restore lost detail. However, too much treble creates listening fatigue and harshness, especially in longer driving sessions.
Step 7: Fine-tune for Your Car’s Acoustics
Every car interior creates unique acoustic challenges:
For compact cars: Often need reduced bass (can sound boomy) and boosted midrange for clarity For SUVs and vans: Typically benefit from slightly boosted bass (larger space absorbs low frequencies) and controlled treble For convertibles: Need significant upper midrange and treble boost to overcome wind noise when the top is down
Car materials also matter—leather interiors reflect more sound than fabric ones, potentially creating harshness in the upper frequencies.
Step 8: Create Position-Specific Settings
Consider creating different equalizer presets for various situations:
- Driver alone: Optimize for the driver’s seat position
- Full car: Balance sound for all passengers
- Highway driving: Enhanced midrange for clarity against road noise
- City driving: More balanced profile for stop-and-go traffic conditions
Modern digital systems often allow you to save these presets for quick switching.
Common Car Equalizer Mistakes to Avoid
Excessive Bass Boost
The most frequent mistake is cranking the bass too high. While thumping bass might feel impressive initially, it quickly becomes fatiguing and can mask other important elements in the music. Excessive bass also strains speakers and amplifiers, potentially causing damage.
Instead, aim for bass that you can feel but that remains balanced with the rest of the frequency spectrum. Quality bass should have definition rather than just volume.
V-Shaped Equalization
Many people create a “V-shaped” equalizer setting with boosted bass and treble but reduced midrange. While this creates an initially impressive sound with punchy bass and sparkly highs, it hollows out the critical midrange where most musical information exists.
This approach might work for casual listening but removes the heart of most recordings—vocals, guitars, pianos, and other midrange-focused instruments lose their natural presence.
Ignoring Car-Specific Acoustics
Your car’s unique acoustic environment significantly impacts sound reproduction. Hard surfaces like windows and dashboards reflect high frequencies, while seats and carpets absorb them. The small, enclosed space creates standing waves and resonances at specific frequencies.
Take time to identify problem frequencies in your particular vehicle. Listen for boomy bass notes or harsh, piercing highs that might need targeted reduction.
Setting and Forgetting
Your ideal equalizer settings change based on:
- The music genre you’re playing
- Your driving speed and resulting road noise
- Number of passengers (who absorb sound)
- Windows open or closed
- Season (winter clothing absorbs more high frequencies)
Create multiple presets for different conditions or adjust on the fly as needed.
Advanced Tips for Audiophile-Quality Car Sound
Time Alignment
If your system offers time alignment controls, use them to ensure sound from all speakers reaches your ears simultaneously. This creates a more cohesive soundstage and improves imaging.
Measure the approximate distance from each speaker to the driver’s seat and input these values into your system’s time alignment feature. The system will add tiny delays to the closer speakers so their sound arrives in sync with the more distant ones.
Crossover Settings
For systems with separate subwoofers, component speakers, or multiple amplifiers, proper crossover settings are crucial:
- Set subwoofer crossovers typically between 60-80 Hz
- Set midrange/midbass crossovers based on speaker capabilities
- Use steep slopes (24dB/octave) to minimize overlap between drivers
Proper crossovers prevent speakers from trying to reproduce frequencies they weren’t designed for, reducing distortion and improving clarity.
Dynamic EQ for Road Noise
Some advanced systems offer dynamic equalization that adjusts automatically based on vehicle speed and resulting road noise. These systems typically boost midrange frequencies as speed increases to maintain clarity against growing background noise.
If your system lacks this feature, consider creating separate equalizer presets for highway and city driving.
How Different Music Genres Benefit from Specific EQ Settings
Rock and Metal
Rock music often benefits from:
- Moderate bass boost around 80-100 Hz for kick drum impact
- Slight cut around 300 Hz to reduce muddiness
- Boost at 2-3 kHz for guitar presence
- Controlled high frequencies to prevent cymbal harshness
Hip-Hop and Electronic
Bass-heavy genres need:
- Sub-bass emphasis (30-60 Hz) for deep bass lines
- Tight control in the 100-200 Hz range for punch without boom
- Clear midrange for vocal intelligibility
- Crisp but not exaggerated highs
Classical and Jazz
Acoustic music requires:
- Natural, unexaggerated bass
- Full midrange presence
- Detailed but smooth high frequencies
- Minimal processing to preserve dynamic range
Pop and Vocal-Focused Music
Vocal clarity demands:
- Controlled bass that doesn’t overpower
- Slight boost around 1-3 kHz for vocal presence
- Just enough upper midrange for articulation
- Smooth treble extension for air without sibilance
When to Consider Professional Calibration
While DIY equalization can yield excellent results, professional calibration might be worth considering if:
- You’ve invested significantly in high-end car audio components
- You hear persistent issues you can’t resolve through adjustment
- You want measurably accurate frequency response
Professional installers use specialized microphones and real-time analyzers to measure your system’s actual output in your specific vehicle. This approach identifies issues your ears might miss and can result in more precise corrections.
Final Thoughts: Enjoy the Journey
Remember that setting your car equalizer isn’t just about achieving technical perfection—it’s about creating a sound that brings you joy while driving. Trust your ears above all else.
Take time to experiment with different settings. Small adjustments can make significant differences, and your preferences might evolve as you become more attuned to the nuances of your system.
The perfect equalizer setting transforms your daily commute or road trip into an immersive listening experience, turning your car into your personal concert hall on wheels.