Choosing the right fuse size for a 1500-watt car amplifier ensures your audio system runs safely and efficiently. A fuse protects your amp, wiring, and vehicle from electrical overloads or short circuits. Selecting the wrong fuse size can lead to blown fuses, damaged components, or even fire hazards. This guide walks you through how to determine the correct fuse size for a 1500-watt amp, why it matters, and tips to optimize your car audio setup. Let’s dive into the details to keep your system booming without risking safety.
Contents
Why Fuse Size Matters for Your 1500-Watt Amp
A fuse acts as a safety barrier in your car audio system. It prevents excessive current from flowing through the amplifier and wiring, which could cause overheating or damage. For a 1500-watt amp, the fuse size must match the power demands to avoid issues. Too small a fuse blows frequently, interrupting your music. Too large a fuse fails to protect the system, risking damage to your amp or vehicle.
Fuses also safeguard your investment. A high-quality 1500-watt amp delivers powerful sound, but without proper protection, electrical surges can fry its circuits. By choosing the right fuse, you ensure consistent performance and longevity for your audio setup. Next, let’s explore how to calculate the correct fuse size based on your amp’s specifications.
Understanding Amperage and Wattage
To pick the right fuse, you need to understand the relationship between wattage, voltage, and amperage. A 1500-watt amplifier draws significant power, and the fuse must handle the current (measured in amps) it pulls. Use this simple formula to calculate amperage:
Amperage (I) = Wattage (P) ÷ Voltage (V)
Most car audio systems operate at 12 volts, though real-world voltage can range from 12V to 14.4V when the engine runs. For a 1500-watt amp at 12 volts:
1500 ÷ 12 = 125 amps
At 14.4 volts (a common alternator output):
1500 ÷ 14.4 ≈ 104 amps
These calculations assume 100% efficiency, but amplifiers are typically 60-80% efficient due to heat loss and other factors. To account for this, divide the amperage by the efficiency rating. For a 70% efficient amp:
125 ÷ 0.7 ≈ 178 amps (at 12V)
104 ÷ 0.7 ≈ 148 amps (at 14.4V)
This means your 1500-watt amp likely draws between 148 and 178 amps under normal conditions. The fuse size should accommodate this current draw while providing a safety margin. Let’s break down how to choose the right fuse size based on these numbers.
How to Choose the Right Fuse Size
For a 1500-watt amp, the fuse size typically ranges from 150 to 200 amps, depending on the amp’s efficiency and your system’s voltage. Here’s a step-by-step process to nail down the perfect fuse size:
- Check the Amp’s Manual: Manufacturers often list recommended fuse sizes in the user manual or on the amp’s spec sheet. This accounts for the amp’s efficiency and design. If the manual suggests a 150-amp fuse, start there.
- Calculate Total Current Draw: Use the formula above to estimate amperage. Factor in efficiency (usually 60-80%) to get a realistic number. For a 1500-watt amp, expect a current draw of 150-180 amps.
- Add a Safety Margin: Choose a fuse rated slightly higher than the calculated amperage to prevent nuisance blowing. A 150-175 amp fuse works for most 1500-watt amps, but a 200-amp fuse may be needed for less efficient models.
- Consider Wiring and Accessories: If your system includes multiple amps or power-hungry accessories, the total current draw increases. Sum the amperage of all components to select a fuse that protects the entire setup.
- Use an Inline Fuse Near the Battery: Place the fuse within 12-18 inches of the battery to protect the power wire. This ensures any short circuit between the battery and amp triggers the fuse, not a fire.
For most 1500-watt amps, a 175-amp fuse strikes a balance between safety and reliability. If your amp runs at higher efficiency or you use a 14.4V system, a 150-amp fuse might suffice. Always double-check with the manufacturer’s recommendations to avoid guesswork.
Types of Fuses for Car Audio Systems
Not all fuses are created equal. For a 1500-watt amp, you’ll encounter several fuse types. Each has pros and cons, so pick one that fits your setup:
- ANL Fuses: These high-capacity fuses handle 100-300 amps, making them ideal for 1500-watt amps. They’re durable, reusable with a fuse holder, and widely available. A 150-200 amp ANL fuse works well for most setups.
- AGU Fuses: Common in older car audio systems, AGU fuses max out at 80-100 amps. They’re too small for a 1500-watt amp, so avoid them unless you’re running multiple smaller fuses (not recommended).
- MIDI or Mini-ANL Fuses: Compact and reliable, these handle up to 150 amps. They’re a good choice for space-constrained installs but may not suffice for high-current 1500-watt amps.
- Circuit Breakers: Instead of blowing, circuit breakers trip and can be reset. They’re convenient but pricier and bulkier than fuses. A 150-200 amp circuit breaker matches a 1500-watt amp’s needs.
ANL fuses are the go-to choice for most car audio enthusiasts due to their reliability and compatibility with high-power systems. Pair the fuse with a quality fuse holder to ensure a secure connection.
Fuse Placement and Wiring Tips
Proper fuse placement and wiring maximize safety and performance. Follow these tips to set up your 1500-watt amp correctly:
- Install the Fuse Close to the Battery: Place the inline fuse within 12-18 inches of the battery to protect the power wire from short circuits. This minimizes the risk of unprotected wiring causing damage.
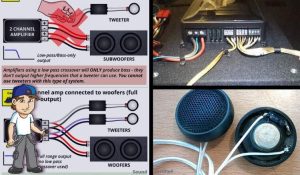
- Use the Right Wire Gauge: A 1500-watt amp drawing 150-200 amps requires 2-gauge or 4-gauge power and ground wires. Thicker wires reduce resistance and heat buildup. Check a wire gauge chart to confirm the correct size for your current draw.
- Secure Connections: Loose connections cause voltage drops and heat, which can blow fuses or damage your amp. Use crimped or soldered terminals and check them regularly.
- Ground Properly: Connect the ground wire to a clean, unpainted metal surface on the vehicle’s chassis. A poor ground can mimic fuse issues, so ensure a solid connection.
- Test the System: After installing the fuse and wiring, test the system at low volume to confirm everything works. Gradually increase the volume to check for blown fuses or overheating.
By following these steps, you create a safe and efficient power path for your 1500-watt amp, letting you enjoy crisp, powerful sound without electrical headaches.
Common Mistakes to Avoid
Even experienced installers make mistakes when choosing a fuse for a 1500-watt amp. Steer clear of these pitfalls to keep your system running smoothly:
- Using Too Small a Fuse: A 100-amp fuse might seem close enough, but it’ll blow under normal operation, cutting power to your amp. Stick to 150-200 amps for reliability.
- Oversizing the Fuse: A 300-amp fuse offers no protection for a 1500-watt amp. It allows excessive current to flow, risking damage to wiring or the amp itself.
- Skipping the Fuse Altogether: Some installers bypass the fuse to avoid blown fuses. This is dangerous and can lead to fires or fried components. Always use a fuse.
- Ignoring Efficiency: Failing to account for your amp’s efficiency leads to inaccurate amperage calculations. Check the manual or assume 60-80% efficiency for safety.
- Poor Fuse Holder Quality: Cheap fuse holders can overheat or corrode, causing power loss. Invest in a high-quality holder rated for your fuse’s amperage.
Avoiding these errors saves you time, money, and frustration while keeping your car audio system safe.
Enhancing Your Car Audio Setup
Choosing the right fuse is just one part of building a stellar car audio system. To get the most out of your 1500-watt amp, consider these upgrades:
- Upgrade Your Alternator: A 1500-watt amp taxes your vehicle’s electrical system. A high-output alternator (150-200 amps) ensures consistent power, especially if you add subwoofers or multiple amps.
- Add a Capacitor: A capacitor stabilizes voltage for your amp, reducing strain on the battery and alternator. It’s especially helpful for bass-heavy tracks that demand sudden power surges.
- Use Quality Cables: Oxygen-free copper (OFC) power and ground cables minimize resistance, improving efficiency and sound quality. Pair them with matching RCA cables for clean signal transfer.
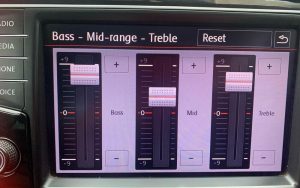
- Tune Your Amp: Adjust the gain, crossover, and bass boost settings to match your speakers and subwoofers. Proper tuning prevents clipping and protects your components.
- Soundproof Your Car: Add sound-deadening mats to doors and panels to reduce road noise and enhance bass response. This lets your 1500-watt amp shine.
These tweaks elevate your listening experience, making your 1500-watt amp the heart of a powerful, clear audio system.
When to Consult a Professional
If calculating fuse sizes or wiring feels overwhelming, don’t hesitate to seek help. A professional car audio installer ensures your 1500-watt amp is set up safely and optimized for performance. Consider professional help if:
- You’re installing multiple amps or a complex system.
- Your vehicle has a high-end electrical system requiring custom wiring.
- You notice frequent blown fuses or dimming headlights, indicating electrical issues.
- You lack the tools or experience to handle heavy-gauge wiring and fuse holders.
A pro can also recommend compatible components, like alternators or capacitors, to support your 1500-watt amp. This saves you from costly mistakes and ensures your system sounds incredible.
Final Thoughts
Selecting the right fuse size for a 1500-watt amp keeps your car audio system safe, reliable, and powerful. A 150-200 amp fuse, preferably an ANL type, suits most 1500-watt amps, but always check the manufacturer’s specs and calculate amperage for accuracy. Proper fuse placement, quality wiring, and attention to efficiency prevent issues and maximize performance. By avoiding common mistakes and considering upgrades like a high-output alternator, you create a car audio setup that delivers heart-pounding sound without compromising safety. Follow these steps, and your 1500-watt amp will keep the music flowing for years to come.