Are you tired of listening to the same old CDs or radio stations during your commute? Maybe you want to play music directly from your smartphone or MP3 player through your car’s speakers? Adding an auxiliary (aux) input to your car stereo can solve this problem, giving you the freedom to play whatever audio you want while on the road.
This guide will walk you through the process of adding an aux input to your car stereo system, from understanding what an aux input is to installing it yourself or knowing when to seek professional help.
Contents
- What Is an Aux Input?
- Benefits of Adding an Aux Input
- Methods to Add an Aux Input
- Tools You’ll Need
- Step-by-Step Guide to Adding an Aux Input Adapter
- Direct Wiring Method for Advanced Users
- Common Issues and Troubleshooting
- Professional Installation vs. DIY
- Alternative Options
- Maintaining Your Aux Input
- Final Thoughts
- FAQs About Adding an Aux Input to Your Car Stereo
What Is an Aux Input?
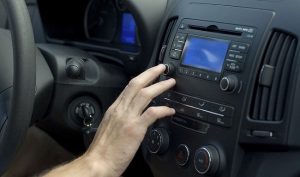
An auxiliary input is a connection that allows you to play audio from an external device through your car’s speaker system. It typically comes in the form of a 3.5mm jack—the same size as the headphone jack on most portable audio devices.
Many newer cars come with built-in aux inputs, but if you own an older vehicle, you might need to add this feature yourself. The good news is that adding an aux input can be much cheaper than replacing your entire stereo system with a new unit.
Benefits of Adding an Aux Input
Before diving into the installation process, let’s look at why adding an aux input is worth considering:
- Cost-effective: Adding an aux input is significantly cheaper than installing a new stereo system.
- Versatility: You can connect virtually any audio device with a headphone jack.
- Sound quality: Direct connections often provide better sound quality than FM transmitters.
- Simplicity: Once installed, an aux input is straightforward to use.
- Retained factory look: You can keep your car’s original stereo and its integrated features.
Methods to Add an Aux Input
There are several ways to add an aux input to your car stereo, depending on your stereo type, budget, and technical skills:
1. Direct Wiring to the Stereo Circuit Board
This method involves opening up your stereo unit and soldering wires directly to the circuit board. It’s the most invasive but often provides the best sound quality and cleanest installation.
2. Using an Aux Input Adapter
Aux input adapters connect to the back of your stereo, often through a CD changer port or satellite radio connection. These adapters trick your stereo into thinking they are an external device that’s part of the factory system.
3. FM Transmitters
While not technically an aux input, FM transmitters can broadcast audio from your device to an unused FM frequency on your radio. This is the easiest method but typically offers lower sound quality.
4. Cassette Adapters
If your car has a cassette player, you can use a cassette adapter that plugs into your device’s headphone jack. This is a simple solution but may not provide the best audio experience.
Tools You’ll Need
Depending on the method you choose, you might need some or all of these tools:
- Screwdrivers (Phillips and flat-head)
- Wire strippers
- Soldering iron and solder
- Electrical tape or heat shrink tubing
- Panel removal tools
- Digital multimeter (for testing connections)
- Drill (if mounting the aux jack in the dashboard)
Step-by-Step Guide to Adding an Aux Input Adapter
Let’s focus on using an aux input adapter, as it’s the most common and practical approach for most car owners:
Step 1: Research Your Car Stereo
First, identify your car stereo’s make and model. Check if it has a CD changer port, satellite radio connector, or other external device connections on the back. This information will help you find the right adapter for your specific stereo.
Many car stereo manufacturers like Pioneer, Kenwood, Sony, and JVC have specific adapters designed for their units. Factory stereos from brands like Ford, Toyota, Honda, and BMW also often have adapters available.
Step 2: Purchase the Right Adapter
Based on your research, purchase an aux input adapter compatible with your stereo. You can find these online or at automotive electronics stores. Common types include:
- CD changer port adapters
- Satellite radio adapters
- Specific factory radio adapters (for brands like Honda, Toyota, Ford, etc.)
Make sure the adapter comes with clear installation instructions specific to your stereo model.
Step 3: Gather Your Tools
Collect all the necessary tools for the installation process. At minimum, you’ll need:
- Screwdrivers to remove the stereo
- Panel removal tools to safely take off dashboard pieces
- Wire connectors or electrical tape
Step 4: Disconnect the Battery
For safety, disconnect your car’s negative battery terminal before starting any electrical work. This prevents short circuits and potential damage to electronic components.
Step 5: Remove the Stereo
Remove your car stereo from the dashboard:
- Take off any trim panels around the stereo
- Remove any screws holding the stereo in place
- Slide the stereo out carefully, being mindful of any wires attached
Car stereo removal techniques vary greatly by vehicle make and model. For some cars, you’ll need special removal keys that slide into slots on the sides of the stereo. For others, you might need to remove surrounding panels first.
Step 6: Connect the Adapter
Once you have access to the back of your stereo:
- Locate the appropriate port for your adapter (CD changer port, satellite radio connection, etc.)
- Disconnect any existing devices from this port if necessary
- Connect your aux input adapter to the port
- Route the aux cable to where you want the input jack to be located (glove compartment, center console, etc.)
Step 7: Test the Connection
Before fully reassembling everything:
- Temporarily reconnect the battery
- Turn on the stereo and switch it to the correct input mode (often labeled AUX, CDC, SAT, or similar)
- Connect a device to your new aux input and play some audio
- Check for sound quality and adjust settings if needed
Step 8: Mount the Aux Input Jack
Once you’ve confirmed the adapter works:
- Choose a convenient, accessible location for your aux input jack
- If mounting in the dashboard, you might need to drill a small hole
- Secure the jack in place using the mounting hardware that came with your adapter
- Make sure the cable is neatly tucked away and won’t interfere with any controls
Step 9: Reassemble Everything
After the aux input is properly installed and tested:
- Slide the stereo back into the dashboard
- Replace any screws and trim panels
- Reconnect the negative battery terminal
- Double-check that everything works properly
Direct Wiring Method for Advanced Users
If you’re technically inclined and want a more integrated solution, the direct wiring method might be for you. This involves identifying the audio input points directly on your stereo’s circuit board and soldering connections.
Warning: This method carries the risk of permanently damaging your stereo if done incorrectly. Only attempt this if you have experience working with electronics.
Basic Direct Wiring Steps:
- Research your specific stereo model to identify where audio signals are processed on the circuit board.
- Open the stereo housing carefully after removing it from the car.
- Locate the audio processing chip or trace the wires from the CD player or radio tuner.
- Solder wires to the left and right audio input points and a ground connection.
- Run these wires to a 3.5mm female jack that you’ll mount somewhere accessible.
- Test thoroughly before reassembling everything.
Common Issues and Troubleshooting
Even with careful installation, you might encounter some problems:
No Sound
- Check that your stereo is set to the correct input mode
- Verify all connections are secure
- Ensure your adapter is compatible with your stereo model
- Test with different audio devices and cables
Poor Sound Quality
- Check for loose connections
- Look for sources of electrical interference
- Try a different aux cable (shielded cables work best)
- Make sure the ground connection is secure
Interference or Engine Noise
- This often indicates a ground loop issue
- Try a ground loop isolator between your device and the aux input
- Check all ground connections in your installation
Stereo Doesn’t Recognize the Adapter
- Some adapters require activation through a specific sequence of button presses
- Consult your adapter’s manual for initialization procedures
- Your stereo might need to be in a specific mode to recognize external devices
Professional Installation vs. DIY
While many car enthusiasts enjoy DIY projects, installing an aux input isn’t for everyone. Consider these factors:
DIY Installation Is Good If:
- You have basic knowledge of car electronics
- You’re comfortable removing dashboard components
- You have the necessary tools
- Your car stereo has readily available adapters
- You enjoy hands-on projects
Professional Installation Makes Sense When:
- Your car has a complex audio system
- The stereo is deeply integrated with other vehicle systems
- You want a custom installation with hidden wiring
- You don’t have the time or tools for DIY work
- The risk of damaging expensive components is high
Professional installation typically costs between $50-$150, depending on your location and the complexity of your car’s audio system.
Alternative Options
If adding an aux input seems too complicated or isn’t possible with your stereo, consider these alternatives:
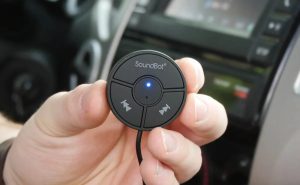
Bluetooth Adapters
Bluetooth adapters can connect to an aux input or FM transmitter, allowing wireless audio streaming from your devices. These are convenient but may require regular charging or power from your car’s cigarette lighter.
New Stereo Installation
Modern aftermarket stereos offer aux inputs, Bluetooth, USB connections, and smartphone integration. While more expensive than adding just an aux input, they provide significantly more features.
Portable Bluetooth Speakers
If you rarely need car audio or drive an older vehicle, a good portable Bluetooth speaker might be simpler than modifying your car’s audio system.
Maintaining Your Aux Input
Once installed, keep these maintenance tips in mind:
- Regularly check connections for looseness or corrosion
- Keep the aux input jack clean and free of dust
- Don’t yank cables out by the cord; always grab the plug
- Consider a dust cap for the aux port when not in use
Final Thoughts
Adding an aux input to your car stereo bridges the gap between older audio systems and modern devices. Whether you choose a simple adapter or a more integrated solution, you’ll enjoy the freedom to play your favorite music, podcasts, and audiobooks through your car’s speakers.
The installation process might take an hour or two, but the convenience of having an aux input will enhance your driving experience for years to come. And remember, if you’re unsure about any step in the process, consulting a professional is always a safe choice.
With the right approach and a bit of patience, you can bring your car’s audio system into the modern era without breaking the bank on a brand new stereo unit.
FAQs About Adding an Aux Input to Your Car Stereo
Q: Will adding an aux input void my car’s warranty? A: In most cases, adding an aux input adapter won’t void your entire car warranty, but it might affect coverage for the stereo system itself. Check your warranty terms before proceeding.
Q: Can I add an aux input to any car stereo? A: While most car stereos can accommodate an aux input through one method or another, some very old or basic systems might present challenges. Research your specific model before purchasing any equipment.
Q: What’s the difference between an aux input and Bluetooth? A: An aux input requires a physical cable connection between your device and the stereo, while Bluetooth allows wireless streaming. Aux connections typically provide better sound quality but less convenience.
Q: How much does it cost to add an aux input? A: DIY aux input adapter kits typically cost between $15 and $75, depending on your car model and adapter type. Professional installation adds $50-$150 to that cost.
Q: Can I still use my CD player after adding an aux input? A: In most cases, yes. Most aux input adapters allow you to switch between the original functions and the new aux input, though this depends on the specific adapter and installation method.