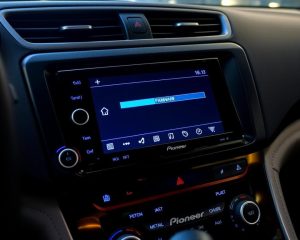
Are you frustrated with your car audio system’s underwhelming performance? The solution might be simpler than you think. Your car amplifier settings could be the key to unlocking that rich, powerful sound you’ve been missing. In this comprehensive guide, we’ll walk through the process of adjusting your car amplifier settings step by step, helping you achieve the audio experience you deserve.
Contents
- Understanding Your Car Amplifier
- Why Proper Amplifier Settings Matter
- Essential Tools for Adjusting Your Amplifier
- Step-by-Step Guide to Adjusting Your Car Amplifier
- Common Mistakes to Avoid
- Troubleshooting Common Issues
- Advanced Techniques for Audio Enthusiasts
- Special Considerations for Different Amplifier Classes
- Maintaining Your Settings
- When to Seek Professional Help
- Conclusion
Understanding Your Car Amplifier
Before diving into adjustments, let’s get familiar with the basic components of a car amplifier. An amplifier serves one primary purpose: to boost the low-level audio signals from your head unit to a level that can properly drive your speakers and subwoofers.
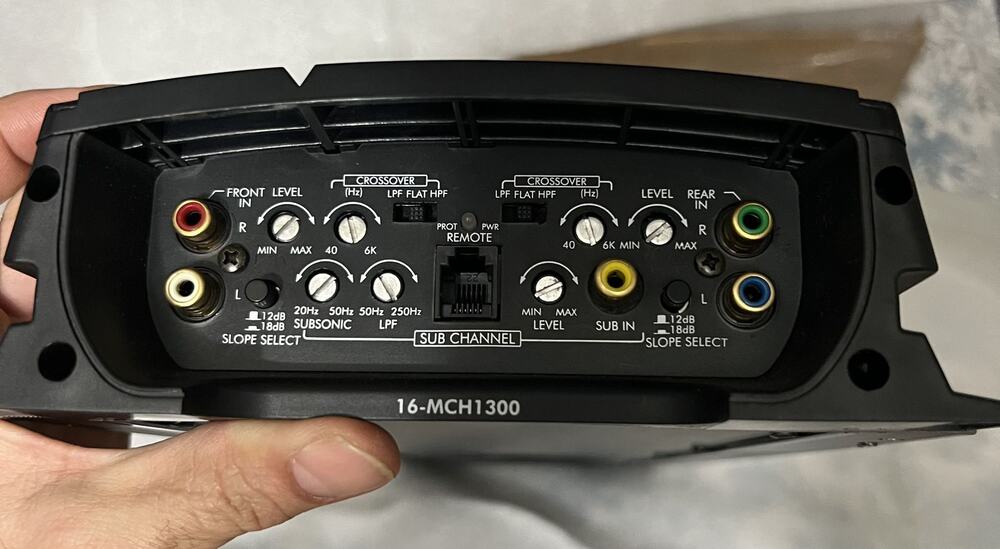
A typical car amplifier includes several adjustable controls:
- Gain control: Matches the amplifier’s input sensitivity to the head unit’s output voltage
- Crossover settings: Directs specific frequencies to the appropriate speakers
- Bass boost: Enhances low-frequency response
- Subsonic filter: Removes ultra-low frequencies that can damage equipment
- Phase control: Aligns the sound waves between speakers and subwoofers
Understanding these controls is essential for proper setup. Each adjustment affects your system’s overall sound quality and performance.
Why Proper Amplifier Settings Matter
Many car audio enthusiasts spend thousands on high-end equipment but neglect the crucial step of properly setting up their amplifiers. This oversight can lead to:
- Distorted sound at higher volumes
- Premature speaker failure
- Underpowered system performance
- Overheating amplifiers
- Excessive battery drain
Taking the time to adjust your amplifier correctly can dramatically improve sound quality without spending an extra dime on new equipment. It’s truly the hidden secret to great car audio.
Essential Tools for Adjusting Your Amplifier
Before starting the adjustment process, gather these tools:
- Small flat-head screwdriver (for adjusting the potentiometers)
- Test tone CD or digital files (50Hz and 1kHz tones at -5dB)
- Digital multimeter (for measuring voltage)
- SPL meter app on your smartphone
- Flashlight
- Pen and paper to note your settings
Having these items ready will make the adjustment process much smoother and more accurate.
Step-by-Step Guide to Adjusting Your Car Amplifier
Step 1: Prepare Your System
Start by turning off your car audio system completely. Then:
- Turn the gain controls on your amplifier to their minimum settings
- Set all equalizer settings on your head unit to flat (zero or center position)
- Disable any bass boost or loudness features on both the head unit and amplifier
- Set your head unit volume to about 75% of maximum
- Make sure your crossover switches are in the correct positions based on your speaker setup
This gives you a clean slate for your adjustments, eliminating any previous settings that might affect your new setup.
Step 2: Setting the Gains Correctly
The gain control is often misunderstood. It’s not a volume knob but rather a sensitivity adjustment that matches your amplifier to your head unit. Here’s how to set it properly:
- Play a test tone (1kHz for full-range channels, 50Hz for subwoofer channels)
- Slowly increase the gain until you hear distortion
- Back off the gain slightly until the distortion disappears
- For a more precise adjustment, use a multimeter to measure the output voltage across the speaker terminals, aiming for a reading just below the amplifier’s maximum clean power output
Proper gain setting prevents distortion and protects your speakers from damage while ensuring you get the maximum clean power from your amplifier.
Step 3: Adjusting the Crossover Settings
Crossovers direct specific frequency ranges to the appropriate speakers, ensuring each speaker handles only the frequencies it’s designed for. To set your crossovers:
- For tweeters and small speakers, use a high-pass filter (HPF) starting at around 80-100Hz
- For subwoofers, use a low-pass filter (LPF) typically between 80-100Hz
- For mid-range speakers, you might use both HPF and LPF to create a band-pass effect
The exact crossover points depend on your specific speakers and personal preference. Start with these recommendations and fine-tune by ear.
Step 4: Setting Bass Boost and Subsonic Filter
If your amplifier has a bass boost feature, use it sparingly:
- Start with bass boost at zero
- Increase gradually while playing bass-heavy music
- Stop when you reach a satisfying level or at the first sign of distortion
For the subsonic filter (mainly for ported subwoofer enclosures):
- Set it slightly below the tuning frequency of your subwoofer box (typically 25-30Hz for most ported boxes)
- This prevents your subwoofer from trying to reproduce frequencies it physically cannot, which wastes power and can cause damage
Step 5: Fine-Tuning the Phase
Phase adjustment ensures your speakers and subwoofers work together rather than against each other:
- Play music with strong bass content
- Listen to the bass response with the phase at 0°
- Switch to 180° and listen again
- Choose the setting with the stronger, cleaner bass response
Some amplifiers offer variable phase control (0-180°), allowing for more precise adjustment.
Step 6: Balancing the System
Now that you’ve adjusted each component individually, it’s time to balance the entire system:
- Play music you’re familiar with across different genres
- Adjust the relative levels between subwoofers, mid-range, and tweeters to achieve a balanced sound
- Fine-tune the crossover points if necessary
- Make minor adjustments to the gains if certain frequencies are too prominent or too weak
This step requires careful listening and patience. Take your time and make small adjustments.
Common Mistakes to Avoid
When setting up your car amplifier, watch out for these common pitfalls:
- Setting gains too high: This is the most common mistake and leads to distortion and potential speaker damage
- Excessive bass boost: This can quickly overload your amplifier and subwoofers
- Improper crossover settings: Making tweeters handle bass or subwoofers handle midrange wastes power and reduces sound quality
- Ignoring phase settings: Incorrect phase can cause bass cancellation, where bass notes seem to disappear
- Setting everything by ear alone: While final adjustments should be made by ear, using test tones and measurement tools gives you a solid starting point
Avoiding these mistakes will help you get the most from your system while protecting your investment.
Troubleshooting Common Issues
If you’re experiencing problems after adjusting your amplifier, here are some troubleshooting tips:
Amplifier Overheating
- Check gain settings—they might be too high
- Ensure proper ventilation around the amplifier
- Verify speaker impedance matches amplifier requirements
- Make sure power and ground connections are secure and properly sized
Distorted Sound
- Reduce gain settings
- Check for clipping lights on the amplifier
- Ensure head unit volume isn’t set too high
- Turn off or reduce any bass boost
- Check speaker wires for damage
Weak Bass Response
- Check phase settings
- Verify subwoofer enclosure is appropriate for the driver
- Ensure crossover settings are appropriate
- Check subwoofer wiring polarity
Battery Drain
- Verify amplifier turns off with the vehicle
- Check for current draw using a multimeter
- Consider upgrading your charging system if necessary
Advanced Techniques for Audio Enthusiasts
If you’re looking to take your car audio system to the next level, consider these advanced techniques:
Time Alignment
Many modern head units offer time alignment, which compensates for the different distances between the listener and each speaker. This creates a more focused, centered sound stage.
Sound Deadening
Adding sound deadening material to your doors, floor, and trunk can dramatically improve sound quality by reducing resonance and outside noise.
Active Crossovers
Using active crossovers before the amplification stage allows for more precise control over frequency distribution and can improve overall system efficiency.
RTA (Real-Time Analysis)
Using a real-time analyzer app with a calibrated microphone lets you see the actual frequency response of your system, allowing for more precise adjustments.
Special Considerations for Different Amplifier Classes
Your amplifier’s class affects how you should approach the setup process:
Class A/B Amplifiers
- Typically run hotter than other classes
- Offer excellent sound quality
- May require more conservative gain settings to prevent overheating
- Usually have more straightforward adjustment processes
Class D Amplifiers
- More efficient with less heat generation
- Often used for subwoofers
- May have more sophisticated crossover options
- Can sometimes introduce switching noise that needs to be addressed
Class GH or Similar Hybrid Designs
- Combine benefits of multiple amplifier classes
- May have special features that need specific adjustment
- Often include more advanced protection circuitry
Knowing your amplifier class helps you understand its strengths, limitations, and optimal setup procedures.
Maintaining Your Settings
Once you’ve dialed in your perfect sound, maintain it with these practices:
- Write down all your settings for future reference
- Take photos of your amplifier controls
- Use the memory presets on your head unit if available
- Check connections and settings periodically, especially after any vehicle service
- Consider installing a voltage display to monitor your electrical system
These habits help ensure your carefully adjusted system stays optimized for the long term.
When to Seek Professional Help
While DIY adjustment is rewarding, sometimes professional help is beneficial:
- If you’re uncomfortable working with electrical components
- When dealing with complex active setups
- If troubleshooting efforts haven’t resolved issues
- For competition-level sound quality tuning
- When integrating with complex factory systems
Professional car audio installers have specialized tools and years of experience that can save you time and prevent costly mistakes.
Conclusion
Properly adjusting your car amplifier transforms your listening experience from ordinary to extraordinary. The process requires patience and attention to detail, but the rewards are well worth the effort. Clean, powerful, distortion-free sound makes every drive more enjoyable.
Remember that perfect settings are subjective and personal. What sounds ideal to you might not please someone else. Trust your ears and adjust your system to suit your preferences and musical tastes.
By following this guide, you’ve taken a significant step toward audio excellence in your vehicle. Your amplifier is now optimized to deliver the best possible performance, protecting your equipment while maximizing sound quality.
Are you ready to experience your music like never before? Start adjusting those amplifier settings today, and prepare to be amazed by what your system can really do!