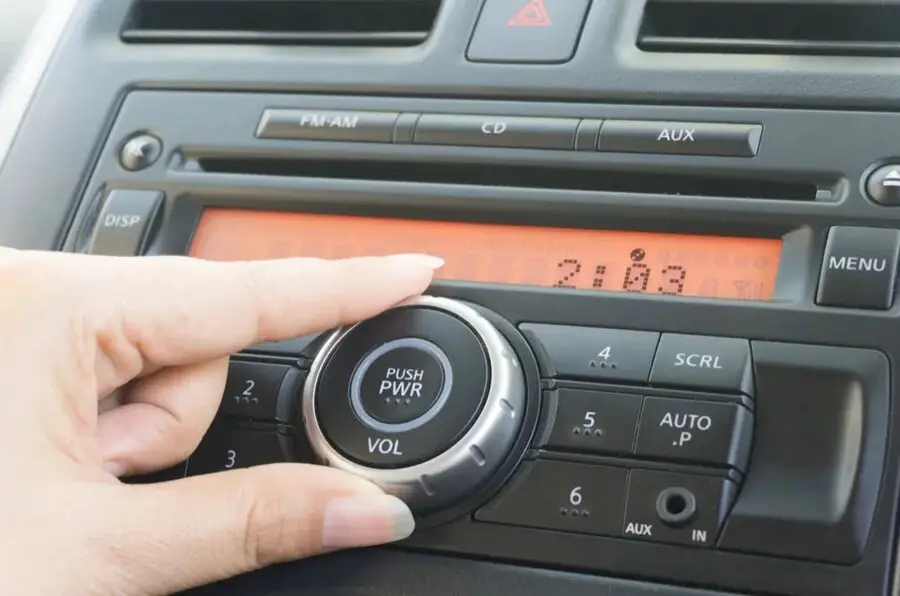
Are you tired of the bland, weak sound coming from your car’s factory radio system? You’re not alone. Many car owners want to boost their audio experience without replacing their entire head unit. The good news is you can connect an amplifier to your factory radio and dramatically improve your sound quality.
This guide walks you through the entire process of connecting an amplifier to your factory stereo system. We’ll cover everything from gathering the necessary tools to making the final connections and testing your new setup.
Contents
- Why Add an Amplifier to Your Factory Radio?
- What You’ll Need
- Step 1: Plan Your Installation
- Step 2: Disconnect the Battery
- Step 3: Install the Line Output Converter
- Step 4: Run the Power Wire
- Step 5: Install the Fuse Holder
- Step 6: Ground the Amplifier
- Step 7: Connect the Remote Turn-On Wire
- Step 8: Mount the Amplifier
- Step 9: Connect the Audio Cables
- Step 10: Connect the Speaker Wires
- Step 11: Make Final Connections and Test
- Step 12: Tune Your Amplifier
- Step 13: Secure and Clean Up
- Troubleshooting Common Issues
- Final Thoughts
Why Add an Amplifier to Your Factory Radio?
Factory car audio systems often lack power and clarity. Adding an amplifier offers several benefits:
- Enhanced sound quality with clearer highs and deeper bass
- Increased volume without distortion
- Ability to power better speakers or a subwoofer
- Customized sound through additional audio controls
Let’s dive into the step-by-step process of adding that much-needed power to your factory system.
What You’ll Need
Before starting this project, gather these essential tools and materials:
- Amplifier kit (includes power wire, RCA cables, and remote wire)
- Line output converter (LOC)
- Wire strippers and crimpers
- Socket set and screwdrivers
- Electrical tape
- Wire ties
- Drill with bits (optional)
- Digital multimeter
- Panel removal tools
You might also need vehicle-specific harnesses or adapters depending on your car model. Check your vehicle’s specifications before purchasing equipment.
Step 1: Plan Your Installation
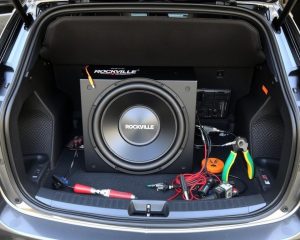
A successful amplifier installation starts with proper planning. First, decide where to mount your amplifier. Popular locations include:
- Under a seat
- In the trunk
- Against the rear wall of the cab (in trucks)
Choose a spot that provides adequate ventilation, as amplifiers generate heat during operation. Make sure the location allows enough space for all connections and cable routing.
Next, plan your wiring routes. You’ll need to run:
- Power wire from the battery to the amplifier
- Ground wire from the amplifier to the chassis
- Speaker wires from the factory radio to the line output converter
- RCA cables from the converter to the amplifier
- Remote turn-on wire from the radio to the amplifier
Sketch a basic diagram if needed. This planning stage helps prevent mistakes and ensures a cleaner installation.
Step 2: Disconnect the Battery
Safety first! Before working on any car electrical system, disconnect the negative terminal of your battery. This prevents short circuits and potential damage to your vehicle’s electronics.
Use the appropriate wrench to loosen the negative battery terminal clamp and move it away from the terminal. Secure it so it doesn’t accidentally make contact during your installation.
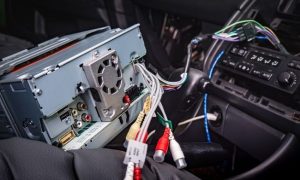
Step 3: Install the Line Output Converter
Since factory radios typically don’t have RCA outputs, you’ll need a line output converter (LOC). This device converts speaker-level signals to low-level signals that your amplifier can use.
To install the LOC:
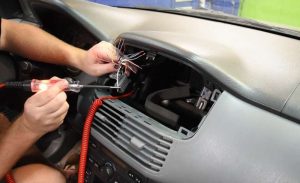
- Remove your factory radio. This usually involves removing trim panels and unscrewing mounting brackets. Vehicle-specific removal instructions can be found online for your exact make and model.
- Locate the speaker wires behind the radio. Factory wiring often follows a standard color code, but it’s best to consult your vehicle’s wiring diagram.
- Connect the input wires of the LOC to the corresponding speaker wires. You’ll typically connect to the front left and right speaker wires for a basic setup.
- Mount the LOC securely near the radio using zip ties or double-sided tape.
- Run the RCA cables from the LOC to your amplifier location. Route these cables along the opposite side of the car from the power wire to prevent interference.
Step 4: Run the Power Wire
The power wire connects your amplifier directly to the battery. This is one of the most crucial steps in the installation process.
- Choose an appropriate gauge wire based on your amplifier’s power requirements. Most amplifier kits include the correct size.
- Find a suitable route from the battery to the amplifier location. Often, you can run the wire through existing grommets in the firewall.
- If needed, drill a small hole in the firewall, but be extremely careful to avoid hitting any components on either side. Install a rubber grommet in the hole to protect the wire.
- Run the power wire through the firewall into the passenger compartment, then route it under trim panels or carpeting to the amplifier location.
- Leave enough slack at both ends for connections, but keep the wire route tidy.
- Do not connect the wire to the battery yet—this happens in the final steps.
Step 5: Install the Fuse Holder
A fuse holder is crucial for safety. It prevents fire hazards by breaking the circuit if too much current flows through the power wire.
- Install the fuse holder within 18 inches of the battery. This ensures that the fuse will blow before the wire can overheat if a short circuit occurs.
- Cut the power wire and connect each end to the fuse holder. Use crimp connectors or solder the connections for reliability.
- Wrap the connections with electrical tape or heat shrink tubing.
- Do not insert the fuse yet—wait until all connections are complete.
Step 6: Ground the Amplifier
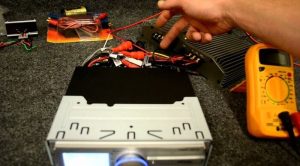
A solid ground connection is essential for proper amplifier operation and to prevent noise in your audio system.
- Find a suitable grounding point on the vehicle chassis near the amplifier. Look for clean, unpainted metal.
- If the spot has paint, sand it down to bare metal to ensure good electrical contact.
- Drill a hole for the ground screw if necessary.
- Attach the ground wire from the amplifier to this point using a ring terminal and secure it with a screw or bolt.
- Keep the ground wire as short as possible—under 18 inches is ideal.
Test the ground with a multimeter to ensure resistance is minimal between the ground point and the negative battery terminal.
Step 7: Connect the Remote Turn-On Wire
The remote wire tells your amplifier when to turn on and off with the radio.
- Find the remote turn-on wire from your amplifier wiring kit. It’s typically blue or blue with a white stripe.
- At the radio, locate a wire that provides 12 volts only when the radio is on. Many factory radios have an accessory wire or dedicated remote output.
- Connect the remote wire to this power source using a crimp connector or solder.
- Run the remote wire alongside the RCA cables to the amplifier location.
Step 8: Mount the Amplifier
Now it’s time to secure your amplifier in its planned location.
- Position the amplifier where you’ve planned to install it.
- Mark the mounting holes with a pencil or marker.
- If mounting to carpeted surfaces, you might need to pre-drill holes for the screws.
- Secure the amplifier using the provided screws or brackets.
- Make sure the amplifier has enough clearance around it for airflow and cable connections.
Step 9: Connect the Audio Cables
With your amplifier mounted, it’s time to connect the audio signal cables.
- Connect the RCA cables from the line output converter to the input jacks on the amplifier.
- Match left and right channels correctly—they’re typically color-coded (red for right, white for left).
- Secure the cables to prevent them from rattling or becoming disconnected.
If you’re adding a subwoofer, connect it to the dedicated subwoofer output channels if your amplifier has them.
Step 10: Connect the Speaker Wires
The final wiring step is connecting your amplifier to your speakers.
For factory speakers:
- Run speaker wires from the amplifier output terminals to your factory speaker locations.
- You might need to splice into existing speaker wires or replace them entirely.
- Make sure to match polarity (positive to positive, negative to negative) on all connections.
For new speakers or subwoofers:
- Connect the speaker wires directly from the amplifier to the new speakers.
- Again, maintain consistent polarity on all connections.
- Secure all wires to prevent rattling or disconnection.
Step 11: Make Final Connections and Test
You’re almost done! Now it’s time to complete the circuit and test your work.
- Double-check all connections for proper polarity and secure attachment.
- Insert the fuse into the fuse holder near the battery.
- Reconnect the negative battery terminal.
- Turn on your car (without starting the engine) and power up the radio at low volume.
- Check that the amplifier powers on—most have a status LED that lights up.
- Listen for sound from all speakers and check for any unusual noise.
- Gradually increase the volume to test the system’s performance.
If everything works correctly, congratulations! If not, troubleshoot by checking your connections and settings.
Step 12: Tune Your Amplifier
Now that your amplifier is working, it’s time to adjust the settings for optimal sound.
- Set the input gain properly. Start with the gain at minimum, play music at about 75% volume, and slowly increase the gain until you hear distortion, then back it off slightly.
- Adjust crossover settings to direct the right frequencies to the right speakers. For full-range speakers, a high-pass filter around 80Hz helps prevent distortion.
- If you have a subwoofer, set the low-pass filter to around 80-100Hz to start.
- Fine-tune the bass boost if your amplifier has this feature, but use it sparingly to avoid distortion.
Take time with this step—proper tuning makes a huge difference in sound quality.
Step 13: Secure and Clean Up
Once everything is working properly:
- Use wire ties to bundle and secure all cables.
- Ensure no wires are pinched or stretched.
- Replace any vehicle panels or trim pieces you removed during installation.
- Make sure the amplifier has proper ventilation.
A clean installation not only looks better but prevents rattles and potential wire damage.
Troubleshooting Common Issues
If you encounter problems with your new amplifier setup, check these common issues:
- No power: Check the fuse, power wire connections, and remote wire.
- No sound: Verify RCA connections, speaker wire connections, and amplifier settings.
- Distorted sound: Lower the gain setting or check for loose connections.
- Engine noise (whining): Improve the ground connection or relocate RCA cables away from power wires.
- Amplifier overheating: Ensure proper ventilation or consider a cooling fan.
Final Thoughts
Connecting an amplifier to your factory radio transforms your listening experience without replacing your head unit. While this project requires some technical knowledge, following these steps carefully results in a successful installation.
Remember that every vehicle is different, so some steps might need adjustment for your specific car model. When in doubt, consult your vehicle’s wiring diagrams or seek professional help.
Enjoy your enhanced audio system! The improved sound quality makes every drive more enjoyable, whether you’re tackling the daily commute or heading out on a road trip.