Factory car stereos often lack the power needed to drive high-quality speakers or subwoofers. Adding an aftermarket amplifier can dramatically improve your audio experience without replacing your entire head unit. This guide walks you through the process of connecting an amplifier to your factory stereo, helping you achieve better sound quality while keeping your vehicle’s original look and features.
Contents
- Why Add an Amplifier to Your Factory Stereo?
- What You’ll Need
- Understanding Your Factory Stereo’s Outputs
- Step-by-Step Installation Guide
- Troubleshooting Common Issues
- Advanced Tips for Better Sound
- Maintaining Your Audio System
- Factory Stereo Integration Products
- When to Consider Professional Installation
- Conclusion
- FAQs About Connecting Amplifiers to Factory Stereos
Why Add an Amplifier to Your Factory Stereo?
Many car enthusiasts want better sound but don’t want to replace their factory stereo. Here’s why:
- Factory stereos integrate perfectly with your car’s dashboard
- Modern factory systems often include touchscreens and vehicle controls
- Factory stereos maintain the original look of your interior
- Replacement can be expensive and complex, especially in newer vehicles
An external amplifier solves this problem by boosting your audio signal while letting you keep your factory head unit.
What You’ll Need
Before starting, gather these essential tools and components:
- Aftermarket amplifier
- Wiring kit (power cables, RCA cables, speaker wire)
- Line output converter (if your factory stereo lacks preamp outputs)
- Distribution blocks (if adding multiple amplifiers)
- Wire strippers and crimpers
- Screwdrivers and basic hand tools
- Digital multimeter
- Zip ties and electrical tape
- Mounting hardware for the amplifier
Understanding Your Factory Stereo’s Outputs
Factory stereos typically have one of three output types:
1. Speaker-Level Outputs
Most factory stereos only have speaker-level outputs. These are high-voltage signals meant to drive speakers directly. An amplifier needs lower-voltage inputs, so you’ll need a line output converter (LOC) to step down the voltage.
2. Preamp (RCA) Outputs
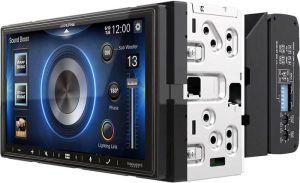
Some premium factory stereos include RCA outputs, making connection much easier. Check the back of your head unit for red and white RCA jacks. If present, you can connect these directly to your amplifier’s input.
3. Digital Outputs
Higher-end factory systems might have digital outputs. These require a digital signal processor (DSP) to convert the signal before connecting to an amplifier.
Step-by-Step Installation Guide
Step 1: Plan Your Setup
Before touching any wires, plan your amplifier placement. Good locations include:
- Under seats (if there’s enough clearance)
- In the trunk against the back seat
- On the side walls of the trunk
- In a custom-built enclosure
Consider ventilation, cable routing, and accessibility. Your amplifier needs airflow to prevent overheating.
Step 2: Disconnect the Battery
Safety first! Disconnect the negative terminal of your car battery before any electrical work. This prevents shorts and potential damage to your vehicle’s electrical system.
Step 3: Run the Power Cable
The power cable needs to run from your battery to the amplifier:
- Find a suitable grommet in the firewall to pass the cable through
- Route the cable along the side of the vehicle, under trim panels
- Keep power cables away from RCA and speaker wires to prevent interference
- Install an inline fuse within 18 inches of the battery connection
The fuse rating should match your amplifier’s requirements. This protects against electrical fires if the cable gets damaged.
Step 4: Connect the Ground Wire
A proper ground connection is vital for amplifier performance:
- Keep the ground wire short (less than 3 feet)
- Connect to clean, bare metal on the car’s chassis
- Remove paint or coatings at the connection point
- Use a star washer to ensure solid contact
- Tighten securely to prevent ground loop noise
Many amplifier problems stem from poor ground connections. Take your time with this step.
Step 5: Install the Remote Turn-On Wire
The remote wire tells your amplifier when to turn on and off:
- For factory stereos with a remote wire output, connect directly
- If no remote wire exists, tap into a switched power source like the radio’s power antenna wire
- Alternatively, use a circuit that’s only powered when the ignition is on
This wire prevents your amplifier from draining the battery when the car is off.
Step 6: Connect Audio Signals
Depending on your factory stereo’s outputs, follow one of these methods:
Method A: Using a Line Output Converter (Most Common)
If your factory stereo only has speaker-level outputs:
- Identify the speaker wires behind your stereo
- Connect these wires to the input side of your line output converter
- Connect RCA cables from the LOC output to your amplifier’s input
Line output converters come in basic and advanced models. Basic LOCs simply convert the signal, while advanced models can adjust gain and frequency response.
Method B: Direct RCA Connection
If your factory stereo has preamp outputs:
- Connect RCA cables directly from your head unit to the amplifier inputs
- Ensure the cables are properly shielded and kept away from power wires
Method C: Digital Signal Processor
For complex factory systems or audiophile-grade installations:
- Connect the factory outputs to the DSP inputs
- Configure the DSP according to your preferences
- Connect the DSP outputs to your amplifier
A DSP gives you maximum control over your audio signal but requires more technical knowledge.
Step 7: Connect Speaker Wires
Now connect your amplifier to your speakers:
- Run speaker wires from the amplifier to each speaker location
- Match positive and negative terminals correctly
- Use appropriate gauge wire for the power handling of your system
- Secure all connections to prevent them from coming loose
For subwoofers, ensure your wiring matches the subwoofer’s impedance requirements.
Step 8: Adjust Amplifier Settings
Before finalizing your installation, adjust your amplifier settings:
- Gain control: Start low and adjust slowly to prevent distortion
- Crossover settings: Set high-pass filters for main speakers and low-pass for subwoofers
- Bass boost: Use sparingly to avoid overdriving your subwoofers
- Subsonic filter: Enable for ported subwoofer enclosures
Take time to listen and make adjustments for your specific audio preferences.
Troubleshooting Common Issues
Even with careful installation, you might encounter these common problems:
Engine Noise in the Audio
If you hear a whining noise that changes with engine RPM:
- Check and improve the ground connection
- Install a ground loop isolator
- Relocate audio cables away from power wires
- Add a noise filter to the power line
Low Output or Poor Sound Quality
If your system sounds weak or distorted:
- Verify all connections are secure
- Check that the LOC is working properly
- Adjust gain settings on both the LOC and amplifier
- Ensure speaker wires aren’t shorted or reversed
Amplifier Goes into Protection Mode
If your amplifier shuts down:
- Check for speaker wire shorts
- Verify the amplifier has adequate ventilation
- Confirm your power and ground connections are solid
- Ensure your factory head unit is providing a clean signal
Advanced Tips for Better Sound
Once your basic installation is complete, try these techniques for superior audio:
Sound Deadening
Adding sound deadening material to your doors and trunk can:
- Reduce road noise
- Improve bass response
- Prevent panel vibrations
- Create a better listening environment
Materials like Dynamat or Noico can make a huge difference in sound quality.
Speaker Upgrades
Your factory speakers might be the weakest link in your system:
- Replace factory speakers with higher quality components
- Add component speakers with separate tweeters for better highs
- Ensure new speakers match your amplifier’s power output
- Consider speaker baffles or adapters for better mounting
Subwoofer Integration
A subwoofer adds low-frequency impact that factory systems lack:
- Choose a subwoofer that matches your musical preferences
- Select an enclosure type (sealed for accuracy, ported for output)
- Set crossover points to blend seamlessly with main speakers
- Adjust phase settings to ensure bass sounds like it’s coming from the front
Maintaining Your Audio System
Keep your amplified system performing well with these maintenance tips:
- Check and clean connections annually
- Inspect wiring for wear or damage
- Listen for changes in sound quality that might indicate problems
- Keep the amplifier area clear of objects that could block airflow
Factory Stereo Integration Products
These specialized products can make factory integration easier:
- JL Audio FiX™ processors: Correct factory EQ curves and processing
- AudioControl LC2i: Popular LOC with AccuBASS correction
- PAC Audio integration adapters: Vehicle-specific harnesses for clean installation
- Kicker KEY amplifiers: Include automatic EQ and time alignment
When to Consider Professional Installation
While DIY installation is rewarding, consider professional help if:
- Your vehicle has a complex factory audio system
- You’re uncomfortable working with vehicle wiring
- Your installation requires custom fabrication
- You want a warranty on the installation work
Professional installers have specialized tools and vehicle-specific knowledge that can save time and prevent costly mistakes.
Conclusion
Adding an amplifier to your factory stereo strikes the perfect balance between sound quality and convenience. You keep your integrated controls and factory look while gaining substantial audio improvements. Whether you’re seeking louder volume, clearer sound, or deeper bass, an external amplifier delivers results that a factory head unit alone simply cannot achieve.
With patience and attention to detail, you can transform your driving experience with a sound system that brings your music to life. The enhanced clarity, dynamics, and power will make every drive more enjoyable, whether you’re commuting to work or taking a cross-country road trip.
FAQs About Connecting Amplifiers to Factory Stereos
Can I add an amplifier without replacing my factory radio? Yes, you can keep your factory radio and add an amplifier using a line output converter or signal processor.
Will adding an amplifier void my vehicle warranty? A properly installed amplifier shouldn’t affect your vehicle warranty. The Magnuson-Moss Warranty Act protects consumers from warranty denials unless the modification caused the problem.
How much power do I need from my amplifier? For most upgrades, an amplifier providing 50-75 watts RMS per channel for speakers and 300-500 watts RMS for a subwoofer is sufficient.
Can I use the factory amplifier with aftermarket speakers? Yes, but you’ll be limited by the factory amp’s power output and sound quality. Aftermarket speakers typically perform better with an aftermarket amplifier.
Do I need a capacitor with my amplifier? Capacitors help stabilize voltage during bass peaks. They’re useful in systems with powerful subwoofers, but aren’t necessary for most modest upgrades.