Connecting a subwoofer to a receiver without a dedicated subwoofer output can feel like a daunting task, especially if you’re new to home audio setups. Many older receivers or budget models lack a specific subwoofer output (often labeled as “Sub Out” or “LFE”). However, you can still achieve deep, powerful bass in your audio system with a few creative workarounds. This guide walks you through the process step by step, ensuring you get that rich, immersive sound without needing to upgrade your receiver. By the end, you’ll have a clear understanding of how to integrate a subwoofer into your setup, troubleshoot common issues, and optimize your audio experience.
Contents
- Why Connect a Subwoofer to a Receiver?
- What You’ll Need
- Method 1: Using Speaker-Level Inputs
- Method 2: Using a Y-Adapter with Pre-Outs
- Method 3: Using a High-to-Low Level Converter
- Method 4: Connecting a Passive Subwoofer with an External Amplifier
- Optimizing Your Subwoofer Setup
- Troubleshooting Common Issues
- Benefits of Adding a Subwoofer
- Choosing the Right Subwoofer
- FAQs
- Final Thoughts
Why Connect a Subwoofer to a Receiver?
A subwoofer enhances your audio by delivering low-frequency sounds, commonly referred to as bass. These frequencies add depth to music, movies, and gaming, creating a more cinematic and engaging experience. Without a subwoofer, your speakers may struggle to reproduce these low-end sounds, resulting in a flat or underwhelming audio performance.
If your receiver lacks a subwoofer output, you might assume adding a subwoofer is impossible. Fortunately, several methods allow you to bypass this limitation. These solutions work with both active (powered) and passive (unpowered) subwoofers, depending on your equipment. Let’s dive into the tools you’ll need and the steps to make it happen.
What You’ll Need
Before starting, gather the necessary equipment. The exact items depend on your setup and the method you choose, but here’s a general list:
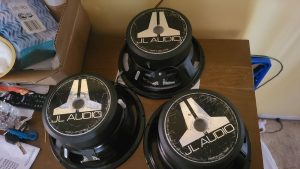
- Subwoofer: Active subwoofers (with built-in amplifiers) are easier to connect, while passive subwoofers require an external amplifier.
- Receiver: Your existing receiver without a subwoofer output.
- Speaker Cables: High-quality cables for connecting speakers and the subwoofer.
- RCA Cables: Useful for certain connection methods, especially with active subwoofers.
- Y-Adapter/Splitter: This splits a single RCA output into two for connecting to the subwoofer.
- External Amplifier (Optional): Needed for passive subwoofers.
- Speaker Wire Stripper or Scissors: For preparing cables.
- High-to-Low Level Converter (Optional): Converts speaker-level signals to line-level signals for some setups.
Having these tools ready streamlines the process. Now, let’s explore the methods to connect your subwoofer.
Method 1: Using Speaker-Level Inputs
Most active subwoofers come with speaker-level inputs, which allow you to connect them directly to your receiver’s speaker outputs. This method is ideal for receivers without a dedicated subwoofer output because it uses the same terminals designed for your main speakers.
Step-by-Step Guide
- Power Off Your Equipment: Always turn off and unplug your receiver and subwoofer to avoid electrical shocks or damage.
- Locate Speaker Outputs on the Receiver: Find the speaker output terminals on the back of your receiver. These are typically labeled as “Front Left,” “Front Right,” or “Main Speakers.”
- Connect Speaker Wires to the Receiver: Take two sets of speaker wires. Connect one end of each wire to the receiver’s left and right speaker output terminals. Ensure the positive (+) and negative (-) terminals match.
- Route Wires to the Subwoofer: Connect the other end of the speaker wires to the subwoofer’s speaker-level input terminals. Again, match the positive and negative connections.
- Connect Main Speakers to the Subwoofer (Optional): Some subwoofers have speaker-level output terminals. If yours does, run additional speaker wires from these outputs to your main speakers. This setup allows the subwoofer to filter low frequencies and pass higher frequencies to your speakers.
- Adjust Subwoofer Settings: Turn on the subwoofer and adjust its crossover frequency (usually 80-120 Hz) and volume to blend with your main speakers.
- Test the Setup: Power on your receiver, play audio, and listen for bass. Tweak the subwoofer’s settings as needed for balanced sound.
Why This Works
Speaker-level inputs on a subwoofer accept the amplified signal from your receiver, which the subwoofer’s built-in amplifier processes to produce bass. This method doesn’t require a dedicated subwoofer output, making it a versatile solution for older or budget receivers.
Tips for Success
- Use high-quality speaker wires to minimize signal loss.
- Double-check polarity (+/-) to ensure proper sound reproduction.
- If the bass sounds weak, adjust the crossover frequency or increase the subwoofer’s volume.
Method 2: Using a Y-Adapter with Pre-Outs
If your receiver has pre-out jacks (labeled “Pre-Out” or “Line Out”), you can use them to connect an active subwoofer. Pre-outs send an unamplified signal, which is perfect for subwoofers with built-in amplifiers. A Y-adapter helps split the signal for compatibility.
Step-by-Step Guide
- Check for Pre-Out Jacks: Look at the back of your receiver for RCA jacks labeled “Pre-Out” or “Line Out.” These are typically found on higher-end or mid-range receivers.
- Get a Y-Adapter: Purchase an RCA Y-adapter with one male end and two female ends.
- Connect the Y-Adapter: Plug the male end of the Y-adapter into the receiver’s left or right pre-out jack. If your receiver has a stereo pre-out, you can use both channels with two Y-adapters.
- Attach RCA Cables: Connect an RCA cable from the Y-adapter’s female ends to the subwoofer’s left and right RCA inputs (or LFE input if available).
- Configure Receiver Settings: Access your receiver’s setup menu and enable the subwoofer output if possible. Set the crossover frequency to around 80 Hz.
- Fine-Tune the Subwoofer: Adjust the subwoofer’s volume and phase settings to match your main speakers.
- Test the Audio: Play music or a movie to confirm the subwoofer produces deep bass. Make adjustments for optimal sound.
Why This Works
Pre-out jacks provide a clean, unamplified signal that active subwoofers can process. The Y-adapter ensures the subwoofer receives a strong signal, even if your receiver has only one pre-out jack.
Tips for Success
- Use shielded RCA cables to prevent interference.
- If your receiver lacks a subwoofer setting, rely on the subwoofer’s crossover to filter frequencies.
- Experiment with phase settings to avoid bass cancellation.
Method 3: Using a High-to-Low Level Converter
For receivers without pre-outs or subwoofer outputs, a high-to-low level converter offers a reliable solution. This device converts speaker-level signals (high-level) from your receiver into line-level signals (low-level) that an active subwoofer can use.
Step-by-Step Guide
- Purchase a High-to-Low Level Converter: Choose a converter with speaker wire inputs and RCA outputs.
- Turn Off All Equipment: Unplug your receiver and subwoofer for safety.
- Connect Converter to Receiver: Attach speaker wires from the receiver’s speaker output terminals to the converter’s input terminals. Match positive and negative connections.
- Connect Converter to Subwoofer: Use an RCA cable to connect the converter’s RCA outputs to the subwoofer’s RCA or LFE input.
- Secure Connections: Ensure all cables are firmly connected to avoid signal loss.
- Adjust Subwoofer Settings: Set the subwoofer’s crossover to 80-120 Hz and adjust the volume.
- Test the System: Play audio and listen for bass. Fine-tune the converter and subwoofer settings as needed.
Why This Works
The high-to-low level converter bridges the gap between your receiver’s speaker outputs and the subwoofer’s line-level inputs. It ensures the subwoofer receives a compatible signal without requiring a dedicated subwoofer output.
Tips for Success
- Choose a converter with adjustable output levels for better control.
- Keep cable lengths short to reduce signal degradation.
- If the bass sounds distorted, check the converter’s settings or lower the receiver’s volume.
Method 4: Connecting a Passive Subwoofer with an External Amplifier
If you have a passive subwoofer, you’ll need an external amplifier to power it. This method is slightly more complex but works well for receivers without subwoofer outputs.
Step-by-Step Guide
- Select an Amplifier: Choose a dedicated subwoofer amplifier or a multi-channel amplifier with enough power for your subwoofer.
- Connect Receiver to Amplifier: Use RCA cables to connect the receiver’s pre-out jacks (if available) to the amplifier’s input. If your receiver lacks pre-outs, use a high-to-low level converter as described in Method 3.
- Connect Amplifier to Subwoofer: Run speaker wires from the amplifier’s output to the subwoofer’s input terminals. Match positive and negative connections.
- Configure Amplifier Settings: Set the amplifier’s crossover frequency to 80-120 Hz and adjust the gain (volume) to match your speakers.
- Test the Setup: Play audio and listen for bass. Adjust the amplifier and subwoofer settings for a balanced sound.
Why This Works
A passive subwoofer relies on an external amplifier to provide power. By connecting the amplifier to your receiver, you create a pathway for the subwoofer to receive and reproduce low-frequency signals.
Tips for Success
- Ensure the amplifier’s power rating matches or exceeds the subwoofer’s requirements.
- Use heavy-gauge speaker wires for high-power setups.
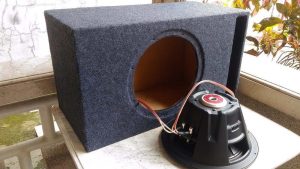
- Place the subwoofer in a corner or against a wall to enhance bass output.
Optimizing Your Subwoofer Setup
Once your subwoofer is connected, take time to optimize its performance. Proper placement and settings make a significant difference in sound quality.
Subwoofer Placement
- Corner Placement: Positioning the subwoofer in a room corner amplifies bass but may sound boomy. Test this spot first.
- Near the Front Speakers: Placing the subwoofer near your main speakers creates a cohesive soundstage.
- Avoid Center Placement: Don’t place the subwoofer in the middle of the room, as it can weaken bass response.
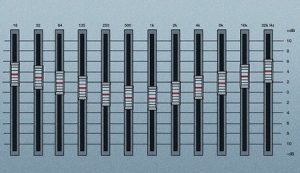
Adjusting Settings
- Crossover Frequency: Set the crossover to 80 Hz for most setups. This ensures the subwoofer handles low frequencies while your speakers focus on mids and highs.
- Phase Adjustment: If the bass sounds hollow, toggle the phase switch (0 or 180 degrees) to align the subwoofer with your speakers.
- Volume Balancing: Adjust the subwoofer’s volume so the bass complements, not overpowers, your speakers.
Room Acoustics
- Add Rugs or Curtains: Soft furnishings reduce echo and improve bass clarity.
- Use Bass Traps: These absorb excess low-frequency energy in small rooms.
- Experiment with Positioning: Move the subwoofer slightly to find the “sweet spot” for bass.
Troubleshooting Common Issues
Even with a proper setup, you may encounter issues. Here are solutions to common problems:
- No Bass Output: Check all connections, ensure the subwoofer is powered on, and verify the receiver’s settings.
- Weak Bass: Increase the subwoofer’s volume, adjust the crossover, or move the subwoofer to a corner.
- Distorted Sound: Lower the receiver’s volume or check for loose cables.
- Humming Noise: Use shielded cables or a ground loop isolator to eliminate interference.
Benefits of Adding a Subwoofer
Integrating a subwoofer into your audio system offers several advantages:
- Enhanced Audio Quality: Deep bass adds realism to music and movies.
- Immersive Home Theater: A subwoofer makes explosions and soundtracks more impactful.
- Relieves Main Speakers: By handling low frequencies, the subwoofer allows your speakers to focus on mids and highs, reducing distortion.
- Customizable Sound: Adjustable settings let you tailor the bass to your preferences.
Choosing the Right Subwoofer
If you’re still shopping for a subwoofer, consider these factors:
- Active vs. Passive: Active subwoofers are easier to set up, while passive models offer flexibility with external amplifiers.
- Size: Larger subwoofers (10-12 inches) produce deeper bass but require more space.
- Power Rating: Match the subwoofer’s power to your room size and listening habits.
- Features: Look for adjustable crossovers, phase controls, and multiple input options.
FAQs
Can I connect a subwoofer to any receiver?
Yes, even receivers without a subwoofer output can connect to a subwoofer using speaker-level inputs, pre-outs, or a high-to-low level converter.
Do I need an expensive subwoofer?
Not necessarily. Budget-friendly subwoofers can deliver great bass for small to medium rooms. Focus on compatibility with your receiver.
How do I know if my subwoofer is working?
Play bass-heavy audio and feel for vibrations from the subwoofer. If there’s no output, check connections and settings.
Can I use multiple subwoofers?
Yes, but it requires additional wiring and calibration. Use Y-adapters or a dedicated subwoofer amplifier for multiple units.
Final Thoughts
Connecting a subwoofer to a receiver without a subwoofer output is entirely possible with the right tools and methods. Whether you use speaker-level inputs, pre-outs, a high-to-low level converter, or an external amplifier, each approach delivers powerful bass to elevate your audio experience. Take time to experiment with placement and settings to achieve the best sound for your room. With this guide, you’re equipped to transform your home audio system into a bass-rich powerhouse, perfect for music, movies, and gaming.