A blown car speaker can ruin your driving experience, turning your favorite tunes into distorted noise or eerie silence. You might notice crackling sounds, buzzing, or a complete lack of audio from one or more speakers. Instead of rushing to replace the speaker, you can often fix the issue yourself with some basic tools and a bit of patience. This guide walks you through the process of diagnosing and repairing a blown car speaker, helping you restore crystal-clear sound to your vehicle. By following these steps, you’ll save money and gain a deeper understanding of your car’s audio system.
Contents
- What Does a Blown Speaker Sound Like?
- Common Causes of Blown Car Speakers
- Tools and Materials You’ll Need
- Step 1: Diagnose the Problem
- Step 2: Remove the Speaker
- Step 3: Inspect and Clean the Speaker
- Step 4: Repair or Replace Damaged Components
- Step 5: Test the Repaired Speaker
- Step 6: Reinstall the Speaker
- When to Replace Instead of Repair
- Tips to Prevent Blown Speakers
- Why Fixing Your Speaker Matters
- Final Thoughts
What Does a Blown Speaker Sound Like?
Before diving into repairs, you need to confirm that your speaker is indeed blown. A blown speaker typically produces distorted audio, such as hissing, crackling, or buzzing, especially when you play music at moderate volumes. In some cases, the speaker may fail to produce any sound at all. You might also notice a lack of bass, treble, or mid-range tones, depending on the damage. To pinpoint the faulty speaker, adjust your car stereo’s balance and fade settings to isolate each speaker. Play a familiar song from a CD or MP3 player to avoid radio static, which can mask the issue. If you hear rattling or no sound from a specific speaker, it’s likely blown and needs attention.
Common Causes of Blown Car Speakers
Understanding why speakers blow out helps prevent future issues. One primary cause is playing music at excessively high volumes for prolonged periods. This puts stress on the speaker’s components, particularly the voice coil and cone, leading to tears or burns. Another culprit is overpowering the speaker with an amplifier that delivers more energy than the speaker can handle. Physical damage, such as impacts from objects in the car or improper installation, can also harm the speaker. Over time, wear and tear degrades materials like the cone and surround, making older speakers more susceptible to failure. By identifying the cause, you can take steps to protect your audio system after repairs.
Tools and Materials You’ll Need
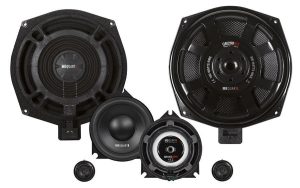
To fix a blown car speaker, gather the right tools and materials. You’ll need a screwdriver set to remove panels and screws, a multimeter to test electrical connections, and a 9-volt battery for quick speaker tests. For repairs, have speaker repair glue, a recone kit, or replacement components like a voice coil or diaphragm on hand. A soft cloth and compressed air help clean dust from the speaker. If you’re replacing parts, ensure they match your speaker’s specifications, such as size and impedance. Having these items ready streamlines the process and ensures you don’t damage other components during the repair.
Step 1: Diagnose the Problem
Start by confirming which speaker is blown. Turn on your car stereo and play a familiar track at a low to medium volume. Use the balance and fade controls to direct sound to each speaker individually. Listen for distortion, rattling, or silence. If you suspect a specific speaker, gently touch the cone to feel for vibrations. A lack of vibration suggests a damaged voice coil or wiring issue. For a more precise diagnosis, use a multimeter to check the speaker’s impedance. A reading of infinity or no continuity indicates a blown speaker. This step helps you focus your repair efforts on the correct component.
Step 2: Remove the Speaker
Once you’ve identified the faulty speaker, remove it from your car. Disconnect the car battery to avoid electrical shocks. Use a screwdriver to remove the door panel, dashboard, or other covering that houses the speaker. Be gentle to avoid damaging the panel or surrounding components. Unplug the speaker’s wiring harness carefully, noting the positive and negative connections. Inspect the speaker for visible damage, such as tears in the cone or a deteriorated surround. If the damage is minor, like a small tear, you may be able to repair it. Severe damage, such as a burnt voice coil, may require replacement parts.
Step 3: Inspect and Clean the Speaker
With the speaker removed, examine its components closely. Look for tears, holes, or dents in the cone, as these can cause distortion. Check the surround, the flexible ring around the cone, for signs of rot or detachment. Dust and debris can also affect sound quality, so use a soft cloth and compressed air to clean the speaker’s surface. If the voice coil appears melted or burnt, it’s likely the source of the problem. For minor cone tears, you can apply speaker repair glue to seal them. Clean the area around the tear with a cotton swab dipped in rubbing alcohol before applying the glue for a secure bond.
Step 4: Repair or Replace Damaged Components
If the damage is limited to the cone or surround, a repair kit can restore the speaker’s functionality. For a torn cone, cut a piece of thin paper towel to match the tear’s size. Apply a small amount of speaker repair glue to the paper and press it over the tear, holding it in place until it dries. For a damaged surround, carefully remove the old one with a sharp knife and glue a new surround in its place. If the voice coil is damaged, replace it using a recone kit. This involves removing the old cone, voice coil, and spider, then installing new components. Ensure all parts are aligned and securely glued to avoid further issues.
Step 5: Test the Repaired Speaker
After repairing or replacing components, test the speaker before reinstalling it. Connect the speaker to a known working audio source, such as a portable stereo, and play music at a low volume. Listen for clear sound without distortion. You can also use a 9-volt battery to test the speaker by briefly touching the positive and negative wires to the battery terminals. A slight pop or cone movement indicates the speaker is functional. If the sound is still distorted or absent, double-check your repairs or consider replacing the speaker entirely. Testing ensures you’ve fixed the issue before reassembling your car’s interior.
Step 6: Reinstall the Speaker
If the speaker passes the test, reinstall it in your car. Reconnect the wiring harness, ensuring the positive and negative terminals match. Secure the speaker to its mounting bracket with screws, taking care not to overtighten them. Reattach the door panel or covering, making sure all clips and screws are in place. Reconnect the car battery and turn on the stereo to verify the speaker’s performance. Play music at varying volumes to confirm the repair holds up. If the sound is clear and balanced, you’ve successfully fixed your blown speaker.
When to Replace Instead of Repair
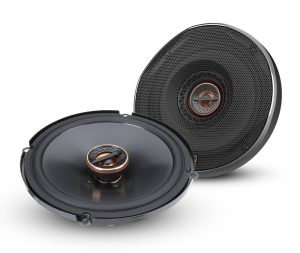
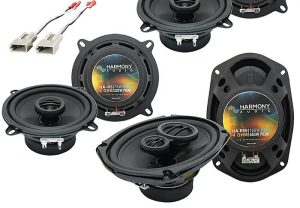
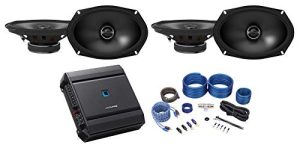
Sometimes, repairing a blown speaker isn’t worth the effort. If the voice coil is severely damaged or the speaker is old and degraded, replacement may be more cost-effective. High-quality aftermarket speakers, like those from JBL or Pioneer, offer improved sound and durability compared to factory units. When choosing a replacement, match the speaker’s size, impedance, and power rating to your car’s audio system. Replacing a speaker involves the same removal and installation steps, but you won’t need to repair components. Consider upgrading your entire audio system if multiple speakers are failing.
Tips to Prevent Blown Speakers
To keep your car speakers in top shape, adopt a few simple habits. Avoid cranking the volume to maximum, especially for extended periods, as this strains the components. Ensure your amplifier’s settings match the speakers’ power handling capabilities to prevent overpowering. Regularly inspect speaker connections for loose or damaged wires, and clean the speakers to remove dust buildup. If you live in a humid climate, protect speakers from moisture to prevent material degradation. By maintaining your audio system, you’ll extend the life of your speakers and enjoy better sound quality.
Why Fixing Your Speaker Matters
A functioning car audio system enhances every drive, whether you’re commuting or embarking on a road trip. Fixing a blown speaker not only saves money but also gives you hands-on experience with your vehicle’s electronics. You’ll gain confidence in tackling other DIY repairs and a deeper appreciation for your car’s audio setup. Plus, restoring clear sound makes every song sound better, turning your car into a mobile concert hall. If the repair feels overwhelming or the damage is too severe, consult a professional car audio technician for expert assistance.
Final Thoughts
Fixing a blown car speaker is a rewarding project that doesn’t require advanced skills. By diagnosing the issue, repairing or replacing damaged parts, and testing your work, you can bring your car’s audio system back to life. Take your time during the process to avoid mistakes, and always prioritize safety by disconnecting the battery. With the right tools and a bit of effort, you’ll enjoy high-quality sound without the cost of a new speaker. Share your repair experience with fellow car enthusiasts, and keep rocking out to your favorite playlist on the road.