Upgrading your car’s audio system feels exciting, but connecting speaker wires incorrectly can ruin the experience. Identifying positive and negative speaker wires ensures crisp sound, protects your equipment, and prevents safety hazards. Incorrect wiring leads to muffled audio, distorted bass, or even damaged speakers. This guide walks you through simple, practical steps to determine wire polarity, avoid common mistakes, and achieve a high-quality car audio setup. Whether you’re a beginner or a seasoned DIYer, these tips make the process straightforward and stress-free.
Contents
- Why Correct Speaker Wire Polarity Matters
- Tools You Need for the Job
- Step 1: Locate the Speaker Wires
- Step 2: Inspect Wire Markings and Color Coding
- Step 3: Use a Multimeter for Accurate Polarity Testing
- Step 4: Try the Battery Test for Quick Results
- Step 5: Connect Wires to the Amplifier
- Common Mistakes to Avoid
- Troubleshooting Audio Issues
- Tips for a Professional Installation
- Understanding Speaker Polarity and Phase
- Choosing the Right Speaker Wires
- Safety Precautions During Installation
- When to Seek Professional Help
- Enhancing Your Car Audio Experience
- Final Thoughts on Speaker Wire Identification
Why Correct Speaker Wire Polarity Matters
Correctly identifying positive and negative speaker wires plays a critical role in your car’s audio performance. When you connect wires properly, speakers operate in phase, meaning their cones move in sync to produce clear, vibrant sound. Out-of-phase speakers, caused by swapped wires, create phase cancellation, resulting in weak bass and muddy audio. Properly wired speakers also safeguard your amplifier and head unit from strain, extending their lifespan. Beyond sound quality, correct polarity eliminates risks like short circuits, which could spark electrical issues or fires. Taking time to verify polarity saves you from costly repairs and disappointing audio.
Tools You Need for the Job
Before diving into the identification process, gather a few essential tools to make the task easier. A digital multimeter tops the list, as it accurately measures voltage and resistance to confirm wire polarity. A wire stripper helps expose bare wire for testing, while a 1.5V AA battery offers a quick, tool-free way to check polarity by observing speaker movement. Keep a screwdriver handy to access speaker panels or the head unit. Labeling tape and a marker simplify tracking wires during installation. With these tools, you’ll work efficiently and avoid guesswork, ensuring a professional-grade setup.
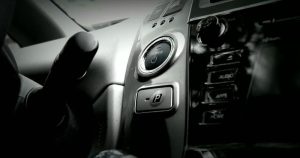
Step 1: Locate the Speaker Wires
Start by finding the speaker wires in your car. Most vehicles hide these wires behind the head unit, inside door panels, or along the trunk for rear speakers. Check your car’s owner’s manual for exact locations, as wiring layouts vary by make and model. If the manual isn’t available, search online for your vehicle’s wiring diagram using terms like “Toyota Camry speaker wiring.” Once located, inspect the wires for visible markings, such as color coding or stripes, which often indicate polarity. Avoid assuming colors alone determine positive or negative, as manufacturers differ in their standards.
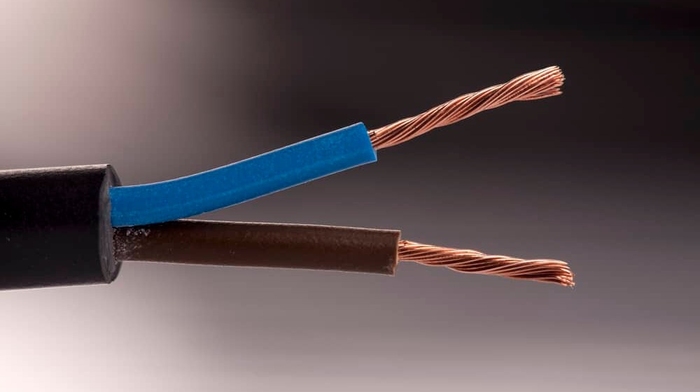
Step 2: Inspect Wire Markings and Color Coding
Many speaker wires feature visual clues to distinguish positive from negative. Some use red for positive and black for negative, while others pair a solid color with a striped version, like green and green with a black stripe. In transparent wires, copper often signals positive, and silver or tinned wire indicates negative. Look for printed symbols like “+” or “–” on the insulation, or check for ridges or text on one wire. If your wires lack clear markings, don’t rely on assumptions—proceed to testing methods to confirm polarity. Consistency across all speakers matters more than the specific color.
Step 3: Use a Multimeter for Accurate Polarity Testing
A multimeter provides the most reliable way to identify speaker wire polarity. Disconnect the car’s battery to stay safe, then set your multimeter to measure DC voltage or resistance (ohms). Strip a small section of insulation from the wire ends to expose bare metal. Touch the red probe to one wire and the black probe to the other. A positive reading means the red probe touches the positive wire; a negative reading indicates the opposite. Repeat this for each wire pair, labeling them as you go. This method eliminates guesswork and works even with unmarked wires.
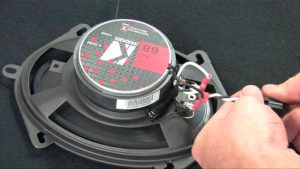
Step 4: Try the Battery Test for Quick Results
If you don’t have a multimeter, a 1.5V AA battery offers a simple alternative. Disconnect the speaker wires from the head unit and amplifier. Briefly touch one wire to the battery’s positive terminal and the other to the negative terminal. Watch the speaker cone: if it moves outward, the wire on the battery’s positive terminal is the positive wire. If the cone moves inward, reverse the connections and test again. Limit contact to 2–3 seconds to avoid damaging the speaker. Label the wires immediately to avoid confusion. This method works well for woofers but may be harder to observe with tweeters.
Step 5: Connect Wires to the Amplifier
Once you’ve identified positive and negative wires, connect them to your amplifier or head unit. Match the positive wire to the amplifier’s positive terminal, typically marked with a “+” or red indicator, and the negative wire to the negative terminal. Secure connections tightly to prevent loose wiring, which can cause interference or signal loss. Double-check your work before powering on the system. If your amplifier lacks clear terminal labels, consult its manual for guidance. Proper connections ensure your speakers deliver optimal sound without distortion.
Common Mistakes to Avoid
Even careful installers make errors when identifying speaker wires. Don’t assume wire colors always follow standard conventions, as manufacturers often deviate. For example, a red wire isn’t guaranteed to be positive. Avoid using improper tools, like a voltmeter instead of a multimeter, which can give inaccurate readings. Never skip testing polarity, even if wires seem obvious, as reversed connections degrade sound quality. Label wires during installation to avoid confusion later. Taking these precautions keeps your audio system performing at its best.
Troubleshooting Audio Issues
If your audio sounds off after installation, polarity issues might be the culprit. Poor sound quality, weak bass, or distortion often signal out-of-phase speakers. Recheck all connections to ensure positive and negative wires match the correct terminals. Test each speaker individually using the battery or multimeter method to confirm polarity. Verify that the head unit and amplifier are powered on and set to appropriate volume levels. If problems persist, inspect wires for damage or shorts, as frayed insulation can disrupt the signal. Persistent issues may require professional help.
Tips for a Professional Installation
Achieve a clean, reliable setup with a few extra steps. Use high-quality speaker wires, such as 14- or 16-gauge, to minimize signal loss and ensure durability. Route wires away from power cables to avoid electromagnetic interference. Secure wires with zip ties to prevent movement, which can loosen connections over time. Test the system after installation by playing music with strong bass and treble to confirm clarity. Label both ends of each wire pair for easy future upgrades or repairs. These habits elevate your car audio experience and simplify maintenance.
Understanding Speaker Polarity and Phase
Speaker polarity refers to the alignment of electrical current between the amplifier and speaker. Correct polarity ensures the speaker cone moves outward during positive voltage, creating proper sound waves. Phase, closely related, describes how speakers work together. In-phase speakers push and pull air in unison, enhancing sound clarity. Out-of-phase speakers cancel each other’s waves, reducing bass and creating a hollow sound. Maintaining consistent polarity across all speakers prevents phase issues, delivering a balanced, immersive audio experience.
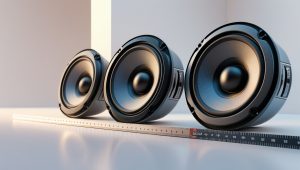
Choosing the Right Speaker Wires
Not all speaker wires suit every car audio system. Select wires based on your setup’s power needs and speaker distance. Thicker wires, like 12-gauge, handle high-power systems over long runs, while 16-gauge works for standard setups. Oxygen-free copper (OFC) wires offer better conductivity than copper-clad aluminum (CCA), improving sound quality. Check your amplifier’s wattage and speaker impedance to match wire gauge. Investing in quality wires reduces resistance, ensuring your speakers receive maximum power for louder, clearer sound.
Safety Precautions During Installation
Working with car audio wiring requires caution to avoid injury or damage. Always disconnect the car’s battery before handling wires to prevent electrical shocks or short circuits. Wear insulated gloves when stripping wires to protect against accidental cuts or shocks. Keep tools organized to avoid losing small screws or damaging panels. Test connections with low volume before fully securing the system to catch errors early. Following these safety tips protects you, your car, and your audio equipment during installation.
When to Seek Professional Help
While DIY installation saves money, complex systems or persistent issues may call for expert assistance. If your car has a factory amplifier or intricate wiring, professional installers can navigate the setup without risking damage. Pros also use specialized tools, like oscilloscopes, to fine-tune polarity and phase for optimal sound. If you’ve tested wires and still face distortion or no sound, a technician can diagnose deeper issues, like a faulty amplifier or blown speaker. Search for reputable car audio shops near you for reliable service.
Enhancing Your Car Audio Experience
Correctly wired speakers lay the foundation for a stellar audio system, but other upgrades can elevate the experience. Add a subwoofer for deeper bass, or install a digital signal processor (DSP) to fine-tune sound output. Sound-deadening mats in doors reduce road noise, letting your speakers shine. Regularly clean and inspect wiring to maintain performance. Experiment with equalizer settings on your head unit to balance treble, midrange, and bass for your music preferences. These tweaks transform your car into a rolling concert hall.
Final Thoughts on Speaker Wire Identification
Identifying positive and negative speaker wires in your car doesn’t require advanced skills, just patience and the right approach. Using a multimeter or battery test, you can confirm polarity with confidence, ensuring your speakers deliver top-notch sound. Avoiding common pitfalls, like assuming wire colors or skipping tests, keeps your system safe and effective. With proper tools, clear labeling, and secure connections, you’ll enjoy a powerful, crystal-clear audio experience on every drive. Take pride in your setup, and let your favorite tunes fill the road ahead.