Setting up your equalizer properly makes a huge difference in sound quality. Many people ignore their audio settings, but with a few simple adjustments, you can transform your listening experience. This guide will walk you through understanding equalizers and optimizing them for different audio situations.
Contents
- What Is an Equalizer?
- Why Equalizer Settings Matter
- Understanding Sound Frequencies
- Basic Equalizer Setup Steps
- Genre-Specific EQ Recommendations
- Room Acoustics and EQ Compensation
- Device-Specific Equalizer Tips
- EQ Mistakes to Avoid
- Advanced EQ Techniques
- Using Equalizers with Streaming Services
- Conclusion: Trust Your Ears
What Is an Equalizer?
An equalizer (EQ) adjusts specific frequencies in audio signals to enhance sound quality. Think of it as a control panel that lets you boost or reduce different elements of sound—like bass, midrange, and treble. Most music players, car stereos, home theater systems, and smartphones come with built-in equalizers.
The standard equalizer divides sound into frequency bands, typically ranging from 20Hz (low bass) to 20kHz (high treble). Each slider or knob on your equalizer controls a specific frequency range, giving you precise control over your audio profile.
Why Equalizer Settings Matter
The right equalizer setup can:
- Bring out hidden details in your music
- Fix acoustical problems in your listening environment
- Compensate for speaker limitations
- Customize sound for different music genres
- Improve vocal clarity in movies and podcasts
- Reduce listening fatigue during long sessions
Default audio settings rarely deliver optimal sound quality. Audio engineers create balanced mixes, but your specific equipment and room acoustics change how this mix sounds in real life. Your equalizer bridges this gap.
Understanding Sound Frequencies
To set your equalizer effectively, you need to understand what different frequencies actually represent:
Sub-Bass (20-60Hz): These extremely low frequencies create rumble and physical sensation rather than distinct notes. Think earthquake effects in movies or the lowest notes on a pipe organ.
Bass (60-250Hz): This range contains the fundamental notes of bass guitars, kick drums, and bass synthesizers. It gives music its foundation and power.
Lower Midrange (250-500Hz): This zone includes the lower registers of vocals, guitars, and pianos. Too much boost here creates a muddy sound; too little makes audio feel thin.
Midrange (500Hz-2kHz): The critical range for vocals and most melodic instruments. Most of music’s character lives here, including vocal presence and instrument recognition.
Upper Midrange (2-4kHz): This range affects perceived clarity and detail. It contains consonant sounds in speech and the attack of instruments like guitars and pianos.
Presence (4-6kHz): These frequencies determine how “forward” sounds feel. They affect vocal intelligibility and instrument definition.
Brilliance/Treble (6-20kHz): The highest frequencies contain cymbals, high-hat sizzle, and the airy quality of recordings. They add sparkle and spaciousness but can cause fatigue if overemphasized.
Basic Equalizer Setup Steps
Setting up your equalizer doesn’t have to be complicated. Follow these steps for better sound:
- Start flat: Reset all equalizer bands to neutral (usually the middle position).
- Listen critically: Play music you know well and identify what sounds wrong or could be improved.
- Make small adjustments: Change settings in small increments (2-3dB at most) and listen for differences.
- Focus on subtraction: Often, reducing problematic frequencies works better than boosting good ones.
- Take listening breaks: Your ears adjust to sound changes quickly, which can lead to increasingly extreme settings.
- Save different presets: Create separate settings for different music genres, devices, and listening environments.
Genre-Specific EQ Recommendations
Different music styles benefit from different equalizer settings:
Rock Music EQ Settings
- Slight boost in low bass (around 60-80Hz) for kick drum impact
- Small cut in lower midrange (300-500Hz) to reduce muddiness
- Moderate boost in upper mids (3-5kHz) for guitar clarity
- Light boost in high frequencies for cymbal definition
Hip-Hop and EDM EQ Settings
- Stronger bass boost (60-100Hz) for beat emphasis
- Sub-bass enhancement (below 60Hz) for physical impact
- Reduced lower mids to prevent masking the beat
- Controlled high frequencies to prevent harshness
Classical Music EQ Settings
- Flatter overall response with minimal adjustments
- Slight boost around 8-10kHz for air and ambience
- Small enhancement at 100-200Hz for string warmth
- Careful midrange balance for instrument separation
Jazz EQ Settings
- Warm bass (80-200Hz) for upright bass presence
- Clear midrange for horn definition
- Slight upper midrange lift for piano sparkle
- Open high frequencies for cymbal texture
Room Acoustics and EQ Compensation
Your listening environment significantly affects sound quality. Hard surfaces reflect sound, while soft materials absorb it. Common problems include:
Room Resonance: Certain bass frequencies get amplified by room dimensions, creating boomy sound. Use your equalizer to identify and reduce these problem frequencies.
Speaker Placement: Speakers placed near walls boost bass unnaturally. If you can’t move them, reduce the corresponding bass frequencies.
Reflective Surfaces: Too many hard surfaces create harsh treble. Soften your equalizer’s high-frequency settings to compensate.
Small Rooms: Limited space often causes bass buildup. Reduce lower frequencies slightly for clearer sound.
Device-Specific Equalizer Tips
Headphone Equalization
Headphones bypass room acoustics but have their own frequency response characteristics:
- Over-ear headphones often need less bass boost than earbuds
- Many consumer headphones already emphasize bass and treble
- Noise-canceling headphones may benefit from midrange enhancement for vocal clarity
- High-end headphones generally need less equalization overall
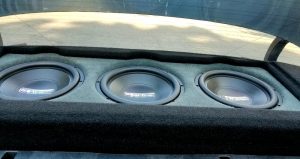
Car Audio Equalization
Car interiors present unique acoustic challenges:
- Road noise masks bass and subtle details, requiring compensation
- Glass surfaces create reflections that can make treble harsh
- Different seating positions experience drastically different sound
- Engine noise often competes with music in the lower frequency ranges
- Start with a “smile curve” (boosted lows and highs) and refine from there
Home Theater EQ
For movie and TV audio:
- Enhance the 100-300Hz range for impact in action scenes
- Boost 2-4kHz slightly for dialogue clarity
- Reduce very low frequencies if your speakers distort during intense scenes
- Create separate daytime and nighttime settings (with reduced extremes for late-night listening)
EQ Mistakes to Avoid
Many people make these common equalizer errors:
Excessive Boosting: Pushing frequencies too high causes distortion. Try cutting competing frequencies instead.
Ignoring the Midrange: The most important frequency range often gets neglected in favor of bass and treble extremes.
Too Many Adjustments: Simpler is often better. Start with just 2-3 key frequency adjustments.
Boosting Already Loud Elements: Adding more of what’s already dominant creates an unbalanced sound.
Ignoring Your Equipment Limitations: Budget speakers can’t reproduce extreme bass no matter how much you boost it.
Advanced EQ Techniques
Once you’re comfortable with basic equalization, try these advanced approaches:
Complementary EQ: Cut frequencies in one element to make room for another (reduce 2-5kHz in music when watching dialogue-heavy content).
Frequency Sweeping: Slowly move a boosted band across the spectrum to identify problem frequencies, then cut them.
Time-Based Adjustments: Create different settings for morning, afternoon, and night listening, accounting for how our hearing sensitivity changes.
A/B Testing: Switch between two slightly different EQ settings to determine which subtle changes actually improve sound.
Using Equalizers with Streaming Services
Many streaming platforms now offer equalizer settings within their apps:
- Spotify’s equalizer works well for quick adjustments on mobile devices
- Apple Music integrates with iOS sound settings
- Tidal offers preset and custom EQ options for audiophile listeners
- YouTube Music provides basic equalization through its settings menu
Remember that higher streaming quality benefits more from careful equalization. Lower-quality streams have less frequency information to work with.
Conclusion: Trust Your Ears
While technical knowledge helps, the most important equalizer tool is your own hearing. Rules and presets provide starting points, but your personal preferences matter most. Experiment regularly, listen critically, and adjust your equalizer to create sound that pleases your ears.
The perfect equalizer setting creates a balanced, natural sound that serves the music without drawing attention to itself. With practice, you’ll develop an intuition for which frequencies need adjustment in different situations.
Try setting aside 15 minutes to experiment with your equalizer today. The improvement in your listening experience will be well worth the effort.