Welcome fellow Honda Pilot enthusiasts! If you’re driving a 2011 Honda Pilot and find yourself yearning for a better auditory experience on the road, you’re in the right place. In this guide, we’ll delve into the world of stereo upgrades, exploring the reasons behind the necessity for an upgrade, top matches for the 2011 Honda Pilot, and a detailed do-it-yourself installation guide. Get ready to transform your driving experience by bringing the sound system of your beloved Honda Pilot into the 21st century.
Why Upgrade Your 2011 Honda Pilot Stereo?
The factory stereo in the 2011 Honda Pilot, while functional, often leaves drivers wanting more. Limited features, outdated technology, and subpar sound quality are common complaints. Upgrading your stereo not only addresses these issues but also opens up a world of possibilities for a more enjoyable driving experience.
Improved Sound Quality: One of the primary reasons to upgrade your 2011 Honda Pilot stereo is to experience a significant boost in sound quality. Factory stereos are often lacking in power and clarity, making it difficult to fully enjoy your favorite tunes or podcasts during your daily commute or road trips.
Modern Features: The technological landscape has evolved since 2011, and modern stereo systems come equipped with advanced features like Bluetooth connectivity, touchscreen controls, and smartphone integration. These features not only enhance convenience but also contribute to a safer driving experience.
Enhanced Connectivity: With the rise of smartphones and smart devices, having a stereo system that seamlessly integrates with your gadgets is crucial. Upgrading your stereo allows you to connect effortlessly, stream music, and make hands-free calls, providing a more connected and enjoyable driving experience.
2011 Honda Pilot Stereo Upgrade Worth It?
The decision to upgrade your 2011 Honda Pilot stereo might leave you wondering if the investment is genuinely worth it. Let’s explore why this upgrade is not just a luxury but a valuable enhancement to your overall driving experience.
1. Enhanced Driving Pleasure: – A superior stereo system turns mundane drives into enjoyable journeys. The richness of sound and clarity adds a new layer to your favorite music, making each drive a pleasure.
2. Increased Resale Value: – Upgrading your Honda Pilot’s stereo with modern features not only benefits you while driving but can also positively impact the resale value of your vehicle. Potential buyers often appreciate up-to-date technology and premium sound systems.
3. Safety and Convenience: – Modern stereo systems come with features like Bluetooth connectivity and hands-free calling, promoting a safer driving environment. Easily control your music and answer calls without taking your hands off the wheel.
4. Future-Proofing Your Vehicle: – Technology evolves rapidly, and upgrading your stereo system ensures that your Honda Pilot remains compatible with the latest devices and features. Future-proofing your vehicle saves you from feeling outdated in the fast-paced world of automotive technology.
5. Personalization and Customization: – Upgrading your stereo allows for a personalized driving experience. Tailor the equalizer settings, choose your favorite apps, and enjoy a system that aligns with your unique preferences.
Research and Planning
Before diving into the world of stereo upgrades, it’s crucial to identify your specific needs and preferences. Do you prioritize crisp sound quality, or are you looking for advanced features like Bluetooth and smartphone integration? Researching top aftermarket stereo options for the 2011 Honda Pilot is essential. Look for user reviews and seek expert opinions to make an informed decision.
Top Matches for 2011 Honda Pilot Stereo Upgrade
When it comes to upgrading your 2011 Honda Pilot stereo, you want the best of the best. Considerations such as sound quality, compatibility with Honda Pilot specifications, and additional features like Bluetooth, touchscreen capabilities, and smartphone integration are crucial.
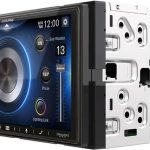
1. Pioneer AVH-W4500NEX: Known for its outstanding sound quality and an intuitive touchscreen interface, the Pioneer AVH-W4500NEX is a top choice for Honda Pilot owners. With Apple CarPlay and Android Auto compatibility, this stereo offers seamless smartphone integration.
2. Kenwood Excelon DDX396: This stereo is praised for its user-friendly interface and excellent audio quality. With built-in Bluetooth and a customizable touchscreen, the Kenwood Excelon DDX396 is a solid choice for those seeking a balance between performance and features.
3. Alpine iLX-W650: If you’re looking for a sleek and minimalist design without compromising on features, the Alpine iLX-W650 is worth considering. It offers Apple CarPlay and Android Auto support, ensuring a modern and connected driving experience.
DIY Installation Guide
Now that you’ve chosen the perfect stereo upgrade for your Honda Pilot, it’s time for the installation process. Gather the necessary tools and equipment, and follow our step-by-step guide for a smooth installation. From removing the old stereo to connecting the new one and dealing with potential challenges, we’ve got you covered.
Tools and Equipment:
- Screwdrivers
- Trim removal tools
- Crimping tool
- Wire stripper
- Panel clips
- Wiring harness adapter
Step-by-Step Installation:
- Disconnect the Battery: Before beginning the installation process, disconnect the negative terminal of the car battery to ensure safety during the procedure.
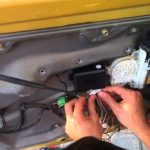
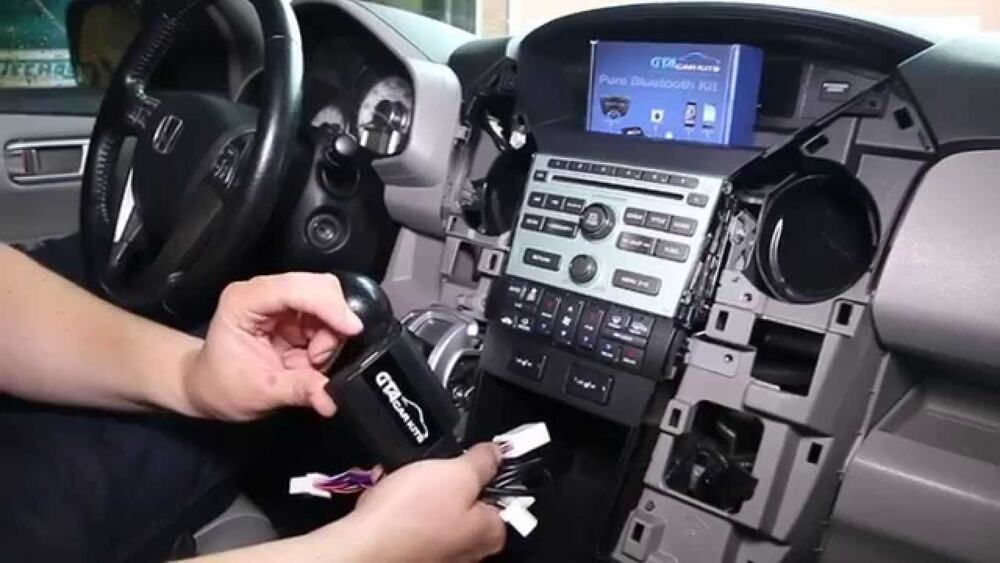
- Remove the Old Stereo: a. Use the appropriate trim removal tools to carefully pry off the trim panel surrounding the stereo. b. Unscrew and remove the old stereo unit. c. Disconnect the wiring harness and antenna cable from the back of the factory stereo.
- Prepare the Wiring Harness: a. Match the colors of the wires on the new stereo’s wiring harness with those on the wiring harness adapter. b. Use crimp connectors or soldering to secure the connections, ensuring a solid electrical connection. c. Connect the wiring harness adapter to the Honda Pilot’s factory wiring.
- Connect the New Stereo: a. Plug the prepared wiring harness adapter into the back of the new stereo. b. Carefully slide the new stereo into the mounting bracket until it clicks into place. c. Reattach the trim panel, securing it with panel clips.
- Test the System: a. Reconnect the car battery and turn on the ignition. b. Test all functions of the new stereo, including sound quality, touchscreen responsiveness, and connectivity features.
- Secure and Finish: a. Once satisfied with the functionality, secure the stereo in place by tightening any mounting screws. b. Ensure that all panels and trim are securely reattached. c. Tidy up the wiring, securing any excess with zip ties for a clean and professional finish.
Common Challenges and Troubleshooting
No Power to the Stereo:
- Check the wiring connections to ensure proper connectivity.
- Verify that the fuse for the stereo system is intact.
Poor Sound Quality:
- Adjust the equalizer settings on the stereo to optimize sound output.
- Ensure that all speaker connections are secure and properly wired.
Bluetooth Connectivity Issues:
- Update the stereo firmware to the latest version.
- Ensure that Bluetooth settings on both the stereo and the connected device are configured correctly.
Tips for Optimizing Sound Quality
Once your new stereo is in place, optimize the sound quality for an unparalleled audio experience.
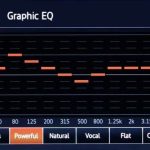
Adjusting Equalizer Settings: – Experiment with the equalizer settings to find the optimal balance for your preferred music genres. – Fine-tune bass, treble, and midrange frequencies to suit your taste.
Speaker Placement and Balancing: – Ensure that speakers are correctly placed to create a balanced and immersive audio experience. – Adjust the balance and fade settings to distribute sound evenly throughout the vehicle.
Additional Accessories for a Premium Audio Experience: – Consider adding components such as amplifiers or subwoofers to further enhance the audio output. – Explore soundproofing options to reduce external noise and improve overall sound clarity.
Maintenance and Care
To ensure your upgraded stereo system performs at its best, regular maintenance is key.
Regular Checks for Optimal Performance: – Periodically inspect wiring connections to ensure they remain secure. – Check for software updates for your stereo system to access any improvements or new features.
Cleaning and Protecting the Upgraded Stereo System: – Use a soft, lint-free cloth to clean the touchscreen and control buttons. – Protect the screen from direct sunlight when parking to prevent damage over time.
Troubleshooting Common Issues: – Stay informed about common issues related to your specific stereo model. – Refer to the user manual for troubleshooting guidance and contact customer support if needed.
Real User Experience
To provide a firsthand account, I recently upgraded the stereo system in my 2011 Honda Pilot. The improvement in sound quality was immediately noticeable, with clearer highs and deeper bass. The touchscreen interface made navigation and music selection a breeze, and the Bluetooth connectivity ensured a seamless integration with my smartphone. While the installation process presented a few challenges, such as adapting the wiring harness, the end result was well worth the effort. The upgraded stereo has truly transformed my driving experience, making every journey more enjoyable.
Conclusion
In conclusion, upgrading the stereo system in your 2011 Honda Pilot is a game-changer for your driving experience. The benefits of improved sound quality, modern features, and enhanced connectivity are well worth the effort. Transform your daily commute or road trips by bringing your Honda Pilot’s audio system into the present day. Upgrade and enjoy the ride like never before! Remember, the key is research, planning, and a little DIY spirit to unleash the full potential of your Honda Pilot’s audio capabilities. Safe travels!