Are you tired of the lackluster sound coming from your factory car stereo? Many drivers don’t realize how much they’re missing until they experience a quality audio upgrade. The good news is that transforming your driving experience with better sound doesn’t have to be complicated or extremely expensive.
Contents
Why Upgrade Your Stock Car Stereo?
Stock car audio systems often fall short in delivering the sound quality music lovers crave. Car manufacturers typically focus on other vehicle aspects, leaving audio as an afterthought. This results in:
- Limited power output
- Basic speakers that lack clarity
- Minimal bass response
- Few audio customization options
- Outdated technology without Bluetooth, USB, or smartphone integration
A stereo upgrade can dramatically improve your daily commute, road trips, and every drive in between. Let’s explore how to transform your car’s sound system.
Assess Your Current System First
Before spending money on new equipment, evaluate what you already have:
- Sound Quality Assessment: Listen carefully to different music genres through your current system. Note where it lacks—bass response, vocal clarity, or overall volume.
- Existing Equipment: Identify your head unit type, speaker sizes, and current audio features.
- Budget Planning: Decide how much you want to spend. Car audio upgrades range from simple speaker replacements ($100-300) to complete system overhauls ($1000+).
- Goals: Define what you want—louder volume, deeper bass, clearer sound, modern connectivity, or all of these.
Components You Can Upgrade
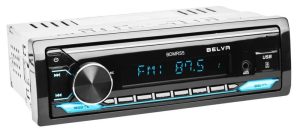
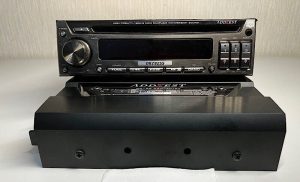
Head Unit (Stereo Receiver)
The head unit serves as the control center of your car audio system. Upgrading it offers numerous benefits:
- Modern Connectivity: Access Bluetooth, USB ports, smartphone integration with Apple CarPlay or Android Auto
- Better Sound Processing: Improved digital-to-analog converters for cleaner sound
- Customization: Advanced EQ settings and audio controls
- Visual Appeal: Touchscreens and customizable displays
When selecting a head unit, consider:
- Single DIN or Double DIN size compatibility with your vehicle
- Features you’ll actually use versus ones you’re paying extra for
- Brand reputation for reliability (Pioneer, Kenwood, Alpine, Sony)
- Integration with your existing car features (steering wheel controls, backup camera)
Speakers
Factory speakers often use inexpensive materials that deteriorate over time. Upgrading to aftermarket speakers can provide:
- Clearer vocals and instruments
- Better frequency response across the sound spectrum
- More durability with quality materials
- Improved efficiency (more sound from the same power)
Speaker options include:
- Coaxial Speakers: All-in-one units with woofer and tweeter combined—easiest to install
- Component Speakers: Separate woofers, tweeters, and crossovers for optimized sound placement—best sound quality but more complex installation
- Three-way Speakers: Include mid-range drivers for added detail
Most cars have speakers in the doors, dash, or rear deck. Measure your existing speakers carefully before purchasing replacements.
Amplifier
While some head units include decent built-in amplifiers, adding a dedicated amplifier provides:
- Substantially more power without distortion
- Headroom for dynamic peaks in music
- Ability to power subwoofers and component speakers properly
- Cleaner sound even at higher volumes
Amplifier considerations:
- Power Output: Match to your speakers’ power handling capabilities
- Channels: 4-channel for main speakers, monoblock for subwoofers, or 5-channel for a complete system
- Class: Class-D amplifiers offer efficiency in a smaller package
- Installation Space: Measure your available mounting locations
Subwoofer
For music lovers who enjoy feeling their music, adding a subwoofer fills in the low frequencies that standard speakers can’t reproduce. Benefits include:
- Deep, accurate bass response
- Reduction of strain on main speakers by handling low frequencies
- More balanced overall sound
Subwoofer options:
- Powered Subwoofers: All-in-one units with built-in amplifiers—great for limited space
- Component Subwoofers: Separate subwoofer and amplifier combinations—more customizable
- Enclosed vs. Custom Enclosures: Pre-made boxes or custom-built enclosures for optimal performance
Step-By-Step Upgrade Process
1. Start With a Plan
Create a roadmap for your upgrade based on:
- Priority improvements (what bothers you most about your current system)
- Budget constraints
- Available installation space
- Whether you’ll install yourself or hire professionals
2. Choose Quality Components Within Budget
Research brands known for reliability and sound quality in your price range. Sometimes it’s better to invest in fewer high-quality components than many mediocre ones.
3. Consider DIY vs. Professional Installation
For basic upgrades like speaker replacement, many car owners handle the installation themselves. More complex changes involving amplifiers, subwoofers, or custom work often benefit from professional installation.
DIY installation pros:
- Cost savings
- Satisfaction of doing it yourself
- Learning about your vehicle’s audio system
Professional installation pros:
- Expertise in proper wiring and placement
- Access to specialized tools
- Warranty protection for both parts and labor
- Clean, factory-like finishing
4. Typical Installation Order
If upgrading multiple components, this order usually works best:
- Head Unit First: Establishes your new system’s foundation
- Speakers Next: Immediately improves sound quality
- Sound Deadening: Reduces vibrations and road noise
- Amplifier Installation: Powers your improved speakers properly
- Subwoofer Addition: Completes the sound spectrum
5. Sound Deadening Consideration
Many car audio enthusiasts overlook this crucial step. Adding sound deadening material to doors and other panels:
- Reduces road noise interference
- Prevents speaker vibration against panels
- Creates a better acoustic environment
- Improves bass response dramatically
6. Setting Up Your New System
After installation:
- Take time to learn your new equipment’s features
- Adjust equalizer settings for different music styles
- Set crossover points between speakers and subwoofers
- Balance front-to-rear and left-to-right speaker levels
Common Upgrade Scenarios
Budget Upgrade ($200-400)
- Replace front door speakers with quality coaxials
- Add a simple Bluetooth-capable head unit
- Apply basic sound deadening to front doors
Mid-Level Upgrade ($500-800)
- Install component speakers in front
- Add a 4-channel amplifier
- Replace head unit with touchscreen model
- Install rear fill speakers
- Apply comprehensive sound deadening
Audiophile Upgrade ($1000+)
- Premium component speaker system
- High-power multi-channel amplifier
- Digital signal processor (DSP)
- Quality subwoofer in custom enclosure
- High-end head unit with advanced features
- Complete sound deadening throughout vehicle
Troubleshooting Common Issues
After upgrading, you might encounter some issues:
Poor Sound Quality Despite New Equipment
Possible causes:
- Incorrect speaker wiring (out of phase)
- Improper amplifier gain settings
- Head unit EQ settings need adjustment
- Speaker placement issues
Electrical System Problems
Signs to watch for:
- Dimming headlights when bass hits
- System shutting down during loud passages
- Battery draining overnight
Solutions may include:
- Adding a capacitor for power storage
- Upgrading ground wiring
- Installing a higher output alternator
- Adding a second battery
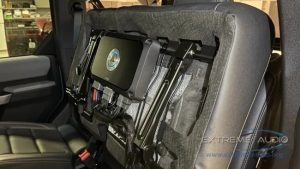
Installation Appearance
If you’re unhappy with how your installation looks:
- Custom panels can hide installations
- Professional trim work improves appearance
- Cable management keeps wiring organized
Keeping Original Features
Many modern cars integrate audio systems with vehicle functions. When upgrading, you might need:
- Wiring harness adapters
- Steering wheel control interfaces
- Climate control retention modules
- Backup camera integration
These adapters ensure you don’t lose factory features when upgrading your audio system.
Conclusion
Upgrading your car’s stock stereo system transforms your driving experience. Whether you’re seeking better sound quality, modern connectivity, or earth-shaking bass, the right upgrades make every journey more enjoyable.
Start with a clear plan, quality components, and reasonable expectations. Remember that car audio upgrades often happen in stages—you don’t need to transform everything at once. Even modest improvements can dramatically enhance your listening experience.
By understanding the components involved and following this guide, you’ll be well on your way to audio enjoyment that makes you look forward to every drive. Your car is about to become your favorite place to listen to music!
FAQs About Car Stereo Upgrades
Will upgrading my car stereo void my vehicle warranty?
Generally, modifications to your car’s audio system won’t void the entire vehicle warranty. The Magnuson-Moss Warranty Act protects consumers, stating that dealers must prove that aftermarket equipment caused a problem before denying warranty coverage.
Can I keep my steering wheel controls with a new stereo?
Yes, with the right adapter. Many companies make steering wheel control interfaces that connect your vehicle’s controls to new aftermarket head units.
What’s the biggest improvement I can make on a small budget?
Replacing factory speakers with quality aftermarket options gives you the most noticeable improvement for minimal investment. The difference is often stunning, even without changing other components.
Do I need an amplifier if I’m just replacing the head unit and speakers?
Not necessarily, but even a modest amplifier provides cleaner power than a head unit alone. If your budget allows, adding an amplifier improves dynamic range and clarity significantly.
How difficult is it to return to the factory system if I decide to sell my car?
If you keep all original components and have the installation done with care, returning to stock is straightforward. Professional installers can ensure modifications are reversible.