Car speakers bring life to your drives, filling the cabin with music, podcasts, or navigation cues. But when a speaker stops working, the silence—or worse, crackling noises—can make every trip frustrating. Whether one speaker cuts out, produces distorted sound, or fails entirely, you can often fix the issue yourself with some basic tools and know-how. This guide walks you through diagnosing and repairing car speaker problems, ensuring your audio system pumps out crystal-clear sound again. With over 1,500 words of actionable advice, you’ll learn practical steps, troubleshooting tips, and preventive measures to keep your car’s audio in top shape.
Contents
Why Do Car Speakers Stop Working?
Before diving into fixes, let’s explore why car speakers fail. Understanding the root cause helps you pinpoint the issue and avoid wasting time. Common culprits include:
- Loose or Damaged Wiring: Vibrations from driving can loosen connections or fray wires, disrupting the speaker’s power supply.
- Blown Speaker: Overloading speakers with high volume or distorted audio signals can damage the cone or voice coil.
- Faulty Head Unit: The car stereo (head unit) may fail to send signals to the speakers due to internal issues or poor connections.
- Corrosion or Moisture: Water seeping into door panels or speaker enclosures can corrode terminals, especially in older vehicles.
- Amplifier Problems: If your car uses an external amplifier, a malfunction can cut sound to one or all speakers.
- Speaker Cone Damage: Physical tears or wear in the speaker cone, often from age or debris, distort or mute sound output.
Each issue requires a specific approach, so let’s break down the diagnostic process to identify what’s wrong with your car audio system.
Tools You’ll Need
To tackle car speaker repairs, gather these tools for a smooth process:
- Screwdriver set (Phillips and flathead)
- Multimeter (for testing electrical connections)
- Wire cutters and strippers
- Electrical tape or heat-shrink tubing
- Replacement speaker (if needed)
- Socket wrench set
- Panel removal tools (to avoid damaging trim)
- Soldering iron and solder (optional, for secure connections)
- Cleaning supplies (rubbing alcohol, cotton swabs)
Having these on hand saves time and ensures you can handle most speaker-related fixes. Now, let’s move to troubleshooting.
Step 1: Diagnose the Problem
Start by narrowing down the issue. A systematic approach prevents guesswork and helps you focus on the real problem.
Check the Head Unit
First, confirm the car stereo works properly. Play audio through different sources—radio, Bluetooth, USB, or AUX—to see if the issue persists across all inputs. If sound comes through some speakers but not others, the head unit is likely fine, and the problem lies with the silent speaker or its wiring. However, if no speakers produce sound, test the head unit further. Ensure the volume is up, the balance and fader settings aren’t skewed to one side, and the mute function is off. If the head unit’s display works but no sound emerges, it may need professional repair or replacement.
Inspect Speaker Performance
Next, test each speaker individually. Adjust the stereo’s balance and fader settings to isolate sound to one speaker at a time. Listen for output. If a speaker is silent, produces static, or sounds distorted, note its location (e.g., front left door, rear right). This helps you focus your repair efforts. Crackling or popping noises often point to loose wiring or a damaged speaker cone, while complete silence suggests a disconnected wire or blown speaker.
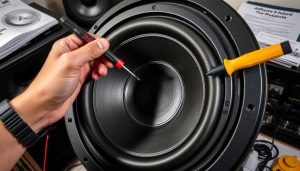
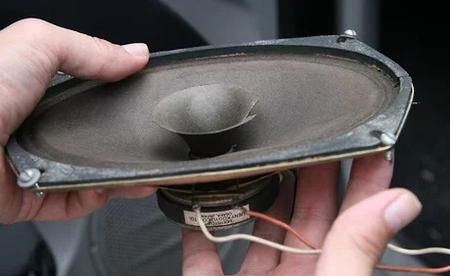
Look for Physical Damage
Pop off the speaker grille or door panel to inspect the speaker visually. Use a panel removal tool to avoid scratching trim. Look for tears in the speaker cone, rust on the terminals, or debris lodged in the assembly. If the cone is torn or the speaker looks corroded, replacement is usually the best fix. While you’re there, check the wiring for frayed ends or loose connections.
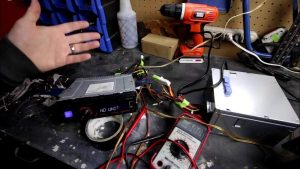
Test with a Multimeter
A multimeter confirms electrical issues. Set it to measure continuity or resistance (ohms). Disconnect the speaker’s wiring and touch the multimeter probes to the speaker’s positive and negative terminals. A healthy speaker typically shows 2–8 ohms of resistance, depending on its impedance rating (check your speaker’s specs). If the reading is infinite (no continuity), the speaker is blown. Also, test the wiring harness for continuity to ensure power reaches the speaker from the head unit or amplifier.
Step 2: Fix Common Speaker Issues
Once you’ve diagnosed the problem, apply the right solution. Here’s how to address the most common car speaker issues.
Tighten or Repair Loose Wiring
Loose or damaged wires are a frequent cause of speaker failure. Trace the wiring from the speaker to the head unit or amplifier. Look for frayed, pinched, or disconnected cables. If you find a loose connection, reattach it securely. For frayed wires, cut the damaged section, strip the ends, and splice them with a wire connector or solder. Wrap splices with electrical tape or heat-shrink tubing to prevent shorts. After reconnecting, test the speaker to confirm sound output.
Replace a Blown Speaker
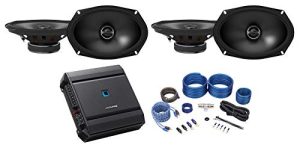
If the speaker is blown (no continuity or distorted sound), replace it. Buy a replacement speaker that matches your car’s specifications—check the size (e.g., 6.5 inches), power rating (RMS and peak), and impedance (e.g., 4 ohms). To install:
- Disconnect the car battery to avoid electrical shocks.
- Remove the door panel or speaker grille using a panel removal tool.
- Unscrew the old speaker and disconnect its wiring.
- Connect the new speaker, ensuring positive and negative terminals align.
- Screw the new speaker into place and reattach the panel.
- Reconnect the battery and test the audio.
Choose quality aftermarket speakers from brands like Pioneer, JBL, or Kenwood for better sound and durability. If replacing one speaker, consider upgrading all speakers for balanced audio.
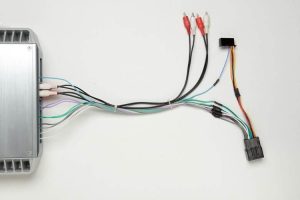
Address Amplifier Issues
If your car has an external amplifier and all speakers are silent, the amp may be faulty. Check its power and ground connections with a multimeter to ensure it receives voltage (typically 12V). Inspect the fuse—replace it if blown. Also, verify the remote turn-on wire (usually blue) is connected to the head unit. If the amp powers on but produces no sound, test its input and output cables for continuity. A malfunctioning amp may need professional repair or replacement.
Clean Corroded Terminals
Moisture can corrode speaker or wiring terminals, blocking electrical flow. Clean corroded areas with rubbing alcohol and a cotton swab. For stubborn corrosion, use a wire brush gently. Apply dielectric grease to terminals after cleaning to prevent future corrosion. Test the speaker afterward to ensure sound returns.
Adjust Head Unit Settings
Sometimes, the issue isn’t hardware but settings. Double-check the head unit’s balance, fader, and equalizer settings. Reset them to neutral if you suspect they’re misconfigured. If your stereo has a “speaker diagnostic” mode, run it to identify faults. Also, ensure the head unit’s firmware is up to date, as outdated software can cause audio glitches.
Step 3: Test the Repair
After applying fixes, test the entire audio system. Play music or a test tone through all speakers, adjusting balance and fader to confirm each one works. Listen for clarity, volume consistency, and any distortion. If one speaker still underperforms, revisit its wiring or consider replacing it. Drive the car briefly to ensure vibrations don’t loosen connections again.
Preventive Tips to Keep Speakers Working
To avoid future speaker issues, adopt these habits:
- Lower the Volume: Avoid maxing out the volume, especially with bass-heavy tracks, to prevent blowing speakers.
- Seal Door Panels: Apply weatherstripping to door panels to block moisture and reduce corrosion risks.
- Check Wiring Regularly: Inspect wiring during routine car maintenance to catch loose connections early.
- Use Quality Audio Files: Low-quality or corrupted audio files can stress speakers, so stick to high-bitrate MP3s or lossless formats like FLAC.
- Install a Capacitor: If your system includes a powerful subwoofer, a capacitor stabilizes power delivery, reducing strain on speakers and the amplifier.
When to Call a Professional
While many speaker issues are DIY-friendly, some situations require expert help:
- Complex wiring problems, especially in premium audio systems like Bose or Harman Kardon.
- Head unit or amplifier failures that need advanced diagnostics.
- Persistent distortion or electrical issues despite troubleshooting.
- Warranty-covered repairs—check if your car or aftermarket speakers are still under warranty.
Search for a reputable car audio technician or contact your dealership for assistance. Expect to pay $50–$200 for professional repairs, depending on the issue and labor rates in your area.
Boost Your Car Audio Experience
Fixing a car speaker not working restores your vehicle’s sound system, making drives enjoyable again. By diagnosing the issue, applying targeted fixes, and maintaining your audio setup, you can achieve high-quality sound without breaking the bank. If you’re feeling inspired, consider upgrading your speakers or adding a subwoofer for richer bass. A well-tuned car audio system transforms every trip into a concert on wheels.
For more car audio tips, explore guides on choosing the best speakers, installing amplifiers, or soundproofing your vehicle. Keep your system in top shape, and enjoy the ride with your favorite tunes blasting loud and clear.