A crackling car stereo or sudden silence during your favorite song often points to one culprit: loose speaker wires. This common issue disrupts your driving experience, turning a joyful ride into a frustrating one. Loose wires cause static, distorted sound, or complete audio failure, and ignoring them risks damaging your car’s audio system or even creating safety hazards. Thankfully, you can fix loose speaker wires yourself with basic tools and a little patience, saving money and restoring crystal-clear sound. This comprehensive guide walks you through identifying, troubleshooting, and repairing loose speaker wires in your car, ensuring your audio system performs at its best.
Contents
- Why Loose Speaker Wires Cause Problems
- Tools You’ll Need to Fix Loose Speaker Wires
- Step 1: Disconnect the Car Battery for Safety
- Step 2: Locate the Loose Speaker Wire
- Step 3: Test the Wire with a Multimeter
- Step 4: Secure Loose Connections
- Step 5: Repair Damaged or Frayed Wires
- Step 6: Replace Severely Damaged Wires
- Step 7: Test Your Audio System
- Preventing Future Loose Speaker Wires
- When to Seek Professional Help
- Benefits of Fixing Loose Speaker Wires Yourself
- Common Mistakes to Avoid
- Enhancing Your Car Audio Experience
- Final Thoughts on Fixing Loose Speaker Wires
Why Loose Speaker Wires Cause Problems
Loose speaker wires create havoc in your car’s audio setup. When connections loosen, the electrical signal struggles to reach the speakers, resulting in poor sound quality or intermittent audio. Vibrations from driving, wear over time, or improper installation often cause wires to wiggle free. Left unchecked, these loose connections can short-circuit, potentially harming your stereo or amplifier. Beyond audio issues, exposed wires pose a fire risk if they contact metal surfaces. Addressing the problem promptly keeps your system safe and your music uninterrupted. By understanding the root causes, you tackle the issue with confidence and prevent future headaches.
Tools You’ll Need to Fix Loose Speaker Wires
Before diving into repairs, gather the right tools to make the job smooth and efficient. A screwdriver set (Phillips and flathead) helps remove panels or speaker covers. Wire strippers ensure clean cuts and expose fresh wire for secure connections. Electrical tape or heat shrink tubing insulates repaired wires, preventing shorts. A multimeter tests wire continuity, confirming whether the connection is intact. Crimp connectors or butt connectors offer a quick, reliable way to join wires, while a crimping tool ensures a tight fit. For more permanent fixes, a soldering iron and solder create strong, lasting bonds. Keep a small flashlight handy for tight, dimly lit spaces like door panels or under dashboards. With these tools, you’re ready to tackle any loose wire issue.
Step 1: Disconnect the Car Battery for Safety
Safety comes first when working with your car’s electrical system. Start by disconnecting the negative battery terminal to prevent shocks or short circuits. Locate the battery, typically under the hood, and use a wrench to loosen the negative terminal (marked with a “-” symbol). Pull the cable away and secure it to avoid accidental contact. This simple step eliminates the risk of electrical mishaps while you handle exposed wires. Double-check that the car’s ignition is off and keys are removed before proceeding. A safe workspace sets the stage for a successful repair.
Step 2: Locate the Loose Speaker Wire
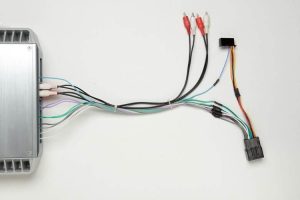
Finding the problematic wire requires a bit of detective work. Begin by identifying which speaker produces distorted or no sound—front, rear, left, or right. Remove the speaker cover or panel using a screwdriver to access the wiring. In most cars, speaker wires run from the head unit (stereo) to the speakers, often tucked behind door panels, under carpets, or along the dashboard. Inspect the connections at both the speaker and stereo ends for looseness, fraying, or corrosion. Gently tug on the wires to check if they’re secure. If you suspect a hidden issue, trace the wire’s path for crimps or breaks, especially where it passes through doors or under seats. Patience here saves time later.
Step 3: Test the Wire with a Multimeter
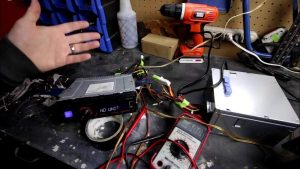
A multimeter confirms whether the wire is faulty or simply loose. Set the multimeter to continuity mode, then touch one probe to the wire’s end at the speaker and the other to the corresponding connection at the stereo. A steady beep or reading indicates the wire is intact; no sound or erratic readings suggest a break or loose connection. Test both the positive and negative wires to pinpoint the issue. If the wire fails the test, you’ll need to repair or replace it. This step ensures you address the root problem, avoiding guesswork and unnecessary fixes.
Step 4: Secure Loose Connections
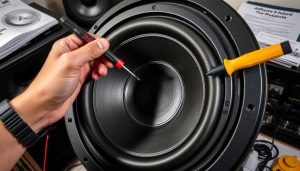
If the wire is intact but loose, resecuring it often solves the problem. Push the wire firmly into its connector until it clicks or feels snug. For terminal connections, use a screwdriver to tighten any screws holding the wire in place. If the connector is damaged, replace it with a new one, ensuring it matches the wire gauge and connector type. Crimp connectors work well for quick fixes—strip the wire ends, insert them into the connector, and crimp tightly with a crimping tool. Check the connection by gently pulling to confirm it’s secure. A solid connection restores audio clarity without further repairs.
Step 5: Repair Damaged or Frayed Wires
Frayed or broken wires require more effort but are fixable. Cut out the damaged section using wire strippers, ensuring you remove all compromised areas. Strip about half an inch of insulation from both ends of the remaining wire to expose fresh copper. Twist the exposed ends together tightly, ensuring a good electrical connection. For a stronger bond, solder the twisted wires by heating them with a soldering iron and applying solder until it flows evenly. Once cooled, wrap the repaired area with electrical tape or slide on heat shrink tubing and apply heat to seal it. This creates a durable, insulated connection that withstands vibrations.
Step 6: Replace Severely Damaged Wires
When a wire is too damaged to repair, replacing it is the best option. Measure the length of the old wire and cut a new one to match, using the same gauge to ensure compatibility with your audio system. Strip the ends of the new wire and connect it to the speaker and stereo, using crimp connectors or soldering for a secure fit. Route the new wire along the same path as the old one, securing it with zip ties to prevent future loosening. Avoid sharp bends or pinching, which can damage the wire over time. A fresh wire guarantees reliable sound and long-term performance.
Step 7: Test Your Audio System
After repairs, test the system to confirm success. Reconnect the negative battery terminal and turn on the car’s ignition. Play music through the stereo, adjusting the balance and fade settings to check each speaker individually. Listen for clear, distortion-free sound from the repaired speaker. If static or silence persists, double-check your connections or retest with the multimeter. Sometimes, a loose connection at the head unit or a blown fuse causes ongoing issues, so inspect those if needed. A successful test means you’ve restored your audio system to its full potential.
Preventing Future Loose Speaker Wires
Keeping your audio system in top shape requires proactive care. Regularly inspect speaker wires and connections for wear, especially after long drives or rough road conditions. Secure wires with zip ties or clips to minimize movement and vibration. Use high-quality connectors and proper installation techniques to reduce the chance of loosening over time. Check your car’s manual for specific wiring diagrams to ensure correct setup. If you’re upgrading your stereo or speakers, invest in durable, appropriately gauged wires to handle the system’s power demands. These steps extend the life of your audio setup and keep your music sounding pristine.
When to Seek Professional Help
While most loose wire issues are DIY-friendly, some situations call for expert assistance. If you encounter complex wiring harnesses, persistent audio problems, or signs of electrical damage beyond the wires, a car audio specialist has the tools and expertise to diagnose and fix the issue. Professionals also handle intricate setups, like amplified systems or custom installations, with precision. If you’re uncomfortable working with electrical components or lack the time, a technician saves you hassle and ensures a reliable repair. Look for reputable shops with experience in car audio for the best results.
Benefits of Fixing Loose Speaker Wires Yourself
Tackling this repair yourself offers multiple rewards. You save money on labor costs, which can range from $50 to $150 at a shop, depending on the complexity. The process builds confidence in handling basic car maintenance, empowering you for future projects. You also gain a deeper understanding of your car’s audio system, making troubleshooting easier down the road. Plus, restoring your speakers to full functionality enhances your driving experience, letting you enjoy music, podcasts, or audiobooks without interruption. A little effort yields big returns in sound quality and satisfaction.
Common Mistakes to Avoid
Even simple repairs can go wrong without care. Avoid twisting wires together and taping them without soldering or crimping, as this creates weak, unreliable connections prone to failure. Don’t skip disconnecting the battery, as working with live wires risks shocks or damage to your stereo. Using the wrong wire gauge or mismatched connectors can degrade sound quality or cause system strain. Rushing the process often leads to sloppy connections, so take your time to ensure each step is done correctly. Double-checking your work prevents repeat repairs and keeps your system running smoothly.
Enhancing Your Car Audio Experience
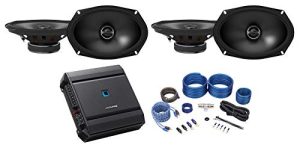
Fixing loose speaker wires is a great opportunity to optimize your audio setup. While you’re working on the system, check for outdated or low-quality components that might limit performance. Upgrading to better speakers, adding an amplifier, or installing sound-deadening materials can elevate sound quality. Ensure your head unit supports modern features like Bluetooth or high-resolution audio for a richer experience. Clean connections and secure wiring enhance reliability, letting you enjoy every note and beat on your drives. A well-maintained system transforms your car into a mobile concert hall.
Final Thoughts on Fixing Loose Speaker Wires
Loose speaker wires are a common but fixable issue that doesn’t require advanced skills or expensive tools. By following these steps—disconnecting the battery, locating the problem, testing, and repairing or replacing wires—you restore your car’s audio system to peak performance. Regular maintenance and careful installation prevent future issues, ensuring long-lasting sound quality. Whether you’re a DIY novice or a seasoned tinkerer, this guide equips you to handle the task with ease. Enjoy the satisfaction of crisp, clear audio on every journey, knowing you’ve mastered a practical car repair.